PXE自动化安装CentOS 8_centos8 pxe boot arp timeout-程序员宅基地
技术标签: PEX linux centos8 PXE自动化安装 linux PEX
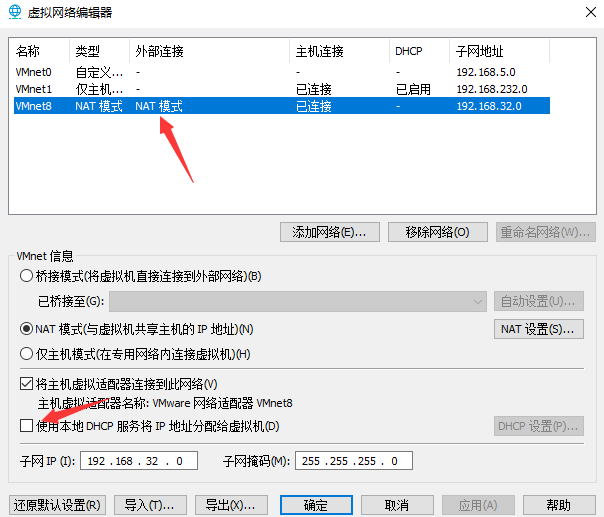
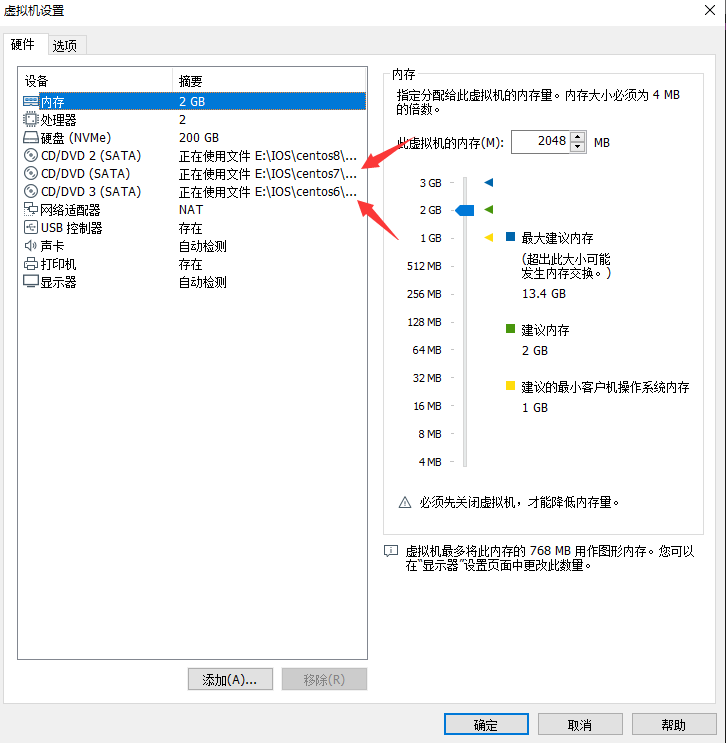
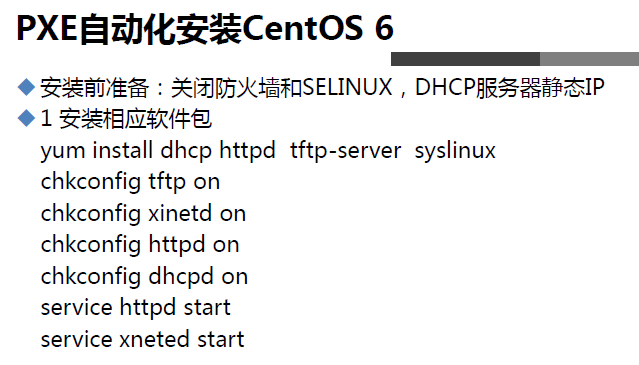
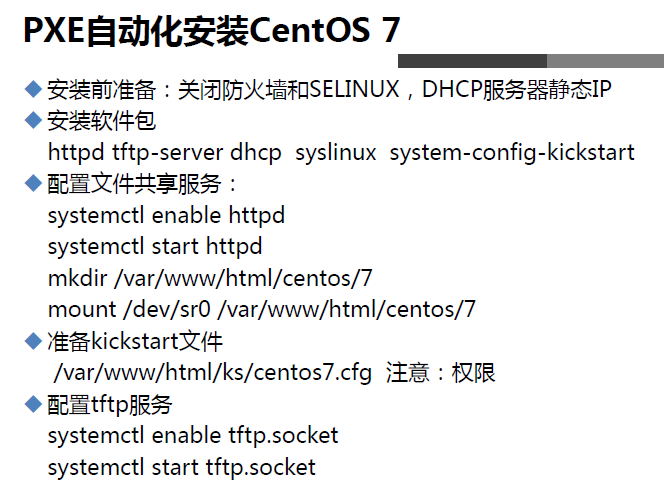
安装前准备:关闭防火墙和SELINUX,DHCP服务器静态IP。
切勿用桥接模式 最好是NET模式而且把自动分配DHCP对勾取消。
查看防火墙和seelinux是否关闭
[root@centos8 ~]#firewall-cmd --state
not running
[root@centos8 ~]#getenforce
Disabled
安装对应的软件包

安装syslinux的时候centos8和centos7存在一点不同在后面的后缀-nonlinux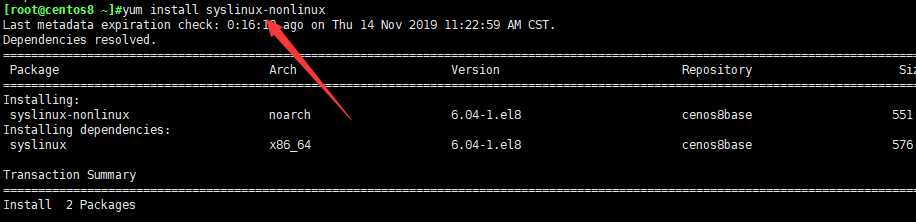
启动相应的三个服务 但是由于dhcp的文件配置还没有配置,所以这里起不来。

[root@centos8 ~]#ss -ntulp
查看对应端口号

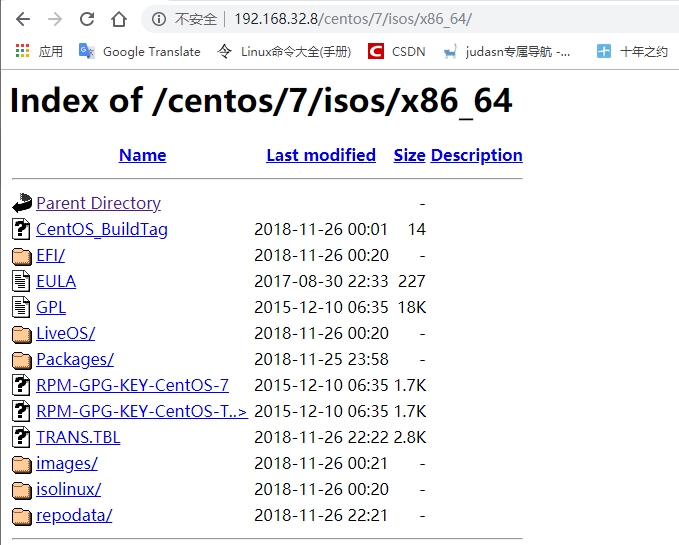
可以正常访问,http服务正常
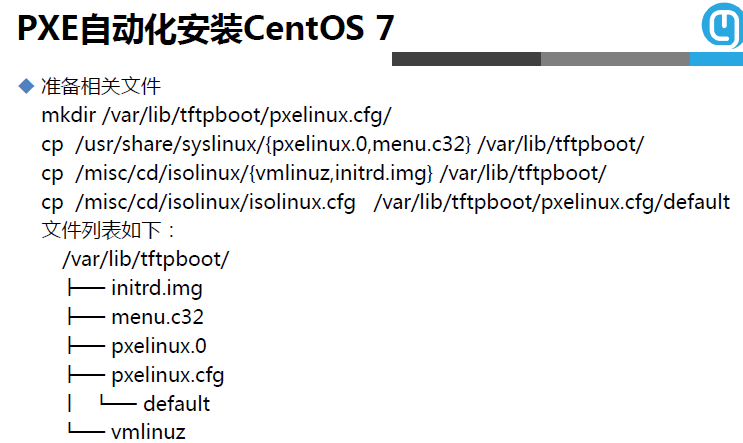
配置tftp服务
[root@centos8 ksdir]#cd /var/lib/tftpboot/
[root@centos8 tftpboot]#rpm -ql syslinux-nonlinux
查找对应的安装包文件。这里我们需要/usr/share/syslinux/menu.c32和/usr/share/syslinux/pxelinux.0
拷贝到 /var/lib/tftpboot/内
[root@centos8 tftpboot]#cp /usr/share/syslinux/menu.c32 .
[root@centos8 tftpboot]#cp /usr/share/syslinux/pxelinux.0 .
[root@centos8 tftpboot]#ls
menu.c32  pxelinux.0
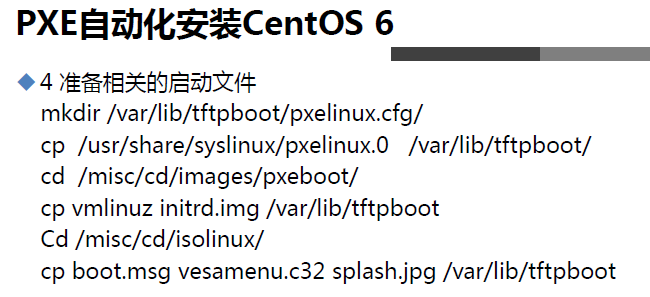
还需要对应的内核启动文件,这些文件在光盘里面有,可以直接拷贝过来
[root@centos8 tftpboot]#ls /var/www/html/centos/8/isos/x86_64/isolinux/
boot.cat  grub.conf   isolinux.bin  ldlinux.c32   libutil.c32  splash.png  vesamenu.c32
boot.msg  initrd.img  isolinux.cfg  libcom32.c32  memtest      TRANS.TBL   vmlinuz

[root@centos8 tftpboot]#cp /var/www/html/centos/8/isos/x86_64/isolinux/vmlinuz .
[root@centos8 tftpboot]#cp /var/www/html/centos/8/isos/x86_64/isolinux/initrd.img .
[root@centos8 tftpboot]#ls
initrd.img  menu.c32  pxelinux.0  vmlinuz
创建一个新的文件夹 pxelinux.cfg,里面用于放置菜单配置文件
[root@centos8 tftpboot]#mkdir pxelinux.cfg
[root@centos8 tftpboot]#cp /var/www/html/centos/8/isos/x86_64/isolinux/isolinux.cfg pxelinux.
pxelinux.0 pxelinux.cfg/
[root@centos8 tftpboot]#cp /var/www/html/centos/8/isos/x86_64/isolinux/isolinux.cfg pxelinux.
pxelinux.0 pxelinux.cfg/
[root@centos8 tftpboot]#cp /var/www/html/centos/8/isos/x86_64/isolinux/isolinux.cfg pxelinux.cfg/default
拷贝过来改名为default
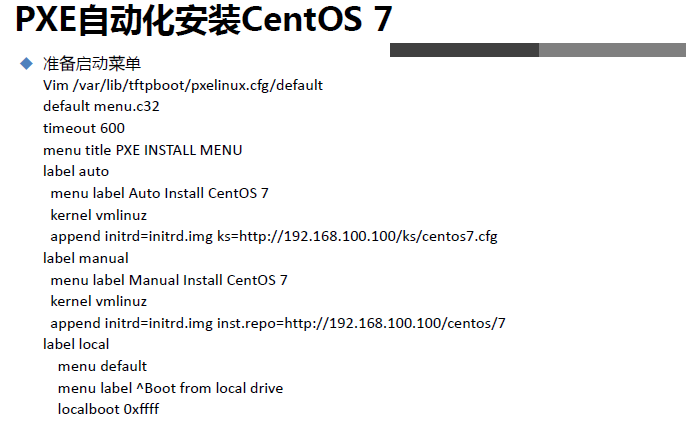
[root@centos8 tftpboot]#vim /var/lib/tftpboot/pxelinux.cfg/default
default menu.c32
timeout 600
menu title CentOS Linux 8
label linux
menu label ^Auto Install CentOS Linux 8.0 mini
kernel vmlinuz
append initrd=initrd.img ks=http://192.168.32.8/ksdir/ks8.cfg
label manual
menu label ^Manual Install CentOS Linux 8.0
kernel vmlinuz
append initrd=initrd.img inst.repo=http://192.168.32.8/centos/8/isos/x86_64/
menu separator # insert an empty line
label local
menu default
menu label Boot from ^local drive
localboot 0xffff
[root@centos8 tftpboot]#cp /var/www/html/centos/8/isos/x86_64/isolinux/ldlinux.c32 .
[root@centos8 tftpboot]#cp /var/www/html/centos/8/isos/x86_64/isolinux/libutil.c32 .
[root@centos8 tftpboot]#cp /var/www/html/centos/8/isos/x86_64/isolinux/libcom32.c32 .
centos 7上面以上三个可以不要  但是centos8上面对于上面三个文件有一定的依赖性,所以也要一起拷贝过来
[root@centos8 tftpboot]#tree
.
├── initrd.img
├── ldlinux.c32
├── libcom32.c32
├── libutil.c32
├── menu.c32
├── pxelinux.0
├── pxelinux.cfg
│   └── default
└── vmlinuz

1 directory, 8 files
到这里tftp服务就配置好了
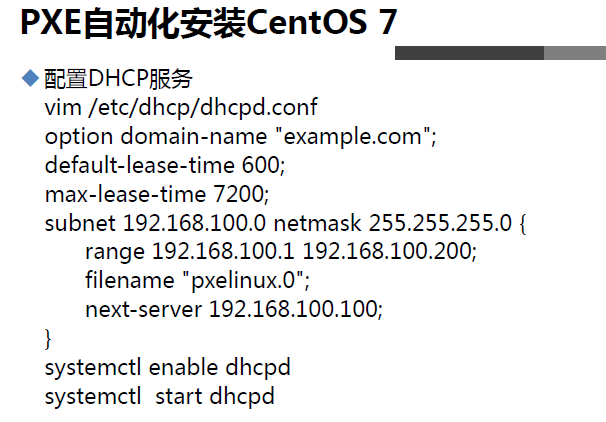
配置DHCP服务
[root@centos8 tftpboot]#systemctl start dhcpd
Job for dhcpd.service failed because the control process exited with error code.
See "systemctl status dhcpd.service" and "journalctl -xe" for details.
报错是因为没有配置/etc/dhcp/dhcpd.conf 这个文件暂时为空。需要复制参考文件
[root@centos8 tftpboot]#cp /usr/share/doc/dhcp-server/dhcpd.conf.example /etc/dhcp/dhcpd.conf
cp: overwrite '/etc/dhcp/dhcpd.conf'? y

[root@centos8 tftpboot]#vim /etc/dhcp/dhcpd.conf
# dhcpd.conf
#
# Sample configuration file for ISC dhcpd
#

# option definitions common to all supported networks...
option domain-name "example.org";
option domain-name-servers 180.76.76.76, 114.114.114.114;

default-lease-time 84600;
max-lease-time 100000;

# Use this to enble / disable dynamic dns updates globally.
#ddns-update-style none;

# If this DHCP server is the official DHCP server for the local
# network, the authoritative directive should be uncommented.
#authoritative;

# Use this to send dhcp log messages to a different log file (you also
# have to hack syslog.conf to complete the redirection).
log-facility local7;

# No service will be given on this subnet, but declaring it helps the
# DHCP server to understand the network topology.

# This is a very basic subnet declaration.

subnet 192.168.32.0 netmask 255.255.255.0 {

  range 192.168.32.100 192.168.32.200;
  option routers 192.168.32.2;
  next-server 192.168.32.8;
  filename "pxelinux.0";
}
~
重启服务即可
[root@centos8 ~]#systemctl restart dhcpd
[root@centos8 ~]#systemctl status dhcpd
● dhcpd.service - DHCPv4 Server Daemon
   Loaded: loaded (/usr/lib/systemd/system/dhcpd.service; enabled; vendor preset: disabled)
   Active: active (running) since Thu 2019-11-14 14:12:29 CST; 5s ago
     Docs: man:dhcpd(8)
           man:dhcpd.conf(5)
 Main PID: 10692 (dhcpd)
   Status: "Dispatching packets..."
    Tasks: 1 (limit: 11377)
   Memory: 5.1M
   CGroup: /system.slice/dhcpd.service
           └─10692 /usr/sbin/dhcpd -f -cf /etc/dhcp/dhcpd.conf -user dhcpd -group dhcpd --no-pid

Nov 14 14:12:29 centos8 dhcpd[10692]: ** Ignoring requests on virbr0.  If this is not what
Nov 14 14:12:29 centos8 dhcpd[10692]: you want, please write a subnet declaration
Nov 14 14:12:29 centos8 dhcpd[10692]: in your dhcpd.conf file for the network segment
Nov 14 14:12:29 centos8 dhcpd[10692]: to which interface virbr0 is attached. **
Nov 14 14:12:29 centos8 dhcpd[10692]:
Nov 14 14:12:29 centos8 dhcpd[10692]: Listening on LPF/eth0/00:0c:29:fe:da:42/192.168.32.0/24
Nov 14 14:12:29 centos8 dhcpd[10692]: Sending on   LPF/eth0/00:0c:29:fe:da:42/192.168.32.0/24
Nov 14 14:12:29 centos8 dhcpd[10692]: Sending on   Socket/fallback/fallback-net
Nov 14 14:12:29 centos8 dhcpd[10692]: Server starting service.
Nov 14 14:12:29 centos8 systemd[1]: Started DHCPv4 Server Daemon.
[root@centos8 ~]#
PEX自动化安装就配置好了
安装新系统
现在去安装一个新的centos8的系统
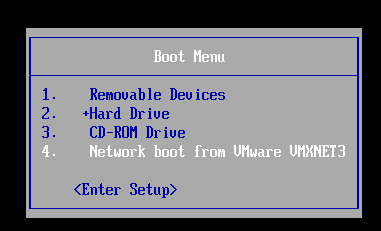
选择菜单
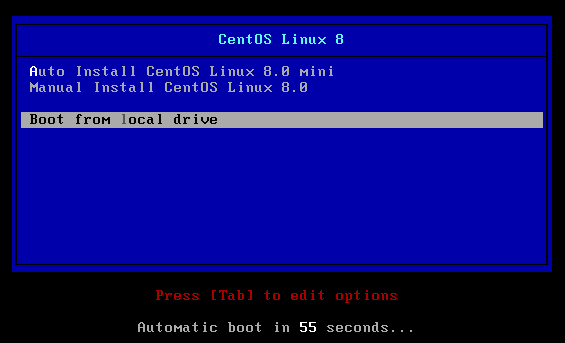
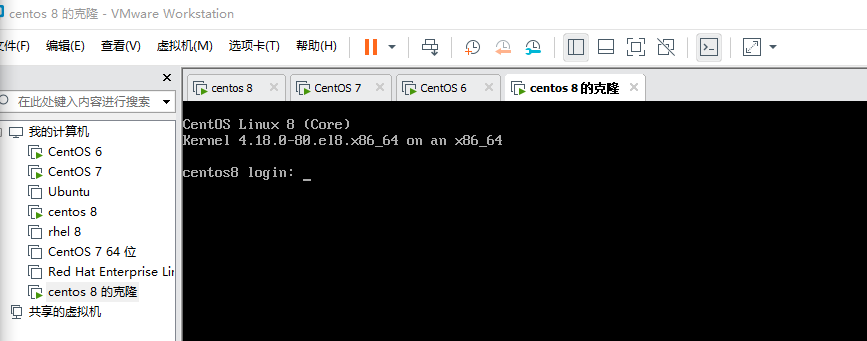
安装成功
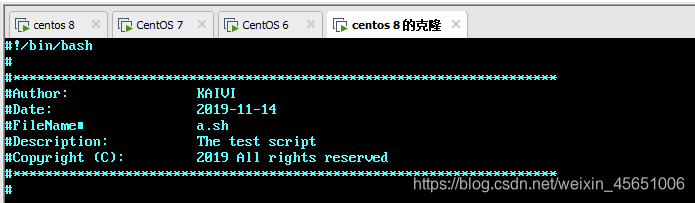
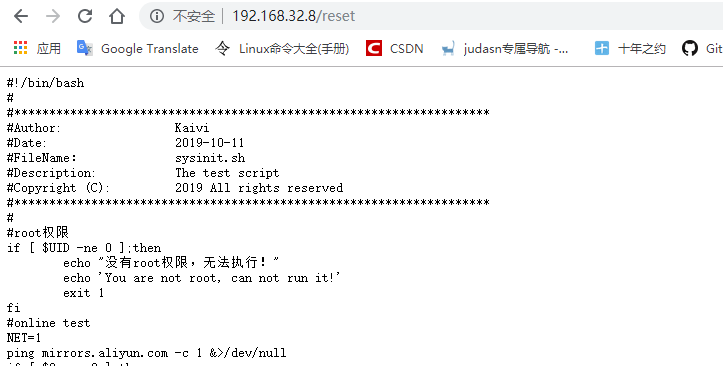
脚本运行成功
扩展同时配置加载安装centos6 和 centos 7
需要安装什么系统,对应的光盘同样需要挂载上去
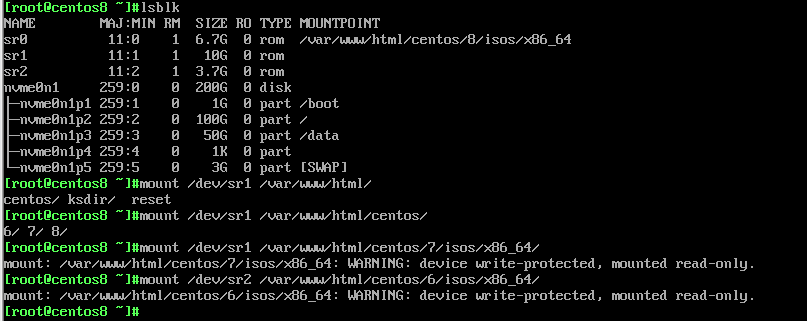
查看web服务器上是否挂载

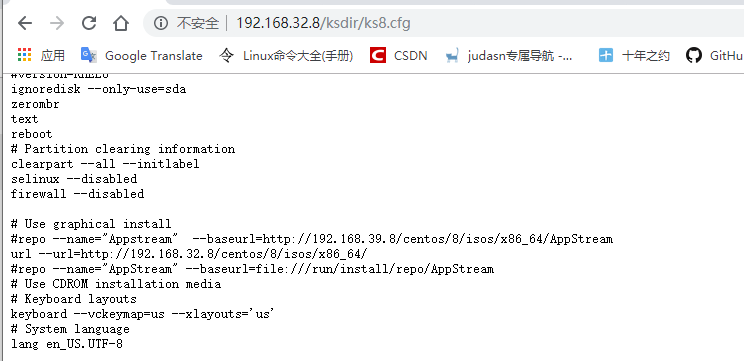
现在配置应答文件,这里用之前已经做好的应答文件
[root@centos8 html]#cd /var/www/html/
[root@centos8 html]#ls
centos  ksdir  reset
[root@centos8 html]#cd ksdir/
[root@centos8 ksdir]#ls
ks8.cfg
[root@centos8 ksdir]#rz -E
rz waiting to receive.
[root@centos8 ksdir]#ls
ks6.cfg  ks7.cfg  ks8.cfg
修改对应的应答文件 特别是注意路径
[root@centos8 ksdir]#vim ks7.cfg
[root@centos8 ksdir]#vim ks6.cfg
[root@centos8 ksdir]#ll
-rw-r--r-- 1 root root 1235 Nov 14 16:13 ks6.cfg
-rw-r--r-- 1 root root 1435 Nov 14 16:09 ks7.cfg
-rw-r--r-- 1 root root 1805 Nov 14 14:35 ks8.cfg
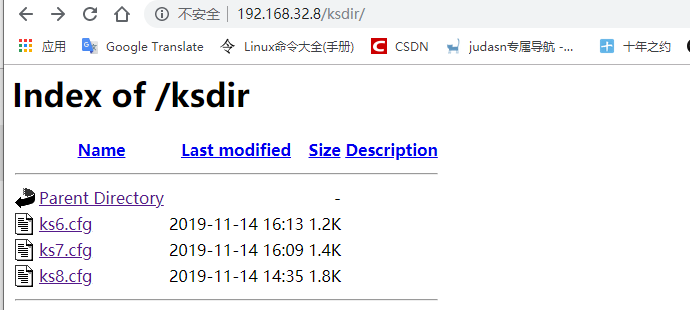
在网页需要分别能打开对应的应答文件,不然就是权限问题 需要设置一下权限
设置tftp配置文件
[root@centos8 tftpboot]#ls
initrd.img  ldlinux.c32  libcom32.c32  libutil.c32  menu.c32  pxelinux.0  pxelinux.cfg  vmlinuz
创建分别放置不同操作系统的目录6 7 8.用来放置不同的内核文件
[root@centos8 tftpboot]#mkdir {6,7,8}
[root@centos8 tftpboot]#mv vmlinuz initrd.img 8/

[root@centos8 tftpboot]#cp /var/www/html/centos/7/isos/x86_64/isolinux/vmlinuz ./7/
[root@centos8 tftpboot]#cp /var/www/html/centos/7/isos/x86_64/isolinux/initrd.img ./7/


[root@centos8 tftpboot]#cp /var/www/html/centos/6/isos/x86_64/isolinux/vmlinuz ./6/
[root@centos8 tftpboot]#cp /var/www/html/centos/6/isos/x86_64/isolinux/initrd.img ./6/
[root@centos8 tftpboot]#tree
.
├── 6
│   ├── initrd.img
│   └── vmlinuz
├── 7
│   ├── initrd.img
│   └── vmlinuz
├── 8
│   ├── initrd.img
│   └── vmlinuz
├── ldlinux.c32
├── libcom32.c32
├── libutil.c32
├── menu.c32
├── pxelinux.0
└── pxelinux.cfg
    └── default

4 directories, 12 files
修改菜单项 注意路径 是相对路径
[root@centos8 tftpboot]#vim pxelinux.cfg/default

default menu.c32
timeout 600

menu title CentOS Linux

label linux8
  menu label Auto Install CentOS Linux ^8.0 mini
  kernel 8/vmlinuz
  append initrd=8/initrd.img ks=http://192.168.32.8/ksdir/ks8.cfg

label linux7
  menu label Auto Install CentOS Linux ^7.0 mini
  kernel 7/vmlinuz
  append initrd=7/initrd.img ks=http://192.168.32.8/ksdir/ks7.cfg

label linux6
  menu label Auto Install CentOS Linux ^6.0 mini
  kernel 6/vmlinuz
  append initrd=6/initrd.img ks=http://192.168.32.8/ksdir/ks6.cfg


label manual
  menu label Manual Install CentOS Linux 8.0
  kernel vmlinuz
  append initrd=initrd.img inst.repo=http://192.168.32.8/centos/8/isos/x86_64/

menu separator # insert an empty line


label local
   menu default
  menu label Boot from ^local drive
  localboot 0xffff
参考文献如下
智能推荐
软件测试流程包括哪些内容?测试方法有哪些?_测试过程管理中包含哪些过程-程序员宅基地
文章浏览阅读2.9k次,点赞8次,收藏14次。测试主要做什么?这完全都体现在测试流程中,同时测试流程是面试问题中出现频率最高的,这不仅是因为测试流程很重要,而是在面试过程中这短短的半小时到一个小时的时间,通过测试流程就可以判断出应聘者是否合适,故在测试流程中包含了测试工作的核心内容,例如需求分析,测试用例的设计,测试执行,缺陷等重要的过程。..._测试过程管理中包含哪些过程
政府数字化政务的人工智能与机器学习应用:如何提高政府工作效率-程序员宅基地
文章浏览阅读870次,点赞16次,收藏19次。1.背景介绍政府数字化政务是指政府利用数字技术、互联网、大数据、人工智能等新技术手段,对政府政务进行数字化改革,提高政府工作效率,提升政府服务质量的过程。随着人工智能(AI)和机器学习(ML)技术的快速发展,政府数字化政务中的人工智能与机器学习应用也逐渐成为政府改革的重要内容。政府数字化政务的人工智能与机器学习应用涉及多个领域,包括政策决策、政府服务、公共安全、社会治理等。在这些领域,人工...
ssm+mysql+微信小程序考研刷题平台_mysql刷题软件-程序员宅基地
文章浏览阅读219次,点赞2次,收藏4次。系统主要的用户为用户、管理员,他们的具体权限如下:用户:用户登录后可以对管理员上传的学习视频进行学习。用户可以选择题型进行练习。用户选择小程序提供的考研科目进行相关训练。用户可以进行水平测试,并且查看相关成绩用户可以进行错题集的整理管理员:管理员登录后可管理个人基本信息管理员登录后可管理个人基本信息管理员可以上传、发布考研的相关例题及其分析,并对题型进行管理管理员可以进行查看、搜索考研题目及错题情况。_mysql刷题软件
根据java代码描绘uml类图_Myeclipse8.5下JAVA代码导成UML类图-程序员宅基地
文章浏览阅读1.4k次。myelipse里有UML1和UML2两种方式,UML2功能更强大,但是两者生成过程差别不大1.建立Test工程,如下图,uml包存放uml类图package com.zz.domain;public class User {private int id;private String name;public int getId() {return id;}public void setId(int..._根据以下java代码画出类图
Flume自定义拦截器-程序员宅基地
文章浏览阅读174次。需求:一个topic包含很多个表信息,需要自动根据json字符串中的字段来写入到hive不同的表对应的路径中。发送到Kafka中的数据原本最外层原本没有pkDay和project,只有data和name。因为担心data里面会空值,所以根同事商量,让他们在最外层添加了project和pkDay字段。pkDay字段用于表的自动分区,proejct和name合起来用于自动拼接hive表的名称为 ..._flume拦截器自定义开发 kafka
java同时输入不同类型数据,Java Spring中同时访问多种不同数据库-程序员宅基地
文章浏览阅读380次。原标题:Java Spring中同时访问多种不同数据库 多样的工作要求,可以使用不同的工作方法,只要能获得结果,就不会徒劳。开发企业应用时我们常常遇到要同时访问多种不同数据库的问题,有时是必须把数据归档到某种数据仓库中,有时是要把数据变更推送到第三方数据库中。使用Spring框架时,使用单一数据库是非常容易的,但如果要同时访问多个数据库的话事件就变得复杂多了。本文以在Spring框架下开发一个Sp..._根据输入的不同连接不同的数据库
随便推点
EFT试验复位案例分析_eft电路图-程序员宅基地
文章浏览阅读3.6k次,点赞9次,收藏25次。本案例描述了晶振屏蔽以及开关电源变压器屏蔽对系统稳定工作的影响, 硬件设计时应考虑。_eft电路图
MR21更改价格_mr21 对于物料 zba89121 存在一个当前或未来标准价格-程序员宅基地
文章浏览阅读1.1k次。对于物料价格的更改,可以采取不同的手段:首先,我们来介绍MR21的方式。 需要说明的是,如果要对某一产品进行价格修改,必须满足的前提条件是: ■ 1、必须对价格生效的物料期间与对应会计期间进行开启; ■ 2、该产品在该物料期间未发生物料移动。执行MR21,例如更改物料1180051689的价格为20000元,系统提示“对于物料1180051689 存在一个当前或未来标准价格”,这是因为已经对该..._mr21 对于物料 zba89121 存在一个当前或未来标准价格
联想启天m420刷bios_联想启天M420台式机怎么装win7系统(完美解决usb)-程序员宅基地
文章浏览阅读7.4k次,点赞3次,收藏13次。[文章导读]联想启天M420是一款商用台式电脑,预装的是win10系统,用户还是喜欢win7系统,该台式机采用的intel 8代i5 8500CPU,在安装安装win7时有很多问题,在安装win7时要在BIOS中“关闭安全启动”和“开启兼容模式”,并且安装过程中usb不能使用,要采用联想win7新机型安装,且默认采用的uefi+gpt模式,要改成legacy+mbr引导,那么联想启天M420台式电..._启天m420刷bios
冗余数据一致性,到底如何保证?-程序员宅基地
文章浏览阅读2.7k次,点赞2次,收藏9次。一,为什么要冗余数据互联网数据量很大的业务场景,往往数据库需要进行水平切分来降低单库数据量。水平切分会有一个patition key,通过patition key的查询能..._保证冗余性
java 打包插件-程序员宅基地
文章浏览阅读88次。是时候闭环Java应用了 原创 2016-08-16 张开涛 你曾经因为部署/上线而痛苦吗?你曾经因为要去运维那改配置而烦恼吗?在我接触过的一些部署/上线方式中,曾碰到过以下一些问题:1、程序代码和依赖都是人工上传到服务器,不是通过工具进行部署和发布;2、目录结构没有规范,jar启动时通过-classpath任意指定;3、fat jar,把程序代码、配置文件和依赖jar都打包到一个jar中,改配置..._那么需要把上面的defaultjavatyperesolver类打包到插件中
VS2015,Microsoft Visual Studio 2005,SourceInsight4.0使用经验,Visual AssistX番茄助手的安装与基本使用9_番茄助手颜色-程序员宅基地
文章浏览阅读909次。1.得下载一个番茄插件,按alt+g才可以有函数跳转功能。2.不安装番茄插件,按F12也可以有跳转功能。3.进公司的VS工程是D:\sync\build\win路径,.sln才是打开工程的方式,一个是VS2005打开的,一个是VS2013打开的。4.公司库里的线程接口,在CmThreadManager.h 里,这个里面是我们的线程库,可以直接拿来用。CreateUserTaskThre..._番茄助手颜色