java实现QQ登录_如何利用改代码登进qq账号-程序员宅基地
技术标签: QQ互联 java springboot
准备工作
1.云服务器
2.备案的域名
3.本地调试需要修改hosts文件,将域名映射到127.0.0.1
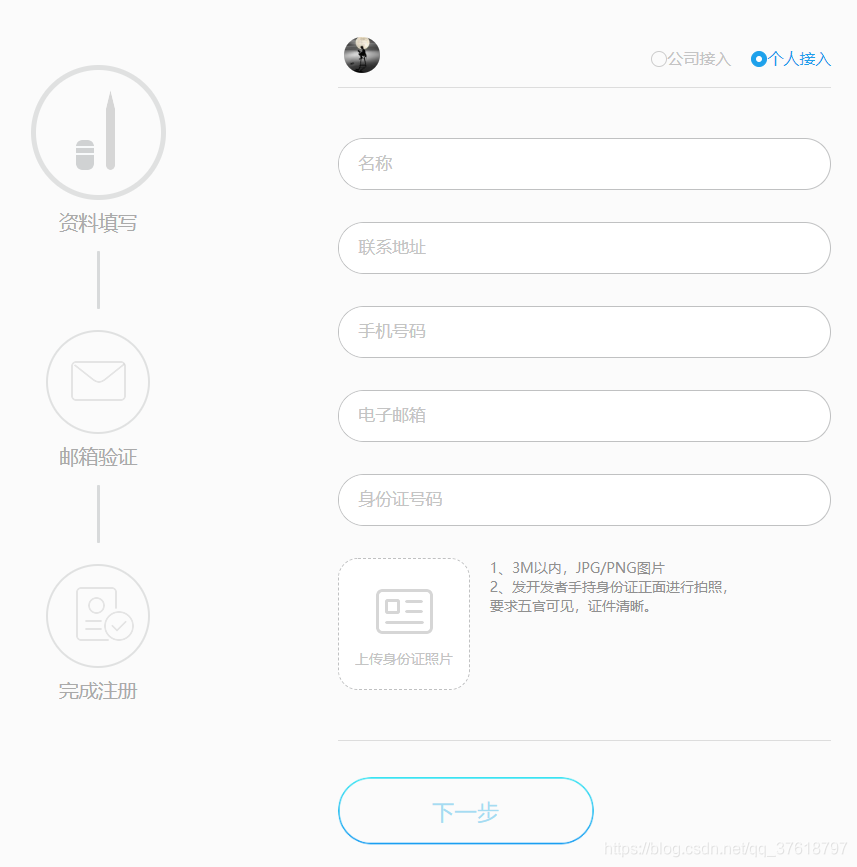
一、申请QQ互联,并成为开发者
QQ互联:https://connect.qq.com/index.html
登录后,点击头像,进入认证页面,填写信息,等待审核。
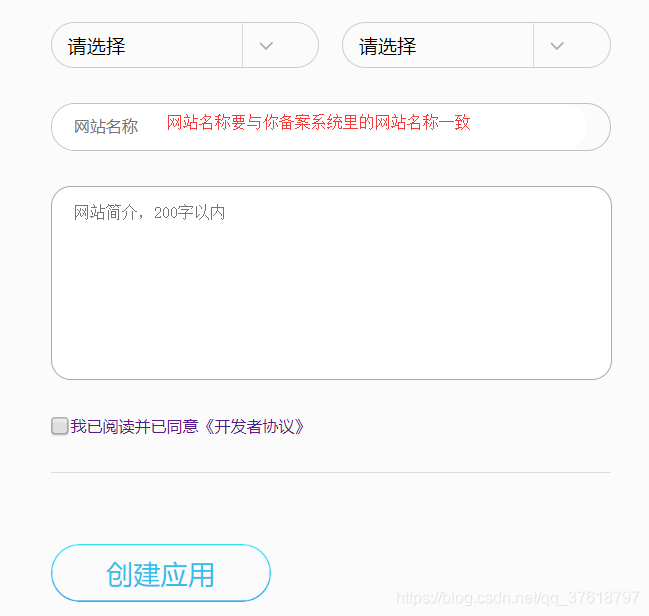
审核通过后,点击创建应用
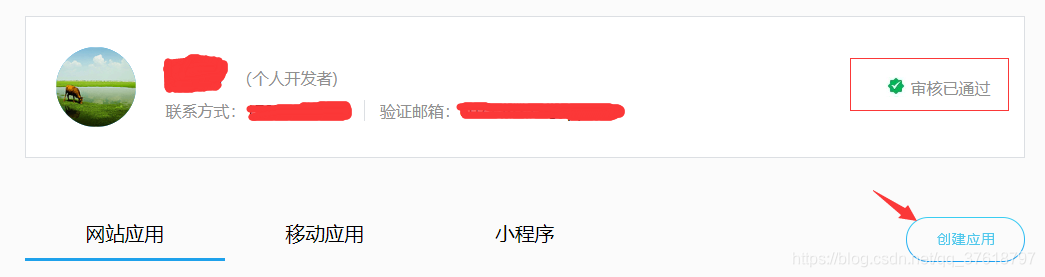
审核通过后,就可以使用APP ID 和 APP Key

二、编写java代码
github:https://github.com/sansheng741/QQLogin
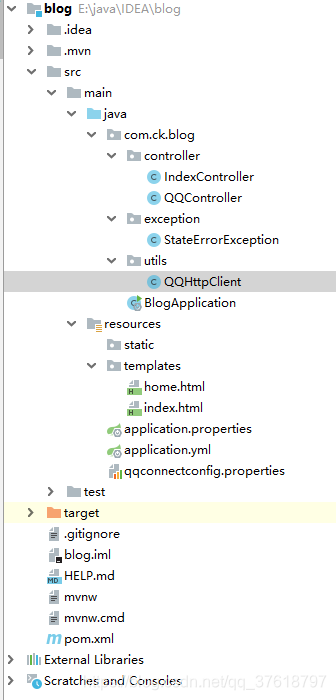
项目结构
yml配置
server:
port: 80
qq:
oauth:
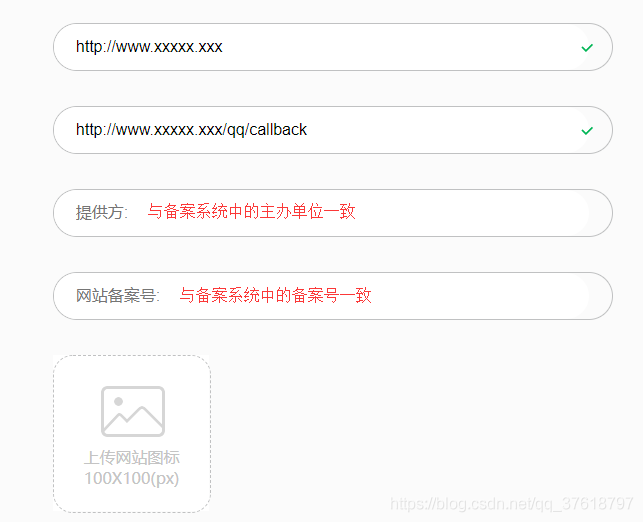
http: //QQ互联中填写的网站地址导入pom依赖
<!--httpclient-->
<dependency>
    <groupId>org.apache.httpcomponents</groupId>
    <artifactId>httpclient</artifactId>
    <version>4.5.6</version>
</dependency>
<!--阿里 JSON-->
<dependency>
    <groupId>com.alibaba</groupId>
    <artifactId>fastjson</artifactId>
    <version>1.2.47</version>
</dependency>
QQController
package com.ck.blog.controller;

import com.alibaba.fastjson.JSONObject;
import com.ck.blog.exception.StateErrorException;
import com.ck.blog.utils.QQHttpClient;
import org.springframework.beans.factory.annotation.Value;
import org.springframework.stereotype.Controller;
import org.springframework.web.bind.annotation.GetMapping;

import javax.servlet.http.HttpServletRequest;
import javax.servlet.http.HttpSession;
import java.net.URLEncoder;
import java.util.UUID;

/**
 * @author ck
 * @create 2019-05-18 20:32
 */
@Controller
public class QQController {


    @Value("${qq.oauth.http}")
    private String http;

    /**
     * 发起请求
     * @param session
     * @return
     */
    @GetMapping("/qq/oauth")
    public String qq(HttpSession session){
        //QQ互联中的回调地址
        String backUrl = http + "/qq/callback";

        //用于第三方应用防止CSRF攻击
        String uuid = UUID.randomUUID().toString().replaceAll("-","");
        session.setAttribute("state",uuid);

        //Step1:获取Authorization Code
        String url = "https://graph.qq.com/oauth2.0/authorize?response_type=code"+
                "&client_id=" + QQHttpClient.APPID +
                "&redirect_uri=" + URLEncoder.encode(backUrl) +
                "&state=" + uuid;

        return "redirect:" + url;
    }

    /**
     * QQ回调
     * @param request
     * @return
     */
    @GetMapping("/qq/callback")
    public String qqcallback(HttpServletRequest request) throws Exception {
        HttpSession session = request.getSession();
        //qq返回的信息:http://graph.qq.com/demo/index.jsp?code=9A5F************************06AF&state=test
        String code = request.getParameter("code");
        String state = request.getParameter("state");
        String uuid = (String) session.getAttribute("state");

        if(uuid != null){
            if(!uuid.equals(state)){
                throw new StateErrorException("QQ,state错误");
            }
        }


        //Step2:通过Authorization Code获取Access Token
        String backUrl = http + "/qq/callback";
        String url = "https://graph.qq.com/oauth2.0/token?grant_type=authorization_code"+
                "&client_id=" + QQHttpClient.APPID +
                "&client_secret=" + QQHttpClient.APPKEY +
                "&code=" + code +
                "&redirect_uri=" + backUrl;

        String access_token = QQHttpClient.getAccessToken(url);

        //Step3: 获取回调后的 openid 值
        url = "https://graph.qq.com/oauth2.0/me?access_token=" + access_token;
        String openid = QQHttpClient.getOpenID(url);

        //Step4:获取QQ用户信息
        url = "https://graph.qq.com/user/get_user_info?access_token=" + access_token +
                "&oauth_consumer_key="+ QQHttpClient.APPID +
                "&openid=" + openid;

        JSONObject jsonObject = QQHttpClient.getUserInfo(url);

        //也可以放到Redis和mysql中
        session.setAttribute("openid",openid);  //openid,用来唯一标识qq用户
        session.setAttribute("nickname",(String)jsonObject.get("nickname")); //QQ名
        session.setAttribute("figureurl_qq_2",(String)jsonObject.get("figureurl_qq_2")); //大小为100*100像素的QQ头像URL


        return "redirect:/home";
    }

}
QQHttpClient
package com.ck.blog.utils;

import com.alibaba.fastjson.JSONObject;
import org.apache.http.HttpEntity;
import org.apache.http.HttpResponse;
import org.apache.http.client.methods.HttpGet;
import org.apache.http.impl.client.CloseableHttpClient;
import org.apache.http.impl.client.HttpClients;
import org.apache.http.util.EntityUtils;

import java.io.IOException;

/**
 * @author ck
 * @create 2019-05-18 20:32
 * QQ工具类(主要用于解析QQ返回的信息)
 */
public class QQHttpClient {
    //QQ互联中提供的 appid 和 appkey
    public static final String APPID = "xxxxxxxx";

    public static final String APPKEY = "xxxxxxxxxx";


    private static JSONObject parseJSONP(String jsonp){
        int startIndex = jsonp.indexOf("(");
        int endIndex = jsonp.lastIndexOf(")");

        String json = jsonp.substring(startIndex + 1,endIndex);

        return JSONObject.parseObject(json);
    }
    //qq返回信息:access_token=FE04************************CCE2&expires_in=7776000&refresh_token=88E4************************BE14
    public static String getAccessToken(String url) throws IOException {
        CloseableHttpClient client = HttpClients.createDefault();
        String token = null;

        HttpGet httpGet = new HttpGet(url);
        HttpResponse response = client.execute(httpGet);
        HttpEntity entity = response.getEntity();

        if(entity != null){
            String result = EntityUtils.toString(entity,"UTF-8");
            if(result.indexOf("access_token") >= 0){
                String[] array = result.split("&");
                for (String str : array){
                    if(str.indexOf("access_token") >= 0){
                        token = str.substring(str.indexOf("=") + 1);
                        break;
                    }
                }
            }
        }

        httpGet.releaseConnection();
        return token;
    }
    //qq返回信息:callback( {"client_id":"YOUR_APPID","openid":"YOUR_OPENID"} ); 需要用到上面自己定义的解析方法parseJSONP
    public static String getOpenID(String url) throws IOException {
        JSONObject jsonObject = null;
        CloseableHttpClient client = HttpClients.createDefault();

        HttpGet httpGet = new HttpGet(url);
        HttpResponse response = client.execute(httpGet);
        HttpEntity entity = response.getEntity();

        if(entity != null){
            String result = EntityUtils.toString(entity,"UTF-8");
            jsonObject = parseJSONP(result);
        }

        httpGet.releaseConnection();

        if(jsonObject != null){
            return jsonObject.getString("openid");
        }else {
            return null;
        }
    }

    //qq返回信息:{ "ret":0, "msg":"", "nickname":"YOUR_NICK_NAME", ... },为JSON格式,直接使用JSONObject对象解析
    public static JSONObject getUserInfo(String url) throws IOException {
        JSONObject jsonObject = null;
        CloseableHttpClient client = HttpClients.createDefault();

        HttpGet httpGet = new HttpGet(url);
        HttpResponse response = client.execute(httpGet);
        HttpEntity entity = response.getEntity();


        if(entity != null){
            String result = EntityUtils.toString(entity,"UTF-8");
            jsonObject = JSONObject.parseObject(result);
        }

        httpGet.releaseConnection();

        return jsonObject;
    }
}
IndexController
package com.ck.blog.controller;

import org.springframework.stereotype.Controller;
import org.springframework.ui.Model;
import org.springframework.web.bind.annotation.GetMapping;

import javax.servlet.http.HttpSession;

/**
 * @author ck
 * @create 2019-05-18 20:31
 */
@Controller
public class IndexController {

    @GetMapping("/index")
    public String index(){
        return "index";
    }

    @GetMapping("/home")
    public String home(HttpSession session, Model model){
        String openid = (String) session.getAttribute("openid");
        String nickname = (String) session.getAttribute("nickname");
        String figureurl_qq_2 = (String) session.getAttribute("figureurl_qq_2");

        model.addAttribute("openid",openid);
        model.addAttribute("nickname",nickname);
        model.addAttribute("figureurl_qq_2",figureurl_qq_2);

        return "home";
    }
}
index.html
<!DOCTYPE html>
<html lang="en" xmlns:th="http://www.thymeleaf.org">
<head>
    <meta charset="UTF-8">
    <title>登录页</title>
</head>
<body>
<a href="/qq/oauth">QQ授权登录</a>
</body>
</html>
home.html
<!DOCTYPE html>
<html lang="en" xmlns:th="http://www.thymeleaf.org">
<head>
    <meta charset="UTF-8">
    <title>QQ授权成功</title>
</head>
<body>
<div>
    openid:[[${openid}]]
</div>
<div>
    nickName:[[${nickname}]]
</div>
<div>
    <img th:src="${figureurl_qq_2}">
</div>
</body>
</html>
效果图

智能推荐
settext 下划线_Android TextView 添加下划线的几种方式-程序员宅基地
文章浏览阅读748次。总结起来大概有5种做法:将要处理的文字写到一个资源文件,如string.xml(使用html用法格式化)当文字中出现URL、E-mail、电话号码等的时候,可以将TextView的android:autoLink属性设置为相应的的值,如果是所有的类型都出来就是**android:autoLink="all",当然也可以在java代码里 做,textView01.setAutoLinkMask(Li..._qaction::settext 无法添加下划线
TableStore时序数据存储 - 架构篇_tablestore 时间类型处理-程序员宅基地
文章浏览阅读6.3k次,点赞2次,收藏10次。摘要: 背景 随着近几年物联网的发展,时序数据迎来了一个不小的爆发。从DB-Engines上近两年的数据库类型增长趋势来看,时序数据库的增长是非常迅猛的。在去年我花了比较长的时间去了解了一些开源时序数据库,写了一个系列的文章(综述、HBase系、Cassandra系、InfluxDB、Prometheus),感兴趣的可以浏览。背景随着近几年物联网的发展,时序数据迎来了一个不小的爆发。从DB..._tablestore 时间类型处理
Ubuntu20.04下成功运行VINS-mono_uabntu20.04安装vins-mono-程序员宅基地
文章浏览阅读5.7k次,点赞8次,收藏49次。可以编译成功但是运行时段错误查找原因应该是ROS noetic版本中自带的OpenCV4和VINS-mono中需要使用的OpenCV3冲突的问题。为了便于查找问题,我只先编译feature_tracker包。解决思路历程:o想着把OpenCV4相关的库移除掉,但是发现编译feature_tracker的时候仍然会关联到Opencv4的库,查找原因是因为cv_bridge是依赖opencv4的,这样导致同时使用了opencv3和opencv4,因此运行出现段错误。oo进一步想着(1)把vins-mon_uabntu20.04安装vins-mono
TMS320C6748_EMIF时钟配置_tms 6748-程序员宅基地
文章浏览阅读3.6k次,点赞3次,收藏12次。创龙TL6748开发板中,EMIFA模块使用默认的PLL0_SYSCLK3时钟,使用AISgen for D800K008工具加载C6748配置文件C6748AISgen_456M_config(Configuration files,在TL_TMS6748/images文件夹下),由图可以看到DIV3等于4,注意这里的DIV3就是实际的分频值(x),而不是写入相应PLL寄存器的值(x-1)。_tms 6748
eigen稀疏矩阵拼接(基于块操作的二维拼接)的思考-程序员宅基地
文章浏览阅读5.9k次,点赞4次,收藏13次。转载请说明出处:eigen稀疏矩阵拼接(块操作)eigen稀疏矩阵拼接(块操作)关于稀疏矩阵的块操作:参考官方链接 However, for performance reasons, writing to a sub-sparse-matrix is much more limited, and currently only contiguous sets of columns..._稀疏矩阵拼接
基于Capon和信号子空间的变形算法实现波束形成附matlab代码-程序员宅基地
文章浏览阅读946次,点赞19次,收藏19次。波束形成是天线阵列信号处理中的一项关键技术,它通过对来自不同方向的信号进行加权求和,来增强特定方向的信号并抑制其他方向的干扰。本文介绍了两种基于 Capon 和信号子空间的变形算法,即最小方差无失真响应 (MVDR) 算法和最小范数算法,用于实现波束形成。这些算法通过优化波束形成权重向量,来最小化波束形成输出的方差或范数,从而提高波束形成性能。引言波束形成在雷达、声纳、通信和医学成像等众多应用中至关重要。它可以增强目标信号,抑制干扰和噪声,提高系统性能。
随便推点
Ubuntu好用的软件推荐_ubuntu开发推荐软件-程序员宅基地
文章浏览阅读3.4w次。转自:http://www.linuxidc.com/Linux/2017-07/145335.htm使用Ubuntu开发已经有些时间了。写下这篇文章,希望记录下这一年的小小总结。使用Linux开发有很多坑,同时也有很多有趣的东西,可以编写一些自动化脚本,添加定时器,例如下班定时关机等自动化脚本,同时对于服务器不太了解的朋友,建议也可以拿台Linux来实践下,同时Ubuntu在Androi_ubuntu开发推荐软件
Nginx反向代理获取客户端真实IP_nginx获取到的是交换机的ip-程序员宅基地
文章浏览阅读2.2k次。一,问题 nginx反向代理后,在应用中取得的ip都是反向代理服务器的ip,取得的域名也是反向代理配置的url的域名,解决该问题,需要在nginx反向代理配置中添加一些配置信息,目的将客户端的真实ip和域名传递到应用程序中。二,解决 Nginx服务器增加转发配置 proxy_set_header Host $host;_nginx获取到的是交换机的ip
Wireshark TCP数据包跟踪 还原图片 WinHex应用_wireshark抓包还原图片-程序员宅基地
文章浏览阅读1.4k次。Wireshark TCP数据包跟踪 还原图片 WinHex简单应用 _wireshark抓包还原图片
Win8蓝屏(WHEA_UNCORRECTABLE_ERROR)-程序员宅基地
文章浏览阅读1.5k次。Win8下安装VS2012时,蓝屏,报错WHEA_UNCORRECTABLE_ERROR(P.S.新的BSOD挺有创意":("),Google之,发现[via]需要BIOS中禁用Intel C-State,有严重Bug的嫌疑哦原因有空再看看..._win8.1 whea_uncorrectable_error蓝屏代码
案例课1——科大讯飞_科大讯飞培训案例-程序员宅基地
文章浏览阅读919次,点赞21次,收藏22次。科大讯飞是一家专业从事智能语音及语音技术研究、软件及芯片产品开发、语音信息服务的软件企业,语音技术实现了人机语音交互,使人与机器之间沟通变得像人与人沟通一样简单。语音技术主要包括语音合成和语音识别两项关键技术。此外,语音技术还包括语音编码、音色转换、口语评测、语音消噪和增强等技术,有着广阔的应用。_科大讯飞培训案例
perl下载与安装教程【工具使用】-程序员宅基地
文章浏览阅读4.7k次。Perl是一个高阶程式语言,由 Larry Wall和其他许多人所写,融合了许多语言的特性。它主要是由无所不在的 C语言,其次由 sed、awk,UNIX shell 和至少十数种其他的工具和语言所演化而来。Perl对 process、档案,和文字有很强的处理、变换能力,ActivePerl是一个perl脚本解释器。其包含了包括有 Perl for Win32、Perl for ISAPI、PerlScript、Perl。_perl下载