【Android】探究Server——Service的基本用法、服务与活动间的通信、服务的生命周期、使用前台服务以及《第一行代码》中后台下载实例的补充(基于android 13)_android server使用-程序员宅基地
技术标签: java android okhttp 回调 Android
二、Service的基本用法
1、创建一个Service
Service通常需要重写三个最常用的方法。
- onCreate:创建服务时调用,注意只会在服务第一次创建的时候调用。
- onStartCommand:每次服务启动时调用。
- onDestroy:服务销毁时调用。
public class MyService extends Service {


    public MyService() {

    }

    @Override
    public IBinder onBind(Intent intent) {

        // TODO: Return the communication channel to the service.
        throw new UnsupportedOperationException("Not yet implemented");

    }

    @Override
    public void onCreate() {

        super.onCreate();
        Log.d("MyService","OnCreate");
    }

    @Override
    public int onStartCommand(Intent intent, int flags, int startId) {

        Log.d("MyService","onStartCommand");
        return super.onStartCommand(intent, flags, startId);
    }

    @Override
    public void onDestroy() {

        super.onDestroy();
        Log.d("MyService","onStartCommand");
    }
}
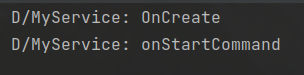
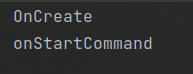
当多次点击创建时:
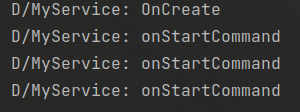
OnCreate只会在创建Service时调用。
2、服务的开始与销毁
2.1 开启一个服务startService
Intent intent = new Intent(MainActivity.this, MyService.class);
startService(intent);   //启动服务
2.2 销毁一个服务stopService
Intent intent = new Intent(MainActivity.this, MyService.class);
stopService(intent);    //关闭服务
3、服务与活动间的通信
3.1 在Service中构建继承Binder的内部类
public class MyService extends Service {


    private DownloadBinder mbinder = new DownloadBinder();

    class DownloadBinder extends Binder{

        public void startDownload(){

            Log.d("MyService","Download");
        }

        public int getProgress(){

            Log.d("MyService","Progress");
            return 0;
        }
    }


    public MyService() {

    }

    @Override
    public IBinder onBind(Intent intent) {

        return mbinder;
    }
}
3.2 在Activity创建匿名类ServiceConnection
public class MainActivity extends AppCompatActivity {

    private MyService.DownloadBinder downloadBinder;
    private boolean isServiceBound;

    private ServiceConnection connection = new ServiceConnection() {


        //打开服务的联系
        @Override
        public void onServiceConnected(ComponentName componentName, IBinder iBinder) {

            //通过iBinder获取MyService.DownloadBinder的实例
            downloadBinder = (MyService.DownloadBinder) iBinder;
            downloadBinder.startDownload();
            downloadBinder.getProgress();
            isServiceBound = true;
        }

        //关闭服务的联系
        @Override
        public void onServiceDisconnected(ComponentName componentName) {

            isServiceBound = false;
        }
    };
}
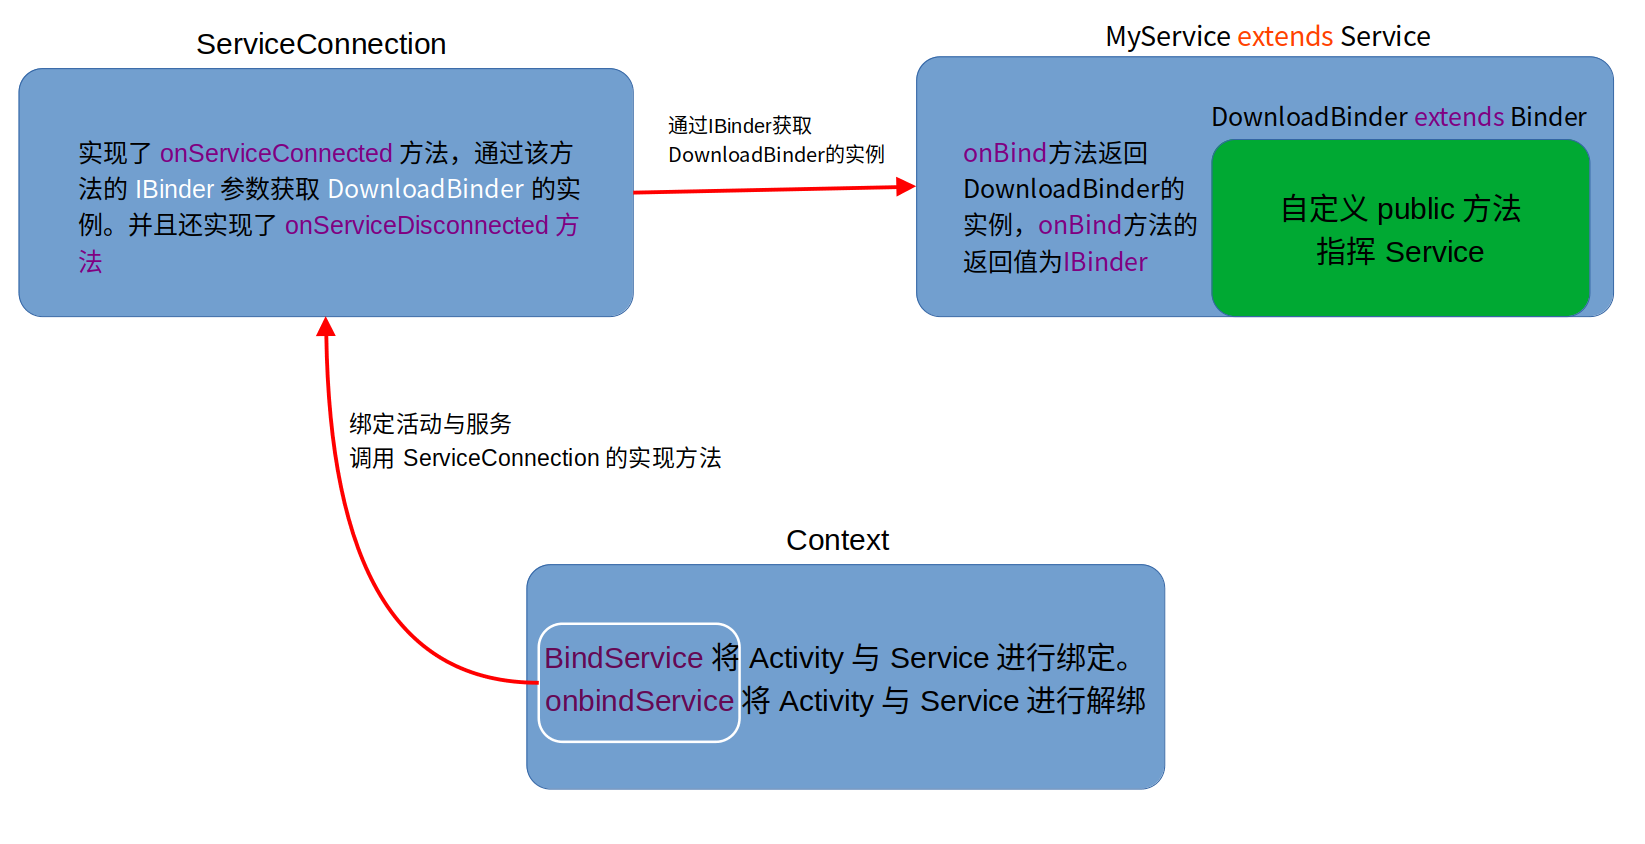
ServiceConnection是一个接口,用于建立与服务之间的连接,它的实现类(即connection对象)负责处理服务连接成功和断开连接的回调。MyService是服务的具体实现类,它继承自Service类,其中包含了服务的生命周期方法和具体功能。- 在绑定服务时,
ServiceConnection的onServiceConnected()方法会被调用,并传递一个IBinder对象,你可以将这个IBinder对象转换为服务中定义的自定义Binder类型,以便与服务进行交互并调用其方法。
ServiceConnection 是用于建立服务与调用者之间的桥梁,而 MyService 则是具体实现服务功能的类。
3.3 绑定Activity和Service
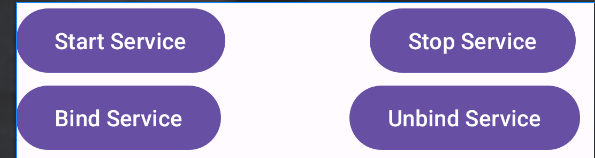
首先制作两个点击按钮
        binding.button3.setOnClickListener(new View.OnClickListener() {

            @Override
            public void onClick(View view) {

                Intent intent = new Intent(MainActivity.this, MyService.class);
                bindService(intent,connection,BIND_AUTO_CREATE);    //绑定服务
            }
        });

        binding.button4.setOnClickListener(new View.OnClickListener() {

            @Override
            public void onClick(View view) {

                //判断服务是否被注册,防止
                //java.lang.IllegalArgumentException: Service not registered 异常
                if(isServiceBound){

                    unbindService(connection);  //解绑服务
                    isServiceBound = false;
                }
            }
        });
bindService用于绑定服务获取一个服务的持久链接,这时候就会回调服务中的onBind()方法,bindService接收三个参数,
- 第一个是
Intent - 第二个是刚刚创建的
ServiceConnection实例 - 第三个是一个标志位:
BIND_AUTO_CREATE表示在活动和服务绑定后自动创建服务

unbindService用于解绑服务,接受一个参数是刚刚创建的ServiceConnection实例

4、服务的生命周期
4.1 打开与关闭服务
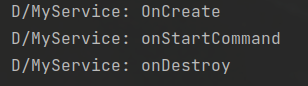
调用Context中startService方法,相应的服务就会被启动,并且回调onStartCommand()方法。
注意OnCreate只会在活动创建时调用并且只会加载一次,之后重复调用startService不会再次加载。
调用Context中stopService,相应的服务就会被关闭。
4.2 链接服务和断开服务
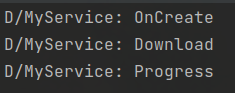
调用Context中的bindService方法,可以获取一个服务的持久链接,这时就会回调服务的onBind方法。只要调用方和服务方链接没有断开,服务就会一直保存运行状态。
调用了服务的OnCreate方法,然后手动调用了服务的自定义public方法Download和Progress。
调用Context中的unbindService方法,链接就会被关闭。
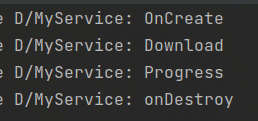
4.3 混合打开服务并且链接服务
调用Context中的bindService方法和startService方法此时就会打开并且链接服务。

那么此时如何销毁服务?
️ 根据Android系统机制,一个服务只要是被启动或者被绑定之后,就会一直处于运行状态。
必须要让在两种条件同时不满足才行。这种情况下需要同时调用unbindService和stopService方法。
三、Service的使用技巧
1、使用前台服务
public class MyService extends Service {

    @Override
    public void onCreate() {

        super.onCreate();
        Log.d("MyService","OnCreate");
        //创建notificationManager对通知进行管理
        NotificationManager notificationManager = getSystemService(NotificationManager.class);

         在 MainActivity 或其他合适的地方创建通知渠道
        if(Build.VERSION.SDK_INT >= Build.VERSION_CODES.O){

            String channelId = "001";   //通知渠道的标识符
            CharSequence channelName = "QQ";    //通知渠道的位置
            String channelDescription = "来自QQ好友的消息";    //通知渠道的描述

            //设置通知渠道的级别
            int importance = NotificationManager.IMPORTANCE_DEFAULT;

            //创建通知渠道
            NotificationChannel notificationChannel = new NotificationChannel(channelId,channelName,importance);
            notificationChannel.setDescription(channelDescription);

            //在系统中注册消息
            notificationManager.createNotificationChannel(notificationChannel);

        }

        Intent intent = new Intent(this,MainActivity2.class);
        PendingIntent pi = PendingIntent.getActivity(this, 0, intent, PendingIntent.FLAG_IMMUTABLE);


        //创建通知
        Notification notification = new NotificationCompat.Builder(this,"001")
            .setContentTitle("QQ消息")    //消息的标题
            .setContentText("你好,我是xx")  //消息的内容
            .setWhen(System.currentTimeMillis())    //指定通知被创建的时间
            .setSmallIcon(R.drawable.notify)    //通知的小图标
            .setLargeIcon(BitmapFactory.decodeResource
                          (getResources(),R.drawable.notify))//通知的大图标
            .setContentIntent(pi).build();


        //显示一个通知
        startForeground(1,notification)
    }
}
注意注册权限和打开对应的权限。第一个权限是通知权限,第二个是前台服务权限
 <uses-permission android:name="android.permission.POST_NOTIFICATIONS" />

     <uses-permission android:name="android.permission.FOREGROUND_SERVICE"/>
非常像创建一个通知,只不过这次在构建出notification对象后并没有使用NotificationManager来将通知显示出来。
而是调用了startForeground()方法。这个方法接收两个参数:
- 第一个参数是通知的id,类似于notify()方法的第一个参数
- 第二个参数则是构建出的Notification对象。
调用 startForeground() 方法后就会让MyService变成一个前台服务,并在系统状态栏显示出来。
2、关闭前台服务
stopForeground(true) 是用于 Android Service 的方法,用于停止服务运行时在前台显示的通知。
3、使用IntentService
新建立MyIntentService继承IntentService
public class MyIntentService extends IntentService {


    public MyIntentService() {

        super("MyIntentService");
    }

    @Override
    protected void onHandleIntent(@Nullable Intent intent) {

        Log.d("IntentService","Thread :"+Thread.currentThread().getName());
    }

    @Override
    public void onDestroy() {

        super.onDestroy();
        Log.d("IntentService","onDestroy");
    }
}
无参构造使用super(“MyIntentService”);为什么?
样的构造函数是为了确保 IntentService 的正常运行。
在 IntentService 的构造函数中,super("MyIntentService") 的参数是用于给父类 Service 设置一个名字标识。这个名字标识在日志输出和系统内部可能会被用到,以标识特定的服务实例。并确保父类的构造函数得到正确的调用,以使得 IntentService 正确地运行。IntentService 的工作原理是它在创建时会自动创建一个工作线程,并在该线程上处理传入的 Intent。
四、后台下载的实例
先看最终效果:
1、首先定义一个回调接口
public interface DownloadListener {

    //当前下载进度
    void onProgress(int progress);

    //下载成功
    void onSuccess();

    //下载失败
    void onFailed();

    //下载暂停
    void onPaused();

    //取消下载
    void onCanceled();
}
2、实现新建线程下载
我们自定义一个类DownloadTask继承自AsyncTask
public class DownloadTask extends AsyncTask<String, Integer, Integer>
重写doInBackground、onPostExecute、onProgressUpdate三个方法
然后在类DownloadTask定义以下几个变量:
    public static final int TYPE_SUCCESS = 0;   //下载成功
    public static final int TYPE_FAILED = 1;    //下载失败
    public static final int TYPE_PAUSED = 2;    //下载暂停
    public static final int TYPE_CANCELED = 3;  //下载取消


    private DownloadListener listener;  //回调接口

    private boolean isCanceled = false; //是否取消下载

    private boolean isPaused = false;   //是否暂停下载

    private int lastProgress;   //前一次的下载进度
并且构造一个具有回调接口的构造方法:
public DownloadTask(DownloadListener listener) {

    this.listener = listener;
}
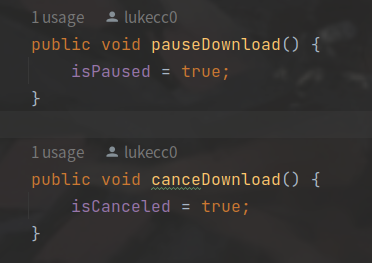
新构建三个方法pauseDownload、canceDownload、getContentLength
    public void pauseDownload() {

        isPaused = true;
    }

    public void canceDownload() {

        isCanceled = true;
    }
这两个方法的作用是用来修改isPaused、isCanceled的值,如果他们的值为true,那么说明需要暂停或者取消下载。所以这两个方法是用来修改下载状态的。
最后这个getContentLength方法是通过okhttp用来计算需要下载数据的长度
//通过okHttp获得下载数据的长度
private long getContentLength(String downloadUrl) throws IOException {

    //okhttp使用的三步方法
    OkHttpClient client = new OkHttpClient();

    Request request = new Request.Builder().url(downloadUrl).build();

    Response response = client.newCall(request).execute();

    //通常在进行网络请求时,我们会通过调用 response.isSuccessful() 来判断请求是否成功
    if (response != null && response.isSuccessful()) {

        long contentLength = response.body().contentLength();
        //关闭数据流
        response.body().close();
        return contentLength;
    }
    return 0;
}
response.isSuccessful()我们用来判断是否请求成功。
接下来我们需要重写最重要的doInBackground方法。
首先我们定义了几个变量:
@Override
protected Integer doInBackground(String... strings) {

    InputStream is = null;  //输入流
    RandomAccessFile savedFile = null;  //随机访问文件
    File file = null;   //本地文件下载地址

    long downloadedLength = 0;  //记录下载的文件长度
    String downloadUrl = strings[0];    //传递给后台的任务url地址

    //假设为:https://www.example.com/downloads/file.txt,可以得到/file.txt
    String filename = downloadUrl.substring(downloadUrl.lastIndexOf("/"));

    //获取下载的本地目录
    String directory = Environment.getExternalStoragePublicDirectory(Environment.DIRECTORY_DOWNLOADS).getPath();

    file = new File(directory + filename);
我们通过doInBackground传入的参数strings获取到需要下载的网址,然后通过downloadUrl.substring(downloadUrl.lastIndexOf("/"))方法解析得到下载链接中的文件名称。lastIndexOf方法获取字符串中最后一次出现 / 的位置,通过substring函数进行切割。
2.1 获取内部下载路径的方法
接下来使用Environment.getExternalStoragePublicDirectory获取到获取外部存储公共目录。
获取外部存储设备上的公共下载目录的路径,并将该路径存储在名为 directory 的字符串变量中。Environment.getExternalStoragePublicDirectory()方法返回的是一个 File 对象,而.getPath()方法则用于获取该对象所代表的文件的路径字符串。
Environment.DIRECTORY_DOWNLOADS 是一个常量,表示公共下载目录,用于存储用户下载的文件。
接下来使用new File(directory + filename);打开这个文件。
如何我们判断一下文件是否存在,如果存在获取已经下载好的文件数据大小,这样就可以在后面使用断点传输功能。
/**
* 检查文件是否存在,获取此时文件的长度
* 这样就可以在后面使用断点传输功能
*/
if (file.exists()) {

    downloadedLength = file.length();
}
这个时候我们就需要判断一下我们要下载的这个文件是不是存在的,或者这个文件我们是不是已经下载好了。
try {

    long contentLength = getContentLength(downloadUrl);

    if (contentLength == 0) {

        return TYPE_FAILED;
    } else if (contentLength == downloadedLength) {

        //通过Url获取的内容长度等于文件长度说明文件已经成功下载
        return TYPE_SUCCESS;
    }
我们通过刚刚okhttp写的getContentLength方法计算这个等待下载文件的长度,如果长度等于0说明这个文件不存在,如果等待下载的文件长度等于本地下载的文件长度说明已经下载完成了。注意getContentLength方法抛出了异常需要处理。
上面这些工作做完了,我们就需要正式开始下载。还是通过okhttp协议获得等待下载的文件。
OkHttpClient client = new OkHttpClient();
Request request = new Request.Builder()
    //断点下载指定从哪个字节开始下载 RANGE: bytes=start-end
    .addHeader("RANGE", "bytes=" + downloadedLength + "-")
    .url(downloadUrl).build();
Response response = client.newCall(request).execute();
2.2 OkHttp中RANGE请求的用法
这里我们用到了一个新的构建方法 addHeader(“RANGE”, “bytes=” + downloadedLength + “-”) 。解释一下这个方法:
RANGE:是一个请求头,是用于指定只请求文件的部分内容的 HTTP 请求头。它通常用于断点续传或分块下载的场景,允许客户端在下载文件时从指定的位置继续下载,而不是从文件的开头开始下载。
bytes=:是下载数据的单位。
例如,如果 downloadedLength 的值是 1024,那么添加的 “RANGE” 请求头将是 “bytes=1024-”,这表示客户端希望从文件的第 1025 字节开始继续下载。
在 HTTP 协议规范中,“RANGE” 请求头的格式如下:
R A N G E : b y t e s = s t a r t − e n d RANGE: bytes=start-end RANGE:bytes=start−end
然后我们就是通过Response获取需要下载的数据,
	 if (response != null) {

         //获取一个字节流
        is = response.body().byteStream();
         //将需要下载到本地的文件地址转化成了一个可以随机读写位置的文件流。
        savedFile = new RandomAccessFile(file, "rw");
        //设置文件指针,跳过已经下载的文件
        savedFile.seek(downloadedLength);

        byte[] buffer = new byte[1024];
        int len = 0;
        int total = 0;  //用于计算下载总量
        while ((len = is.read(buffer)) != -1) {

            //处理暂停状态和取消事件
            if (isCanceled) {

                return TYPE_CANCELED;
            } else if (isPaused) {

                return TYPE_PAUSED;
            } else {

                savedFile.write(buffer, 0, len);
                total += len;
                //计算已经下载的百分比
                int progress = (int) ((total + downloadedLength) * 100 / contentLength);
                publishProgress(progress);
            }
        }
    }
    //关闭下载流
    response.body().close();
    return TYPE_SUCCESS;
}
2.3 随机读取文件字节任意位置的用法
通过获取了一个可以随机读取地址的文件流,用于实现断点下载。
- new RandomAccessFile(file, “rw”)
- 它允许你在文件中进行读取和写入操作,并且可以跳转到文件的任意位置进行操作,而不必按照顺序进行读取或写入。
- file: 这是一个 File 对象,表示你要操作的文件。
- “r”:只读模式
- “rw”: 这是打开文件的模式。“rw” 表示读写模式,
- “rws”:同步只读模式,每次写入操作都会同步写入磁盘。
- “rwd”:同步读写模式,每次写入操作都会同步写入磁盘。
接下来就是IO流的读写操作了,在读写的过程中这时候就要用到刚刚的pauseDownloa、canceDownload通过这两个方法判断此时处于一个什么样的下载状态。如果不处于这两个方法那么就需要继续下载了。
total += len;
//计算已经下载的百分比
int progress = (int) ((total + downloadedLength) * 100 / contentLength);
publishProgress(progress);
这段代码计算当前下载数据占总数据的的百分比,然后通过publishProgress刷新数据,传递给onProgressUpdate方法。
catch (IOException e) {

    throw new RuntimeException(e);
} finally {


    try {

        if (is != null) {

            is.close();
        }
        if (savedFile != null) {

            savedFile.close();
        }
        //如果处于取消下载事件的情况下,关闭文件流
        if(isCanceled && file != null){

            file.delete();
        }
    }catch (Exception e){

        e.printStackTrace();
    }
}
}
注意关闭各种流。防止内存泄漏
最后我们编写onPostExecute、onProgressUpdate这两个方法。
    @Override
    protected void onPostExecute(Integer integer) {

        switch (integer){

            case TYPE_SUCCESS:
                listener.onSuccess();
                break;
            case TYPE_FAILED:
                listener.onFailed();
                break;
            case TYPE_PAUSED:
                listener.onPaused();
                break;
            case TYPE_CANCELED:
                listener.onCanceled();
                break;
        }
    }

    @Override
    protected void onProgressUpdate(Integer... values) {

        int progress = values[0];
        //比较当前进度和上一次是否发送变化,如果发生变化则使用onProgress方法进行通知
        if(progress > lastProgress){

            listener.onProgress(progress);
            lastProgress = progress;
        }
    }
3、实现Service管理下载线程
还是新建一个DownloadService继承Service,定义以下几个变量。
public class DownloadService extends Service {


    private DownloadTask downloadTask;  //下载线程
    private String downloadUrl;     //待下载的url
    private String downloadedFilePath = null; // 添加这个变量来存储下载
然后我们需要创建一个通知,用于管理下载情况向用户发送信息。
GetNotificationManagerCompat用于创建一个通知的管理类,getNotification用于创建一个有具体信息的通知实例,传入两个参数分别是通知的标题和下载进度。
//获取通知的管理类
private NotificationManagerCompat GetNotificationManagerCompat() {

    return NotificationManagerCompat.from(this);
}

//创建一个通知
private Notification getNotification(String title, int progress) {


    //注册一个渠道
    if (Build.VERSION.SDK_INT >= Build.VERSION_CODES.O) {

        String id = "001";
        String name = "Download";

        int importance = NotificationManager.IMPORTANCE_HIGH;

        NotificationChannel notificationChannel = new NotificationChannel(id, name, importance);
        GetNotificationManagerCompat().createNotificationChannel(notificationChannel);
    }

    //设置一个点击事件
    Intent Fileintent = new Intent(this, MainActivity.class);
    PendingIntent pi = PendingIntent.getActivity(this, 0, Fileintent, PendingIntent.FLAG_IMMUTABLE);

    //设置通知样式
    NotificationCompat.Builder notification = new NotificationCompat.Builder(this, "001");
    notification.setContentTitle(title);
    notification.setSmallIcon(R.drawable.nofity);
    notification.setLargeIcon(BitmapFactory.decodeResource(getResources(), R.drawable.nofity));
    notification.setContentIntent(pi);
    notification.setAutoCancel(true);

    if (progress >= 0) {

        //只有进度大于等于0才会显示
        notification.setStyle(new NotificationCompat.BigTextStyle().bigText(progress + "%"));
        //设置一个进度条
        notification.setProgress(100, progress, false);
    }
    return notification.build();
}
3.1 在通知中设置一个进度条
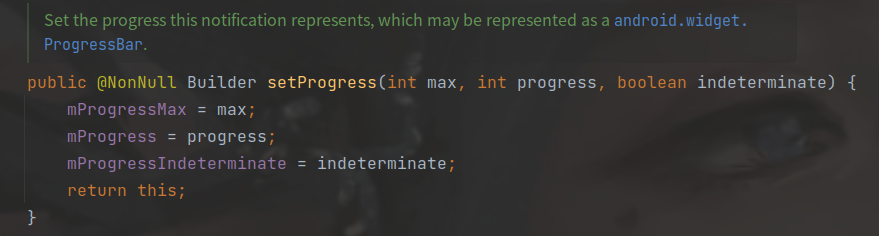
max:表示进度条的最大值,通常是任务的总大小或总进度值。progress:表示当前的进度值,通常是任务已经完成的大小或进度。indeterminate:表示进度条是否是不确定模式。如果设置为 true,表示进度条是不确定的,不显示具体的进度值;如果设置为 false,表示进度条是确定的,会显示具体的进度值。
现在需要设置本地广播发送下载完成的消息,当我们下载完成后使用本地广播发送文件的下载路径。因为本地广播LocalBroadcastManager是单例模式,所以我们使用getInstance获取的实例是唯一的。
// 发送广播通知下载成功,传递下载文件路径
private void sendDownloadSuccessBroadcast(String downloadedFilePath) {

    Intent intent = new Intent("com.example.servicedown.DOWNLOAD_SUCCESS");
    intent.putExtra("file_path", downloadedFilePath);
    LocalBroadcastManager.getInstance(this).sendBroadcast(intent);
}
3.2 实现回调接口
我们在刚刚使用了DownloadListener的接口但是没有实现接口的方法,既然是回调,那么就应该在DownloadService中实现这些方法。
//实现回调方法
private final DownloadListener listener = new DownloadListener() {

    @Override
    public void onProgress(int progress) {

        GetNotificationManagerCompat().notify(1, getNotification("下载中.....", progress));
    }

    @Override
    public void onSuccess() {

        //获取文件路径
        String filename = downloadUrl.substring(downloadUrl.lastIndexOf("/"));
        String directory = Environment.getExternalStoragePublicDirectory
            (Environment.DIRECTORY_DOWNLOADS).getPath();
        downloadedFilePath = directory+filename;
        sendDownloadSuccessBroadcast(downloadedFilePath); // 发送广播通知下载成功,传递下载文件路径

        downloadTask = null;
        //下载成功时关闭前台服务通知,并且创建一个下载成功的通知
        stopForeground(true);
        GetNotificationManagerCompat().notify(1, getNotification("下载成功", -1));
        Toast.makeText(DownloadService.this, "下载成功", Toast.LENGTH_SHORT).show();
    }

    @Override
    public void onFailed() {

        downloadTask = null;
        //下载失败时关闭前台服务通知,并创建一个下载失败的通知
        stopForeground(true);
        GetNotificationManagerCompat().notify(1, getNotification("下载失败", -1));
        Toast.makeText(DownloadService.this, "下载失败", Toast.LENGTH_SHORT).show();

    }

    @Override
    public void onPaused() {

        downloadTask = null;
        Toast.makeText(DownloadService.this, "下载暂停", Toast.LENGTH_SHORT).show();
    }

    @Override
    public void onCanceled() {

        downloadTask = null;
        stopForeground(true);
        Toast.makeText(DownloadService.this, "取消下载", Toast.LENGTH_SHORT).show();
    }
};
这些方法基本上都是一样的,关闭前台服务通知,并创建一个的通知,不同的是在onSuccess中我们需要发送创建成功的广播消息,将下载的路径发送。
3.3 使用Binder与活动建立联系
接下来就要实现活动与服务通信需要用到的Binder,我们建立一个内部类DownloadBinder继承Binder。并且在外部类创建一个内部类的实例。
private DownloadBinder mBinder = new DownloadBinder();  //内部类的实例

//实现Service的功能
class DownloadBinder extends Binder{

    //下载功能
    public void StartDownload(String Url){

        //若未开始下载则进行下载
        if(downloadTask == null){

            downloadUrl = Url;
            downloadTask = new DownloadTask(listener);
            downloadTask.execute(downloadUrl);
            //打开前台服务

            startForeground(1,getNotification("下载中...",0));
        }
    }

    //暂停下载
    public void pauseDownload(){

        if(downloadTask != null){

            downloadTask.pauseDownload();
        }
    }

    //取消下载
    public void cancelDownload(){

        if(downloadTask != null){

            downloadTask.canceDownload();
        }

        //取消下载时,判断是不是有数据已经被下载了,有的话删除已经下载的数据
        if(downloadUrl != null){

            //获取文件路径
            String filename = downloadUrl.substring(downloadUrl.lastIndexOf("/"));
            String directory = Environment.getExternalStoragePublicDirectory
                (Environment.DIRECTORY_DOWNLOADS).getPath();

            File file= new File(directory+filename);
            //删除文件
            if(file.exists()){

                file.delete();
            }
            //关闭通知
            GetNotificationManagerCompat().cancel(1);
            //关闭前台服务
            stopForeground(true);

        }

    }
}
接下来就是实现开始下载、暂停下载、取消下载三个方法便于活动调用。
StartDownload:方法很简单先判断downloadTask是不是存在,存在则证明正在下载,不存在就启动这个下载线程和前台服务pauseDownload:这个方法也一样先判断,如果是下载状态则调用DownloadTask中的pauseDownload方法。cancelDownload:也是一样调用downloadTask.canceDownload();
不同的是我们需要将文件中已经下载的内容删除,还是一样先获取文件路径,然后删除文件,最后再关闭前台服务和通知。
在最后既然是活动和服务间需要通信,那么我们就需要将这个内部类传递出去。
@Override
public IBinder onBind(Intent intent) {

    return mBinder;
}
4、在活动中使用服务
4.1 使用ServiceConnection链接服务和活动
最后我们修改MainActivity中的代码
public class MainActivity extends AppCompatActivity implements View.OnClickListener {

    private DownloadService.DownloadBinder binder;

    private String downloadedFilePath; // 添加这个变量来存储下载文件路径
    private ServiceConnection connection = new ServiceConnection() {

        @Override
        public void onServiceConnected(ComponentName componentName, IBinder iBinder) {

            binder = (DownloadService.DownloadBinder) iBinder;
        }

        @Override
        public void onServiceDisconnected(ComponentName componentName) {


        }
    };
制作一个ServiceConnection的实例,用于链接服务和活动。
4.2 接受广播和安装文件
接下来需要一个广播接收器,用于接受DownloadService发送下载完成的广播。
private BroadcastReceiver downloadSuccessReceiver = new BroadcastReceiver() {

    @Override
    public void onReceive(Context context, Intent intent) {

        if (intent.getAction().equals("com.example.servicedown.DOWNLOAD_SUCCESS")) {

            downloadedFilePath = intent.getStringExtra("file_path");
            //提示是是否安装
            showInstallDialog();
        }
    }
};
当我们接受到下载完成的广播,我们需要提示用户是否安装。showInstallDialog方法用于加载一个提示框。
// 显示安装对话框的方法
private void showInstallDialog() {

    AlertDialog.Builder builder = new AlertDialog.Builder(this);
    builder.setTitle("下载完成");
    builder.setMessage("是否要安装下载的应用?");
    builder.setPositiveButton("安装", new DialogInterface.OnClickListener() {

        @Override
        public void onClick(DialogInterface dialog, int which) {

            //实现安装操作
            installApk();
        }
    });
    builder.setNegativeButton("取消", null);
    builder.show();
}
如果用户选择安装,那么启动installApk方法,安装这个Apk.
// 安装APK的方法
private void installApk() {

    if (downloadedFilePath != null) {

        File apkFile = new File(downloadedFilePath);
        // 安装 APK
        Intent installIntent = new Intent(Intent.ACTION_VIEW);

        //将 APK 文件的 file:// URI 转换为一个安全的 content:// URI。
        //FileProvider 是用于共享文件的特殊 ContentProvider,它会为文件分配临时权限,以防止 FileUriExposedException 异常。
        Uri apkUri = FileProvider.getUriForFile(this, getPackageName() + ".fileprovider", apkFile);

        /**
             * 设置意图的数据和 MIME 类型。setDataAndType 方法接受两个参数:URI 和 MIME 类型。
             * MIME 类型用于指定要打开的文件类型,"application/vnd.android.package-archive" 表示 APK 文件类型。
             */
        installIntent.setDataAndType(apkUri, "application/vnd.android.package-archive");

        /**
             * 为安装应用的 Intent 添加 FLAG_GRANT_READ_URI_PERMISSION 标志,以授予临时读取 URI 的权限。
             */
        installIntent.addFlags(Intent.FLAG_GRANT_READ_URI_PERMISSION);

        startActivity(installIntent);
    }
}
我们首先需要打开这个安装包文件,然后设置一个Intent用于启动安装管理。
注意在android我们需要一个安全的Url文件路径去安装文件,而不能直接通过文件去安装。否则会出现FileUriExposedException异常。
4.3 然后重写onCreate方法
@Override
protected void onCreate(Bundle savedInstanceState) {

    super.onCreate(savedInstanceState);
    setContentView(R.layout.activity_main);

    ActivityMainBinding binding = ActivityMainBinding.inflate(getLayoutInflater());
    setContentView(binding.getRoot());

    //加载应用时获取通知权限
    if(ContextCompat.checkSelfPermission(MainActivity.this,
                                         Manifest.permission.POST_NOTIFICATIONS) != PackageManager.PERMISSION_GRANTED){

        ActivityCompat.requestPermissions(MainActivity.this
                                          ,new String[]{
    Manifest.permission.POST_NOTIFICATIONS},1);
    }


    Intent intent = new Intent(MainActivity.this,DownloadService.class);
    startService(intent);//启动服务

    //绑定服务
    bindService(intent,connection,BIND_AUTO_CREATE);

    //三个按钮的点击事件
    binding.startDownload.setOnClickListener(this);
    binding.pauseDownload.setOnClickListener(this);
    binding.cancelDownload.setOnClickListener(this);

    //动态注册一条广播
    IntentFilter intentFilter = new IntentFilter("com.example.servicedown.DOWNLOAD_SUCCESS");
    LocalBroadcastManager.getInstance(this).registerReceiver(downloadSuccessReceiver, intentFilter);
}
4.4 提示用户获取通知权限
在android 13 我们需要向用户申请通知的权限,然后我们启动服务,绑定服务,最后在注册广播。
向用户申请权限的访问,如果用户拒绝提供权限,友好的引导用户给予应用权限。
@Override
public void onRequestPermissionsResult(int requestCode, @NonNull String[] permissions, @NonNull int[] grantResults) {

    super.onRequestPermissionsResult(requestCode, permissions, grantResults);
    switch (requestCode){

        case 1:
            if (grantResults.length > 0 && grantResults[0] != PackageManager.PERMISSION_GRANTED){

                showPermissionExplanation("需要通知权限才能使用该功能,请前往设置界面开启权限。");
            }
            break;
    }
}

// 显示权限解释对话框,引导用户去设置界面开启权限
private void showPermissionExplanation(String message) {

    new AlertDialog.Builder(this)
        .setMessage(message)
        .setPositiveButton("去设置", new DialogInterface.OnClickListener() {

            @Override
            public void onClick(DialogInterface dialog, int which) {

                // 跳转到应用设置权限的界面
                Intent intent = new Intent(Settings.ACTION_APPLICATION_DETAILS_SETTINGS);   //操作应用程序详细信息设置

                intent.setData(Uri.fromParts("package", getPackageName(), null));
                startActivity(intent);
            }
        })
        .setNegativeButton("取消", null)
        .setCancelable(false)
        .show();
}
setData(Uri.fromParts("package", getPackageName(), null)) 这段代码用于创建一个特殊类型的 Uri 对象,并将其设置为 Intent 的数据。这个特殊的 Uri 通常用于打开应用程序的详细信息页面或跳转到应用程序的系统设置页面。
Uri.fromParts(): 这是一个静态方法,用于创建 Uri 对象。它接收三个参数。

- Scheme: 这是指定
Uri的数据类型的标识。在setData(Uri uri)方法中,Uri表示一个数据的标识符,而"Scheme"指定了这个数据的类型。在这个特定的用例中,我们使用了"package"作为Scheme,它是一种特殊的Scheme,用于表示要查看的数据类型是一个Android应用程序的包名。 - 指定的部分(Specific Part): 这是
Uri的一部分,它表示与特定Scheme相关的数据信息。在这个例子中,我们使用getPackageName()来获取当前Android应用程序的包名。因此,指定的部分就是当前应用程序的包名。 - 片段(Fragment): 这是
Uri的另一部分,用于标识数据的特定部分。在这个例子中,我们没有使用片段,因此传递了null。
系统将根据这个特殊的Uri自动选择合适的界面来显示应用程序的详细信息或系统设置页面。
4.5 设置点击事件
最后设置按钮点击事件
@Override
public void onClick(View view) {

    int id = view.getId();
    if(binder == null){

        return;
    }

    if(id == R.id.start_download){

        String Url = "https://dldir1.qq.com/music/clntupate/QQMusic2005000982_64.apk";
        binder.StartDownload(Url);
    }else if (id == R.id.pause_download){

        binder.pauseDownload();
    }else {

        binder.cancelDownload();
    }

}
5、在AndroidManifest中静态注册权限
    <uses-permission android:name="android.permission.POST_NOTIFICATIONS"/>
    <uses-permission android:name="android.permission.REQUEST_INSTALL_PACKAGES" />
    <uses-permission android:name="android.permission.FOREGROUND_SERVICE"/>
    <uses-permission android:name="android.permission.INTERNET" />
第一个权限是通知权限,用于向用户通知消息
第二个权限是请求安装安装包的权限,用于安装下载的安装包
第三个权限是显示前台服务权限,用于显示下载状态
第三个权限是允许上网权限,用于进行联网下载
智能推荐
Qt:Qt框架的初步认识和基本使用
QT框架基本认识
泰克Tektronix THDP0100高压差分探头-程序员宅基地
文章浏览阅读45次。泰克THDP0100高压差分探头Tektronix提供了广泛的高压探测解决方案,使用户能够安全、准确地进行浮动测量。高达6000 V的差速器(DC+PK AC)多2300 V通用(RMS)功率变换器设计与使用。安全高压探头解决方案。
使用uiautomator2自动化测试app(三)------实战篇_uiautomator2创建虚拟机-程序员宅基地
文章浏览阅读1.4k次。这里我主要会介绍怎么自动的化操控模拟器和一些其它的测试.1. 博主使用的是雷电模拟器,其它模拟器不适用此方法雷电模拟器接口:http://www.ldmnq.com/bbs/thread-30-1-1.html这里面是介绍了雷电模拟器调试接口的一些命令,需动手在cmd上先行操作!2. 新建一个.py文件,开始编写脚本这里主要实现了:2.1 创建模拟器2.2 修..._uiautomator2创建虚拟机
microk8s的registry私有镜像库
【代码】microk8s的registry私有镜像库。
开源项目,毕业设计_本科毕业设计拿别人的开源代码修改-程序员宅基地
文章浏览阅读1.5w次,点赞35次,收藏385次。自己在网上找的开源项目,比较好分享给大家热门开源项目(包含小四轴、智能手环、光立方、智能车、防丢器等项目)号外!号外!(搞四轴,有这套就足够了!)科研级别的小四轴STM32F4芯片支持WIFI且android手机控制自适应控制就是牛掰!该飞机面向有科研和强烈学习意向的小伙伴们使用,如果只是想玩的话你肯定不会喜欢这套四轴的,主要设计思想是提供一个高性能的控制和姿态算法验证平台,因此..._本科毕业设计拿别人的开源代码修改
Java快速开发框架_若依——Ruoyi添加自己的业务模块_ruoyi java17-程序员宅基地
文章浏览阅读1w次,点赞2次,收藏26次。QQ 1274510382Wechat JNZ_aming商业联盟 QQ群538250800技术搞事 QQ群599020441解决方案 QQ群152889761加入我们 QQ群649347320共享学习 QQ群674240731纪年科技aming网络安全 ,深度学习,嵌入式,机器强化,生物智能,生命科学。叮叮叮:产品已上线 —>关注 官方-微信公众号——济南纪年信息科技有限公司民生项目:商城加盟/娱乐交友/创业商圈/外包兼职开发-项目发布/安全项目:态势感.._ruoyi java17
随便推点
macbook历代_苹果历代MacBook笔记本简要回顾-程序员宅基地
文章浏览阅读4.3k次。2006年5月份的时候,苹果悄然取消了12英寸的PowerBook和12/14英寸的iBook机型,取而代之的是13.3英寸的MacBook。作为苹果从PowerPC处理器向Intel迁移的最后一步,该机拥有有黑/白两种颜色。随后,该公司又推出了15和17英寸的MacBook Pro机型。最近,苹果公司更是推出了只有一个USB-C接口的12英寸MacBook。不过本文的主要目的,还是带大家回顾一下..._macbook9.1是哪年的
用maven命令将jar包导入本地仓库_mavend导入jar包命令-程序员宅基地
文章浏览阅读2.8k次。1、将jar包放在D盘根目录下D:\ojdbc6.jar2、 _mavend导入jar包命令
常量与十六进制数0x7f或0x3f做&(与)运算含义-程序员宅基地
文章浏览阅读2.5w次,点赞13次,收藏31次。做个复习。十六进制数 [0~10 A~F]0x7f对应的二进制数及十进制数为:0111 1111 = 2^7 = 1280x3f对应的二进制数及十进制数为:0011 1111 = 2^6 = 640x7f与常量做与运算实质是保留常量(转换为二进制形式)的后7位数,既取值区间为[0,128]比如,0x7f & 256 0111 1111 -------- 1..._0x7f
Python爬虫绕过登录的小技巧_python 爬虫 跳过会员限制-程序员宅基地
文章浏览阅读6.3k次,点赞4次,收藏17次。前言很多时候我们做 Python 爬虫时或者自动化测试时需要用到 selenium 库,我们经常会卡在登录的时候,登录验证码是最头疼的事情,特别是如今的文字验证码和图形验证码。文字和图形验证码还加了干扰线,本文就来讲讲怎么绕过登录页面。登录页面的验证,比如以下的图形验证码。还有我们基本都看过的 12306 的图形验证码。绕过登录方法绕过登录基本有两种方..._python 爬虫 跳过会员限制
安装 GMP、NTL、CTMalloc ,编译 OpenFHE_openfhe安装-程序员宅基地
文章浏览阅读565次。首先安装 GMP、NTL、CTMalloc 等等很有用的三方库,然后编译 OpenFHE 工具包。_openfhe安装
外包干了2个月,技术退步明显。。。。。
先说一下自己的情况,本科生,17年通过校招进入武汉某软件公司,干了接近3年的功能测试,今年国庆,感觉自己不能够在这样下去了,长时间呆在一个舒适的环境会让一个人堕落!而我已经在一个企业干了3年的功能测试,已经让我变得不思进取,谈了1年的女朋友也因为我的心态和工资和我分手了。于是,我决定要改变现状,冲击下大厂。