maven配置详解-程序员宅基地
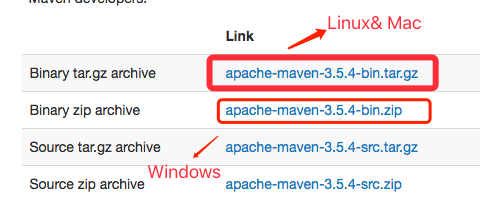
下载地址:Maven – Download Apache Maven,
添加环境变量:MAVEN_HOME
一、配置文件
maven的配置文件主要有 settings.xml 和pom.xml 两个文件。
1.其中在maven安装目录,例如apache-maven-3.8.1\conf目录下的settings.xml 文件是全局配置文件
2.用户目录的.m2子目录下面的settings.xml的配置只是针对当前用户的配置
3.项目根路径下的pom.xml主要是对当前项目的配置。
局部配置优先于全局配置。 配置优先级从高到低:pom.xml> user settings > global settings
二、settings.xml 配置详解
1.LocalRepository 本地仓库配置:
<localRepository>D:\repository</localRepository>
2.InteractiveMode 用户输入配置:
<interactiveMode>true</interactiveMode>
3.离线模式
<offline>false</offline>
3.插件组,当我们使用某个插件,并且没有在命令行为其提供组织Id(groupId)的时候,Maven就会使用该列表。默认情况下该列表包含了org.apache.maven.plugins和org.codehaus.mojo
<pluginGroups>
    <pluginGroup>org.sonarsource.scanner.maven</pluginGroup>
</pluginGroups>
4.私服服务器配置,配置私服的用户名和密码。配置的私服服务器可以用来发布jar包,与pom.xml 中 发布标签distributionManagement 中配置的仓库ID相互对应。
<servers>
    <server>
        <id>maven-releases</id>
        <username>developer</username>
        <password>123456</password>
        <!--文件被创建时的权限。 -->
        <filePermissions>664</filePermissions>
        <!--目录被创建时的权限。 -->
        <directoryPermissions>775</directoryPermissions>
    </server>
</servers>
5.镜像配置
<mirror>
    <id>alimaven</id>
    <name>aliyun maven</name>
    <url>https://maven.aliyun.com/repository/central</url>
    <!-- 被镜像的服务器的id -->
    <mirrorOf>*</mirrorOf>
</mirror>
6.Profiles配置。
settings.xml中的profile元素是pom.xml中profile元素的子集。只包含了id、activation、repositories、pluginRepositories和 properties元素。
如果一个settings.xml中的profile被激活,它的值会覆盖任何其它定义在pom.xml中带有相同id的profile。
<profiles>
    <profile>
        <id>nexus</id>
        <!-- 设置默认激活 -->
        <activation>
            <activeByDefault>true</activeByDefault>
        </activation>
        <repositories>
            <!-- 配置依赖仓库,可以配置多个仓库,maven会按照顺序进行依赖的加载 -->
            <repository>
                <id>nexus</id>
                <name>gwm nexus</name>
                <url>http://nexus.maven.cn/repository/maven-public/</url>
                <releases>
                    <enabled>true</enabled>
                </releases>
                <snapshots>
                    <enabled>true</enabled>
                </snapshots>
            </repository>
        </repositories>
        <!-- 设置插件仓库 -->
        <pluginRepositories>
            <pluginRepository>
                <id>nexus</id>
                <name>gwm nexus</name>
                <url>http://nexus.maven.cn/repository/maven-public/</url>
                <releases>
                    <enabled>true</enabled>
                </releases>
                <snapshots>
                    <enabled>true</enabled>
                </snapshots>
            </pluginRepository>
        </pluginRepositories>
    </profile>
    <profile>
        <id>sonar</id>
        <activation>
            <activeByDefault>true</activeByDefault>
        </activation>
        <!-- 配置Sonarquebe 代码扫描插件的全局属性-->
        <properties>
            <sonar.host.url>
                http://localhost:9000
            </sonar.host.url>
            <sonar.login>admin</sonar.login>
            <sonar.password>admin</sonar.password>
        </properties>
    </profile>
</profiles>
7. Activation配置,用来设置profile配置激活的条件逻辑。
<activation>
  <!--profile默认是否激活的标识 -->
  <activeByDefault>false</activeByDefault>
  <!--当匹配的jdk被检测到,profile被激活。例如,1.4激活JDK1.4,1.4.0_2,而!1.4激活所有版本不是以1.4开头的JDK。 -->
  <jdk>1.8</jdk>

  <!--如果Maven检测到某一个属性(其值可以在POM中通过${name}引用),其拥有对应的name = 值,Profile就会被激活。如果值字段是空的,那么存在属性名称字段就会激活profile,否则按区分大小写方式匹配属性值字段 -->
  <property>
    <!--激活profile的属性的名称 -->
    <name>mavenVersion</name>
    <!--激活profile的属性的值 -->
    <value>2.0.3</value>
  </property>
  <!--提供一个文件名,通过检测该文件的存在或不存在来激活profile。missing检查文件是否存在,如果不存在则激活profile。另一方面,exists则会检查文件是否存在,如果存在则激活profile。 -->
  <file>
    <!--如果指定的文件存在,则激活profile。 -->
    <exists>${basedir}/file2.properties</exists>
    <!--如果指定的文件不存在,则激活profile。 -->
    <missing>${basedir}/file1.properties</missing>
  </file>
</activation>
8.properties 配置,对应profile的扩展属性和pom中properties的属性列表,这些值可以在pom.xml,setting.xml中使用标记${X}来使用,这里X是指属性的名称。
<!--
  1. env.X: 在一个变量前加上"env."的前缀,会返回一个shell环境变量。例如,"env.PATH"指代了$path环境变量(在Windows上是%PATH%)。
  2. project.x:指代了POM中对应的元素值。例如: <project><version>1.0</version></project>通过${project.version}获得version的值。
  3. settings.x: 指代了settings.xml中对应元素的值。例如:<settings><offline>false</offline></settings>通过 ${settings.offline}获得offline的值。
  4. Java System Properties: 所有可通过java.lang.System.getProperties()访问的属性都能在POM中使用该形式访问,例如 ${java.home}。
  5. x: 在<properties/>元素中,或者外部文件中设置,以${someVar}的形式使用。
 -->
<properties>
<project.version>1.0</project.version>
</properties>
9. Repositories 远程仓库配置,可以配置多个。可以配置在<settings>标签中,也可以配置在<profile>标签中(比较常见,配置在<profile>标签中可以根据profile的激活情况动态选择仓库)。配置形式参见《6.Profiles配置》。
10.插件仓库pluginRepositories 和repositories相同。
11. 激活profile配置 activeProfiles,用来激活配置的profile。和 activation 配置相比 activeProfiles 配置比较简单,也比较常用。
<activeProfiles>
        <activeProfile>nexus</activeProfile>
    </activeProfiles>
三、POM.xml配置文件:
<parent>
    <!--父项目的构件标识符 -->
    <artifactId />
    <!--父项目的唯一标识符 -->
    <groupId />
    <!--父项目的版本 -->
    <version />
    <!-- 父项目的pom.xml文件的相对路径。
    默认值是../pom.xml。
    Maven首先在构建当前项目的地方寻找父项目的pom,其次在文件系统的这个位置(relativePath位置),然后在本地仓库,最后在远程仓库寻找父项目的pom。
    注意:如果在父项目中通过<modules>指定了子模块,且子模块在父项目目录下,则不需要指定此配置。如果子项目不在父项目的目录下,应该指定此配置。
    -->
    <relativePath>../pom.xml</relativePath>
</parent>

<!-- 模型版本 -->
<modelVersion>4.0.0</modelVersion>
<!-- 公司或者组织的唯一标志-->
<groupId>com.companyname.project-group</groupId>
<!-- 项目的唯一ID->
<artifactId>project</artifactId>
<!-- 版本号 -->
<version>1.0</version>

<!--项目产生的构件类型,例如jar、war、ear、pom -->
<packaging>jar</packaging>

<!-- 属性配置 -->
<properties>
    <!-- 编译时的编码 -->
    <maven.compiler.encoding>UTF-8</maven.compiler.encoding>
    <spring-boot.version>2.3.7.RELEASE</spring-boot.version>
</properties>
<!-- 依赖配置 -->
<dependencies>
    <dependency>
        <groupId>org.springframework.boot</groupId>
        <artifactId>spring-boot-starter</artifactId>
        <version>${spring-boot.version}</version>
        <scope>compile</scope>
    </dependency>
</dependencies>
<!-- 依赖声明,不会真正引入包。一般在父pom中进行声明,在子pom中真正引入 -->
<dependencyManagement>
    <dependencies>
        <dependency>
            <groupId>cn.hutool</groupId>
            <artifactId>hutool-core</artifactId>
            <version>${hutool.version}</version>
        </dependency>
    </dependencies>
</dependencyManagement>

<!-- 编译构建相关配置 -->
<build>
    <!-- 插件申明,一般在父pom中声明,在子pom中真正引入 -->
    <pluginManagement>
        <plugins>
            <plugin>
                <groupId>org.springframework.boot</groupId>
                <artifactId>spring-boot-maven-plugin</artifactId>
                <version>${spring-boot.version}</version>
            </plugin>
        </plugins>
    </pluginManagement>
    <!-- 插件引入,在父pom中引入以后,所有子pom中都会引入 -->
    <plugins>
        <plugin>
            <groupId>org.sonarsource.scanner.maven</groupId>
            <artifactId>sonar-maven-plugin</artifactId>
            <version>3.6.0.1398</version>
        </plugin>
    </plugins>
</build>

<!-- 针对当前项目的远程仓库配置 -->
<repositories>
    <repository>
        <id>aliyun-public</id>
        <url>https://maven.aliyun.com/repository/public</url>
        <snapshots>
            <enabled>false</enabled>
        </snapshots>
        <releases>
            <enabled>true</enabled>
        </releases>
    </repository>
</repositories>
<!-- 针对当前项目的远程插件仓库配置 -->
<pluginRepositories>
    <pluginRepository>
        <id>aliyun-public</id>
        <url>https://maven.aliyun.com/repository/public</url>
        <snapshots>
            <enabled>false</enabled>
        </snapshots>
        <releases>
            <enabled>true</enabled>
        </releases>
    </pluginRepository>
</pluginRepositories>

<!--jar包发布私服配置-->
<distributionManagement>
    <repository>
        <!-- 此ID和setting.xml 中server中配置的服务器进行对应 -->
        <id>maven-releases</id>
        <name>releases</name>
        <url>http://nexus.maven.cn/repository/maven-releases/</url>
        <uniqueVersion>true</uniqueVersion>
    </repository>
    <snapshotRepository>
        <id>maven-snapshots</id>
        <name>snapshots</name>
        <url>http://nexus.maven.cn/repository/maven-snapshots/</url>
    </snapshotRepository>
</distributionManagement>

<!--动态构建配置,通过设置活动的profile,profile中的配置会作用于当前的项目编译构建 -->
<profiles>
    <profile>
        <id>dev</id>
        <properties>
            <spring.profiles.active>dev</spring.profiles.active>
        </properties>
        <activation>
            <activeByDefault>true</activeByDefault>
        </activation>
    </profile>
    <profile>
        <id>prod</id>
        <properties>
            <spring.profiles.active>prod</spring.profiles.active>
        </properties>
    </profile>
</profiles>
四、远程仓库的加载
maven仓库依赖下载顺序:
1,在settings.xml文件中配置的本地仓库中寻找依赖,没找到则进入第2步。
2,在settings.xml文件中配置的全局远程仓库中寻找,没找到则进入第3步。
3,在当前项目的pom.xml中配置的远程仓库中寻找,如果没找到则进入第4步。
4,在中央仓库 https://repo.maven.apache.org/maven2 中寻找,如果没找到则抛出依赖无法加载异常。
镜像替换:
1,如果在找寻的过程中,如果发现该仓库有镜像匹配,则直接从镜像仓库中加载。
2,如果仓库的 id 设置成 <mirrorOf>central</mirrorOf>,则会覆盖 maven 的中央仓库配置。
3,如果镜像 ID 设置为 <mirrorOf>*</mirrorOf> 表示匹配所有的仓库,则所有依赖只从此镜像仓库中下载。
4,如果镜像ID 设置为 <mirrorOf>repo1,repo2</mirrorOf>,则匹配仓库repo1和repo2,使用逗号分隔多个远程仓库
5,如果镜像ID设置为 <mirrorOf>*,!repo1</miiroOf>匹配所有远程仓库,repo1除外,使用感叹号将仓库从匹配中排除
建议将镜像地址作为一个 普通仓库repository 进行配置,这样可以在其他 仓库下载不了的情况下查找到此仓库。如果配置了镜像仓库代替其他仓库容易出现在镜像中找不到依赖,导致项目无法编译的问题。
原创文章,引用请注明出处,并联系本人征得本人同意后才可转载。
智能推荐
Spring Boot 获取 bean 的 3 种方式!还有谁不会?,Java面试官_springboot2.7获取bean-程序员宅基地
文章浏览阅读1.2k次,点赞35次,收藏18次。AutowiredPostConstruct 注释用于在依赖关系注入完成之后需要执行的方法上,以执行任何初始化。此方法必须在将类放入服务之前调用。支持依赖关系注入的所有类都必须支持此注释。即使类没有请求注入任何资源,用 PostConstruct 注释的方法也必须被调用。只有一个方法可以用此注释进行注释。_springboot2.7获取bean
Logistic Regression Java程序_logisticregression java-程序员宅基地
文章浏览阅读2.1k次。理论介绍 节点定义package logistic;public class Instance { public int label; public double[] x; public Instance(){} public Instance(int label,double[] x){ this.label = label; th_logisticregression java
linux文件误删除该如何恢复?,2024年最新Linux运维开发知识点-程序员宅基地
文章浏览阅读981次,点赞21次,收藏18次。本书是获得了很多读者好评的Linux经典畅销书**《Linux从入门到精通》的第2版**。下面我们来进行文件的恢复,执行下文中的lsof命令,在其返回结果中我们可以看到test-recovery.txt (deleted)被删除了,但是其存在一个进程tail使用它,tail进程的进程编号是1535。我们看到文件名为3的文件,就是我们刚刚“误删除”的文件,所以我们使用下面的cp命令把它恢复回去。命令进入该进程的文件目录下,1535是tail进程的进程id,这个文件目录里包含了若干该进程正在打开使用的文件。
流媒体协议之RTMP详解-程序员宅基地
文章浏览阅读10w+次,点赞12次,收藏72次。RTMP(Real Time Messaging Protocol)实时消息传输协议是Adobe公司提出得一种媒体流传输协议,其提供了一个双向得通道消息服务,意图在通信端之间传递带有时间信息得视频、音频和数据消息流,其通过对不同类型得消息分配不同得优先级,进而在网传能力限制下确定各种消息得传输次序。_rtmp
微型计算机2017年12月下,2017年12月计算机一级MSOffice考试习题(二)-程序员宅基地
文章浏览阅读64次。2017年12月的计算机等级考试将要来临!出国留学网为考生们整理了2017年12月计算机一级MSOffice考试习题,希望能帮到大家,想了解更多计算机等级考试消息,请关注我们,我们会第一时间更新。2017年12月计算机一级MSOffice考试习题(二)一、单选题1). 计算机最主要的工作特点是( )。A.存储程序与自动控制B.高速度与高精度C.可靠性与可用性D.有记忆能力正确答案:A答案解析:计算...
20210415web渗透学习之Mysqludf提权(二)(胃肠炎住院期间转)_the provided input file '/usr/share/metasploit-fra-程序员宅基地
文章浏览阅读356次。在学MYSQL的时候刚刚好看到了这个提权,很久之前用过别人现成的,但是一直时间没去细想, 这次就自己复现学习下。 0x00 UDF 什么是UDF? UDF (user defined function),即用户自定义函数。是通过添加新函数,对MySQL的功能进行扩充,就像使..._the provided input file '/usr/share/metasploit-framework/data/exploits/mysql
随便推点
webService详细-程序员宅基地
文章浏览阅读3.1w次,点赞71次,收藏485次。webService一 WebService概述1.1 WebService是什么WebService是一种跨编程语言和跨操作系统平台的远程调用技术。Web service是一个平台独立的,低耦合的,自包含的、基于可编程的web的应用程序,可使用开放的XML(标准通用标记语言下的一个子集)标准...
Retrofit(2.0)入门小错误 -- Could not locate ResponseBody xxx Tried: * retrofit.BuiltInConverters_已添加addconverterfactory 但是 could not locate respons-程序员宅基地
文章浏览阅读1w次。前言照例给出官网:Retrofit官网其实大家学习的时候,完全可以按照官网Introduction,自己写一个例子来运行。但是百密一疏,官网可能忘记添加了一句非常重要的话,导致你可能出现如下错误:Could not locate ResponseBody converter错误信息:Caused by: java.lang.IllegalArgumentException: Could not l_已添加addconverterfactory 但是 could not locate responsebody converter
一套键鼠控制Windows+Linux——Synergy在Windows10和Ubuntu18.04共控的实践_linux 18.04 synergy-程序员宅基地
文章浏览阅读1k次。一套键鼠控制Windows+Linux——Synergy在Windows10和Ubuntu18.04共控的实践Synergy简介准备工作(重要)Windows服务端配置Ubuntu客户端配置配置开机启动Synergy简介Synergy能够通过IP地址实现一套键鼠对多系统、多终端进行控制,免去了对不同终端操作时频繁切换键鼠的麻烦,可跨平台使用,拥有Linux、MacOS、Windows多个版本。Synergy应用分服务端和客户端,服务端即主控端,Synergy会共享连接服务端的键鼠给客户端终端使用。本文_linux 18.04 synergy
nacos集成seata1.4.0注意事项_seata1.4.0 +nacos 集成-程序员宅基地
文章浏览阅读374次。写demo的时候遇到了很多问题,记录一下。安装nacos1.4.0配置mysql数据库,新建nacos_config数据库,并根据初始化脚本新建表,使配置从数据库读取,可单机模式启动也可以集群模式启动,启动时 ./start.sh -m standaloneapplication.properties 主要是db部分配置## Copyright 1999-2018 Alibaba Group Holding Ltd.## Licensed under the Apache License,_seata1.4.0 +nacos 集成
iperf3常用_iperf客户端指定ip地址-程序员宅基地
文章浏览阅读833次。iperf使用方法详解 iperf3是一款带宽测试工具,它支持调节各种参数,比如通信协议,数据包个数,发送持续时间,测试完会报告网络带宽,丢包率和其他参数。 安装 sudo apt-get install iperf3 iPerf3常用的参数: -c :指定客户端模式。例如:iperf3 -c 192.168.1.100。这将使用客户端模式连接到IP地址为192.16..._iperf客户端指定ip地址
浮点性(float)转化为字符串类型 自定义实现和深入探讨C++内部实现方法_c++浮点数 转 字符串 精度损失最小-程序员宅基地
文章浏览阅读7.4k次。 写这个函数目的不是为了和C/C++库中的函数在性能和安全性上一比高低,只是为了给那些喜欢探讨函数内部实现的网友,提供一种从浮点性到字符串转换的一种途径。 浮点数是有精度限制的,所以即使我们在使用C/C++中的sprintf或者cout 限制,当然这个精度限制是可以修改的。比方在C++中,我们可以cout.precision(10),不过这样设置的整个输出字符长度为10,而不是特定的小数点后1_c++浮点数 转 字符串 精度损失最小