C++ QT进阶_qt 进阶培训-程序员宅基地
技术标签: qt C/C++、Java/Scala
前言
- 为什么会有这篇文章呢?为什么学QT呢?
- 学了c/c++,除了会刷几道leetcode,用二分法解个方程,尝试深搜走地图,用线性筛找个素数······;难道C++的应用就是为了ACM吗?不,个人觉得并不是,这不是自己的初衷!于是乎,开始学习数据结构,网络编程,系统编程,web前端(html、css、JavaScript)······
- 因为学了c++还没找到一个好的应用,感觉很糟!如果您想了解
为什么学习qt,请点击链接查看:《为什么 qt 成为 c++ 界面编程的第一选择?》 - 推荐一个详细的学习笔记:《Qt 5 基础教程》
- 推荐一个B站榜首视频教程:《最新QT从入门到实战完整版|传智教育》
- 推荐一个51CTO榜首视频教程:《C++QT5跨平台界面编程原理和实战大全视频课程》
- 本文基于《【达内】2021年QT图形框架,编程开发全套教程》学习记录所得!
本文主要将记录以下五部分:
- 父窗口
- 信号和槽
- 面向对象Qt编程
- Qt设计师
- Qt创造器
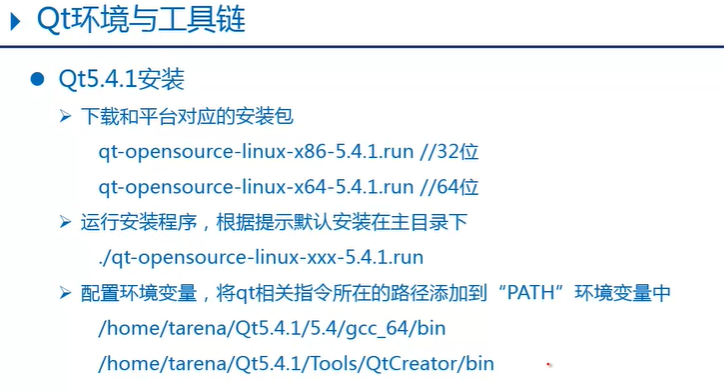
00 QT 环境搭建
QT源码和SDK下载
- https://download.qt.io/archive/qt/
- http://www.qt.io/
- http://download.qt.io/
- http://www.ffmpeg.club/qt
- 推荐的一个安装教程:QT5.14.2安装
01 父窗口
- QWidget
- QMainWindow(主窗口)//QWidget的直接子类
- QDialog(对话框)//QWidget的直接子类


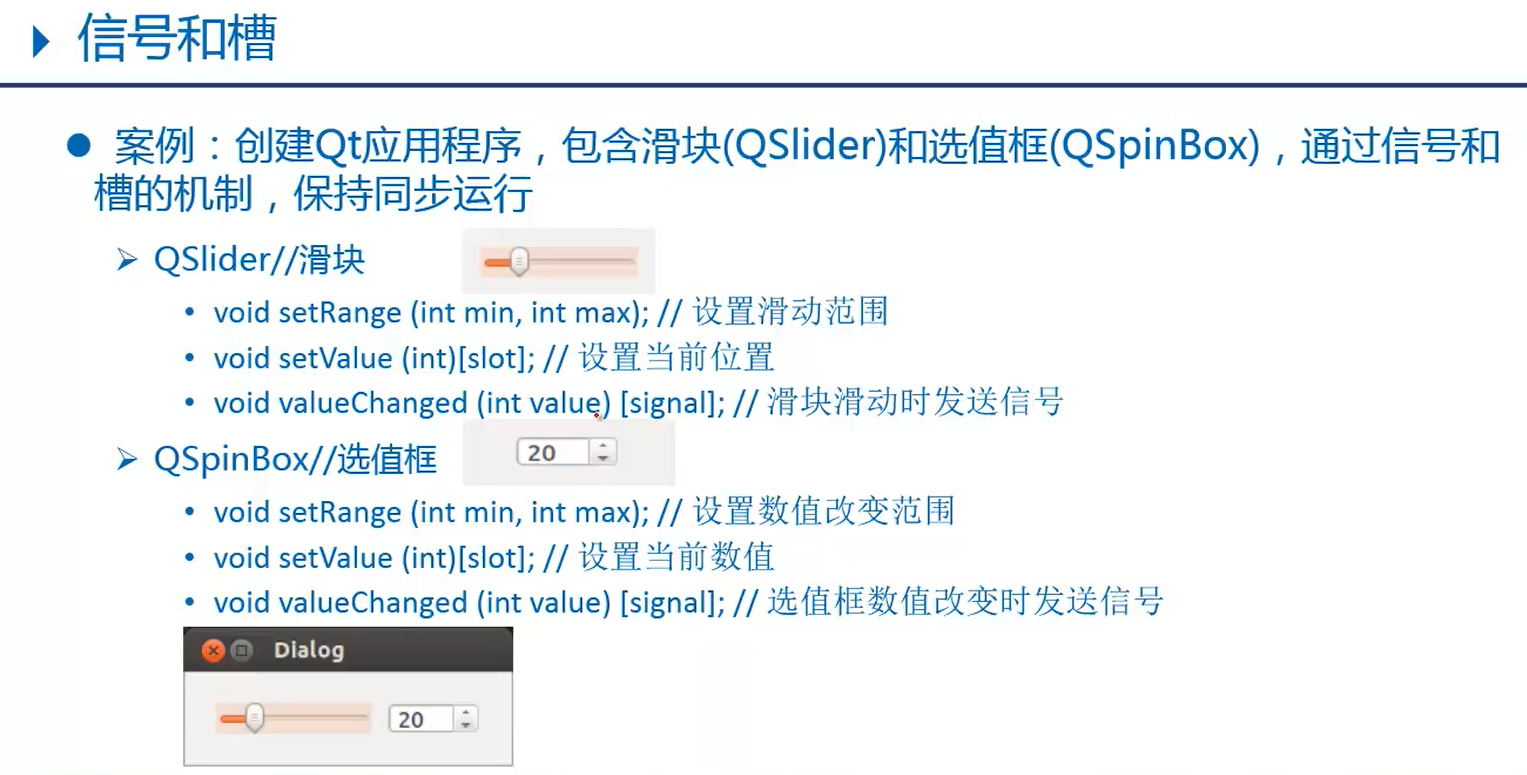
02 信号和槽(实现QSlider与QSpinBox)
1.1 初始代码
#include <QApplication>
#include <QSlider>
#include <QSpinBox>
#include <QMainWindow>
#include <QObject>
int main(int argc, char *argv[])
{
QApplication a(argc, argv);
QMainWindow myMainWindow;
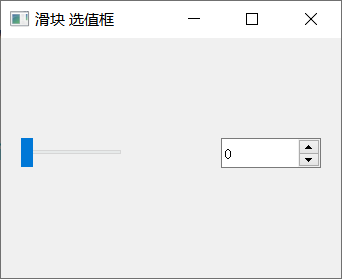
myMainWindow.setWindowTitle("滑块 选值框");
myMainWindow.resize(340,240);
//创建水平滑块,依附于myMainWindow
QSlider myslider(Qt::Horizontal,&myMainWindow);
myslider.move(20,100);
myslider.setRange(0,200);
//创建选值框,依附于myMainWindow
QSpinBox myspinbox(&myMainWindow);
myspinbox.move(220,100);
myspinbox.setRange(0,200);
//显示框内所有元素
myMainWindow.show();
//滑动滑块,让选值框内数值随之改变
//QObject::connect(&myslider,SIGNAL(valueChanged(int)),&myspinbox,SLOT(setValue(int)));
QObject::connect(&myslider,&QSlider::valueChanged,&myspinbox,&QSpinBox::setValue);
//选值框数值改变,让滑块随之滑动
//QObject::connect(&myspinbox,SIGNAL(valueChanged(int)),&myslider,SLOT(setValue(int)));
QObject::connect(&myspinbox,static_cast<void (QSpinBox::*)(int)>(&QSpinBox::valueChanged),&myslider,&QSlider::setValue);
return a.exec();
}
1.2 运行结果
1.3 改进思想
- 此处应该使用
水平布局器<QHBoxLayout>来优化,还有使用面向对象思维来完成封装!
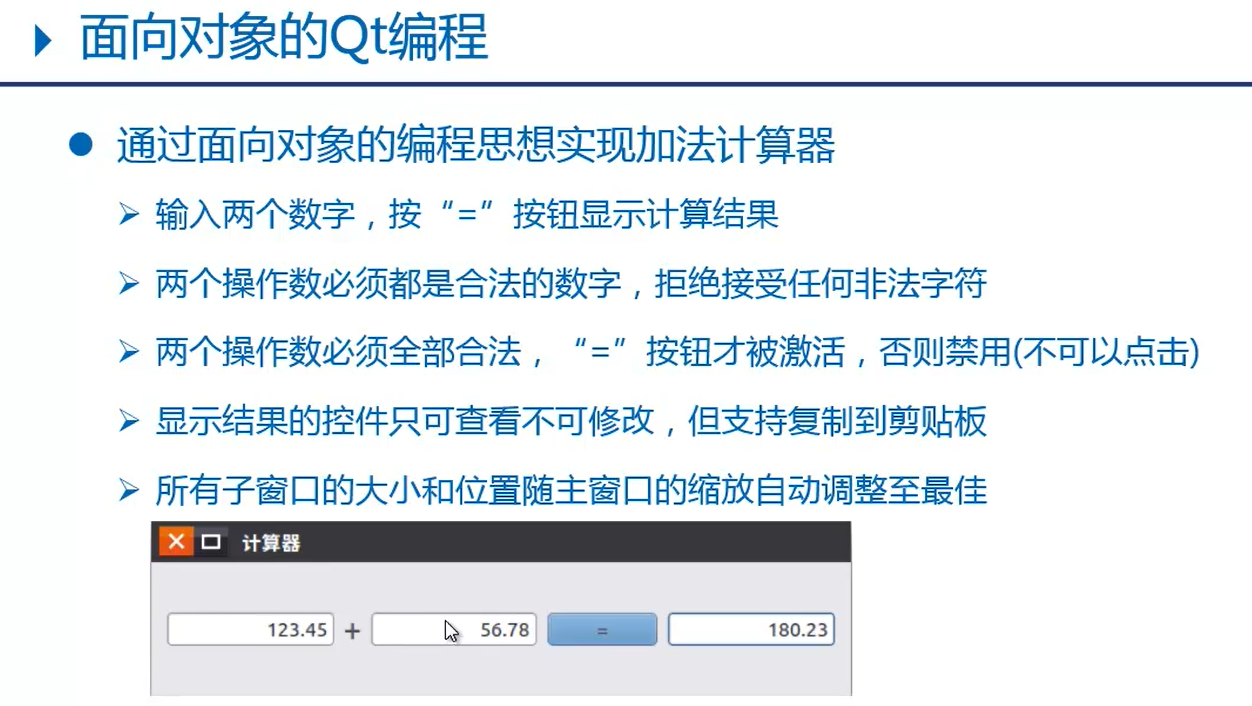
03 面向对象的QT编程
3.1 加法计算器
3.1.1 calculatordialog.h
#ifndef __CALCULATORDIALOG_H
#define __CALCULATORDIALOG_H

#include <QDialog>//父窗口类之一
#include <QLabel>//标签
#include <QPushButton>//按钮
#include <QLineEdit>//行编辑控件
#include <QHBoxLayout>//水平布局器
#include <QDoubleValidator>//验证器
class CalculatorDialog:public QDialog
{

    Q_OBJECT //moc
public:
    CalculatorDialog(void);
public slots:
    //使能等号按钮的槽操作数
    void enableButton(void);
    //计算结果和显示的槽函数
    void calcClicked(void);
private:
    QLineEdit* m_editX;//左操作数
    QLineEdit* m_editY;//右操作数
    QLineEdit* m_editZ;//显示结果
    QLabel* m_label;//"+"
    QPushButton* m_button;//"="
};

#endif // CALCULATORDIALOG_H
3.1.2 calculatordialog.cpp
#include "calculatordialog.h"
//构造函数
CalculatorDialog::CalculatorDialog(void)
{

    //界面初始化
    setWindowTitle("计算器");
    //左操作数,this指针即为当前父窗口指针
    m_editX = new QLineEdit(this);
    //设置文本对齐:右对齐
    m_editX->setAlignment(Qt::AlignRight);
    //设置数字验证器,只能输入数字形式内容
    m_editX->setValidator(new QDoubleValidator(this));
    //右操作数
    m_editY = new QLineEdit(this);
    m_editY->setAlignment(Qt::AlignRight);
    m_editY->setValidator(new QDoubleValidator(this));
    //显示结果
    m_editZ = new QLineEdit(this);
    m_editZ->setAlignment(Qt::AlignRight);
    m_editZ->setReadOnly(true);//设置只读
    //"+"
    m_label = new QLabel("+",this);
    //"="
    m_button = new QPushButton("=",this);
    m_button->setEnabled(false);//设置禁用

    //创建布局器 : 自动调用每个控件的大小和位置
    QHBoxLayout* layout = new QHBoxLayout(this);
    //按水平方向,依次将控件添加到布局器中
    layout->addWidget(m_editX);
    layout->addWidget(m_label);
    layout->addWidget(m_editY);
    layout->addWidget(m_button);
    layout->addWidget(m_editZ);
    //设置布局器
    setLayout(layout);

    //信号和槽函数连接
    //左右操作数文本改变时,发送信号 textChanged()
    connect(m_editX,SIGNAL(textChanged(QString)),
            this,SLOT(enableButton(void)));
    connect(m_editY,SIGNAL(textChanged(QString)),
            this,SLOT(enableButton(void)));
    //点击按钮发送,发送信号clicked
    connect(m_button,SIGNAL(clicked(void)),
            this,SLOT(calcClicked(void)));
}
//使能等号按钮的槽操作数
void CalculatorDialog::enableButton(void){

    bool bXOK, bYOK;
    //text():获取输入文本(QString)
    //toDouble():QString转换为double,参数保存转换是否设置禁用
    m_editX->text().toDouble(&bXOK);
    m_editY->text().toDouble(&bYOK);
    //当左右操作数都输入了有效数据,则使能等号按钮,否则设置禁用
    m_button->setEnabled(bXOK && bYOK);
}
//计算结果和显示的槽函数
void CalculatorDialog::calcClicked(void){

    double res = m_editX->text().toDouble() +
            m_editY->text().toDouble();
    //number():将double转换为QString
    QString str = QString::number(res);
    //显示字符串形式结果
    m_editZ->setText(str);
}
3.1.3 main.cpp
#include "calculatordialog.h"
#include <QApplication>

int main(int argc, char *argv[])
{

    QApplication app(argc, argv);

    CalculatorDialog calc;
    calc.show();
    return app.exec();
}
2.1.4 运行结果

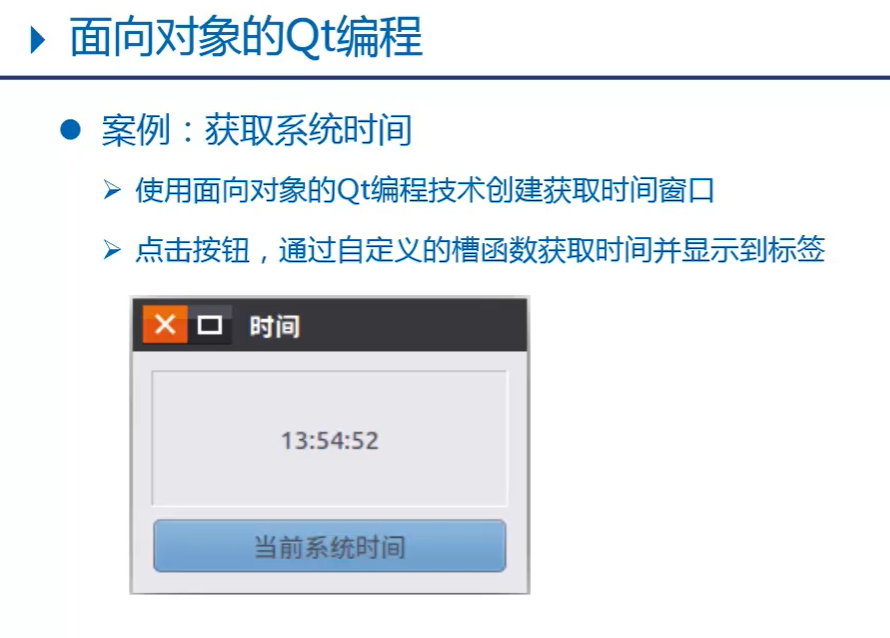
3.2 获取系统时间
3.2.1 timedialog.h
#ifndef __TIMEDIALOG_H
#define __TIMEDIALOG_H

#include <QDialog>
#include <QLabel>
#include <QPushButton>
#include <QVBoxLayout>//垂直布局器
#include <QTime>//时间
#include <QDebug>//打印调试

class TimeDialog : public QDialog{

    Q_OBJECT //moc
public:
    //构造函数
    TimeDialog(void);
signals:
    //自定义信号函数 只需声明 不能写定义
    void mySignal(const QString&);
public slots:
    //获取系统时间的槽函数
    void getTime(void);
private:
    QLabel* m_label;//显示时间label
    QPushButton* m_button;//获取时间button
};
#endif // TIMEDIALOG_H
3.2.2 timedialog.cpp
#include "timedialog.h"

TimeDialog::TimeDialog(void)
{

    //初始化界面

    //显示时间
    m_label = new QLabel(this);
    //设置label边框消息:凹陷面板
    m_label->setFrameStyle(QFrame::Panel|QFrame::Sunken);
    m_label->setAlignment(Qt::AlignHCenter|Qt::AlignVCenter);
    //设置label的字体大小
    QFont font;
    font.setPointSize(20);
    m_label->setFont(font);

    //获取系统时间的按钮
    m_button = new QPushButton("获取当前时间");
    m_button->setFont(font);

    //创建垂直布局器
    QVBoxLayout* layout = new QVBoxLayout(this);
    layout->addWidget(m_label);
    layout->addWidget(m_button);
    //设置布局器
    setLayout(layout);

    //信号和槽函数连接
    connect(m_button,SIGNAL(clicked(void)),
            this,SLOT(getTime(void)));
    //通过自定义信号,出发label的setText槽函数执行
    connect(this,SIGNAL(mySignal(QString)),
            m_label,SLOT(setText(QString)));
}
//获取系统时间的槽函数
void TimeDialog::getTime(void){

    qDebug("getTime");
    qDebug() << "getTime";
    //获取当前系统时间
    QTime time = QTime::currentTime();
    //将时间对象转换为字符串
    QString str = time.toString("hh:mm:ss");
    /*//显示时间
    m_label->setText(str);*/
    //emit:是Qt关键字,标记当前是发射信号
    /*emit*/ mySignal(str);//发射信号
}
3.2.3 main.cpp
#include "timedialog.h"

#include <QApplication>

int main(int argc, char *argv[])
{

    QApplication a(argc, argv);
    TimeDialog w;
    w.show();
    return a.exec();
}
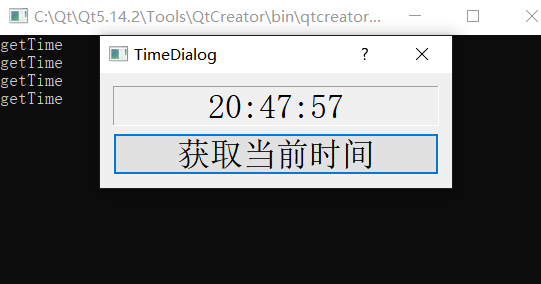
3.2.4 运行结果
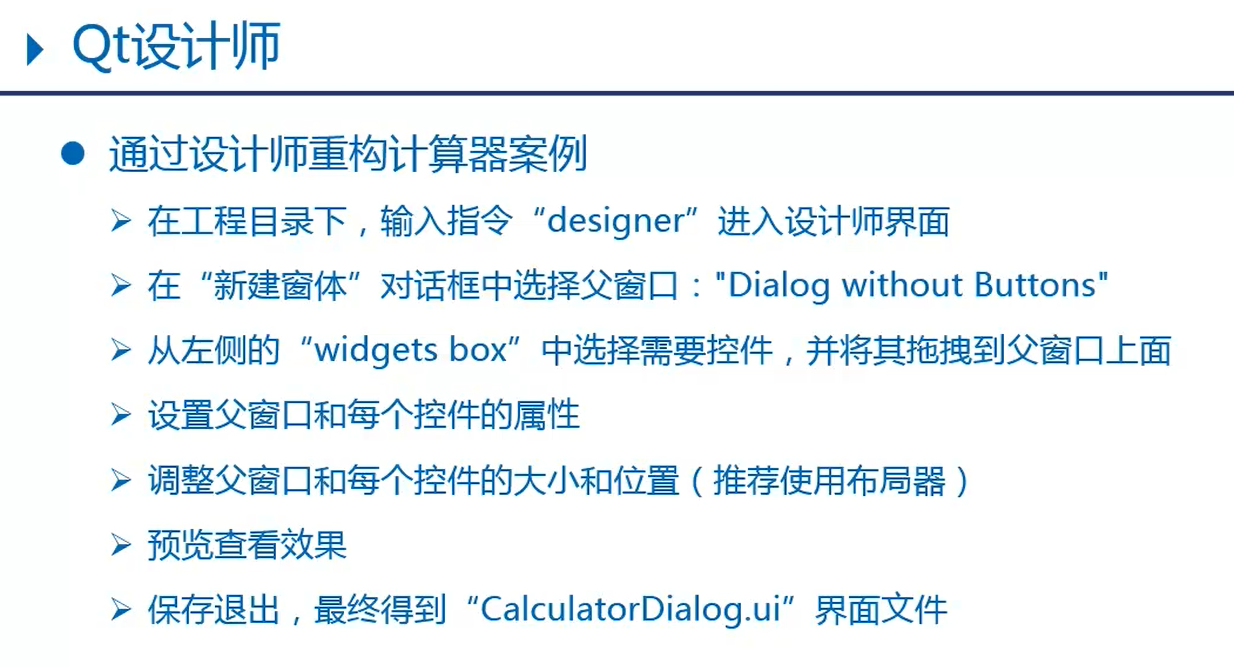
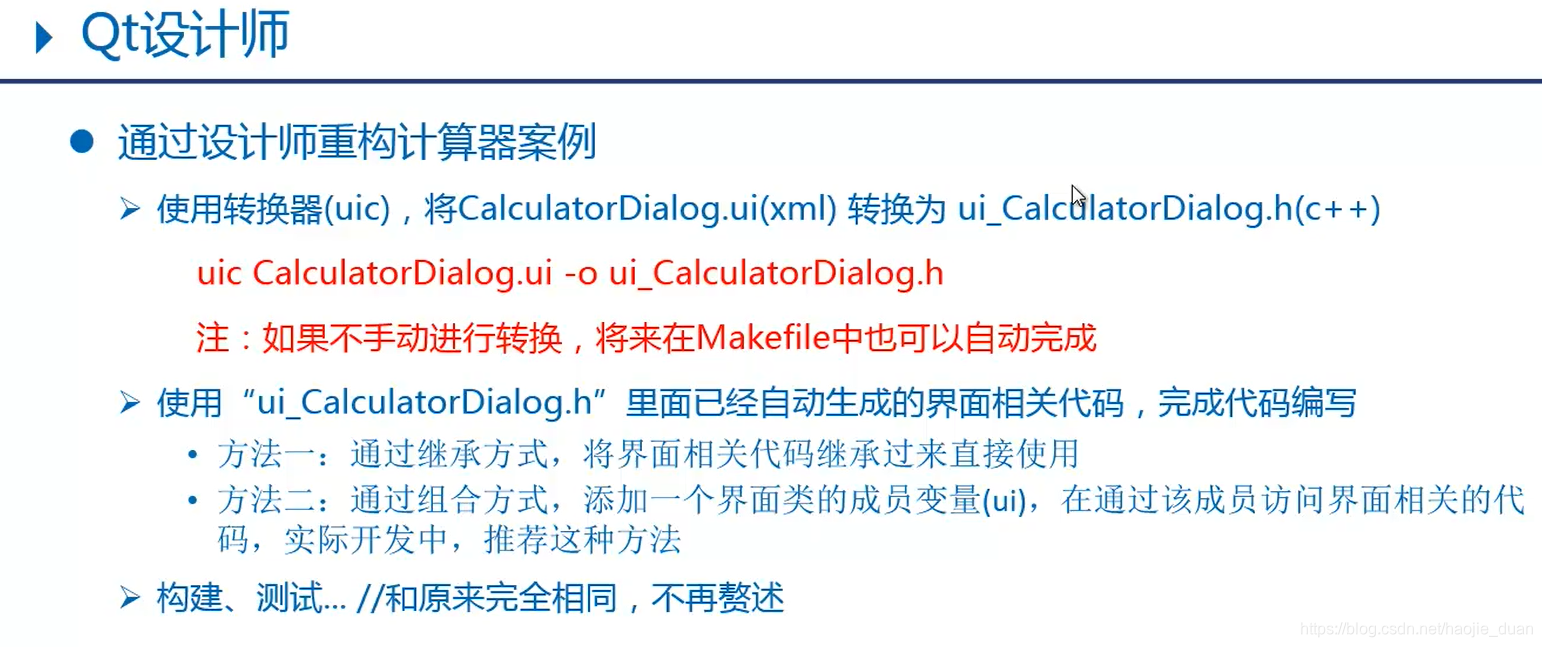
04. QT设计师
UIC
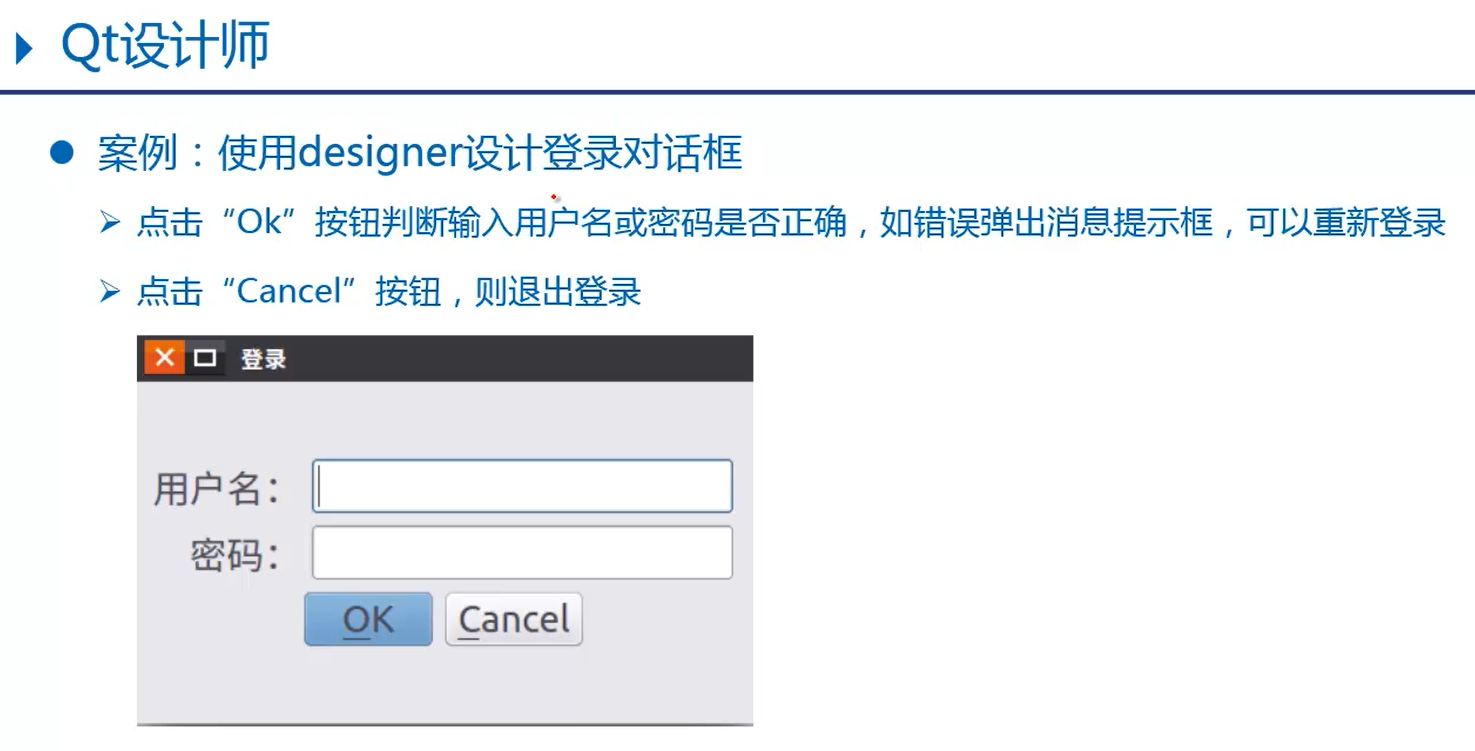
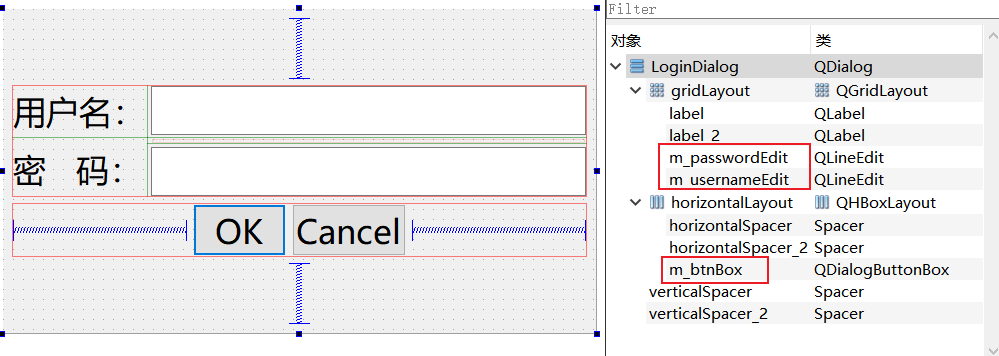
4.1 使用designer设计登录对话框
4.1.1 logindialog.ui
<?xml version="1.0" encoding="UTF-8"?>
<ui version="4.0">
 <class>LoginDialog</class>
 <widget class="QDialog" name="LoginDialog">
  <property name="geometry">
   <rect>
    <x>0</x>
    <y>0</y>
    <width>593</width>
    <height>324</height>
   </rect>
  </property>
  <property name="font">
   <font>
    <family>微软雅黑</family>
    <pointsize>20</pointsize>
   </font>
  </property>
  <property name="windowTitle">
   <string>登录</string>
  </property>
  <property name="sizeGripEnabled">
   <bool>false</bool>
  </property>
  <layout class="QVBoxLayout" name="verticalLayout">
   <item>
    <spacer name="verticalSpacer">
     <property name="orientation">
      <enum>Qt::Vertical</enum>
     </property>
     <property name="sizeHint" stdset="0">
      <size>
       <width>20</width>
       <height>54</height>
      </size>
     </property>
    </spacer>
   </item>
   <item>
    <layout class="QGridLayout" name="gridLayout">
     <item row="0" column="0">
      <widget class="QLabel" name="label_2">
       <property name="text">
        <string>用户名:</string>
       </property>
      </widget>
     </item>
     <item row="0" column="1">
      <widget class="QLineEdit" name="m_usernameEdit"/>
     </item>
     <item row="1" column="0" rowspan="2">
      <widget class="QLabel" name="label">
       <property name="text">
        <string>密   码:</string>
       </property>
      </widget>
     </item>
     <item row="2" column="1">
      <widget class="QLineEdit" name="m_passwordEdit">
       <property name="echoMode">
        <enum>QLineEdit::Password</enum>
       </property>
      </widget>
     </item>
    </layout>
   </item>
   <item>
    <layout class="QHBoxLayout" name="horizontalLayout">
     <item>
      <spacer name="horizontalSpacer">
       <property name="orientation">
        <enum>Qt::Horizontal</enum>
       </property>
       <property name="sizeHint" stdset="0">
        <size>
         <width>40</width>
         <height>20</height>
        </size>
       </property>
      </spacer>
     </item>
     <item>
      <widget class="QDialogButtonBox" name="m_btnBox">
       <property name="layoutDirection">
        <enum>Qt::LeftToRight</enum>
       </property>
       <property name="standardButtons">
        <set>QDialogButtonBox::Cancel|QDialogButtonBox::Ok</set>
       </property>
      </widget>
     </item>
     <item>
      <spacer name="horizontalSpacer_2">
       <property name="orientation">
        <enum>Qt::Horizontal</enum>
       </property>
       <property name="sizeHint" stdset="0">
        <size>
         <width>40</width>
         <height>20</height>
        </size>
       </property>
      </spacer>
     </item>
    </layout>
   </item>
   <item>
    <spacer name="verticalSpacer_2">
     <property name="orientation">
      <enum>Qt::Vertical</enum>
     </property>
     <property name="sizeHint" stdset="0">
      <size>
       <width>20</width>
       <height>53</height>
      </size>
     </property>
    </spacer>
   </item>
  </layout>
 </widget>
 <resources/>
 <connections/>
</ui>
4.1.2 logindialog.h
#ifndef LOGINDIALOG_H
#define LOGINDIALOG_H

#include <QDialog>
#include <QMessageBox>//消息提示框
#include <QDebug>//打印提示

QT_BEGIN_NAMESPACE
namespace Ui {
     class LoginDialog; }
QT_END_NAMESPACE

class LoginDialog : public QDialog
{

    Q_OBJECT

public:
    //LoginDialog(QWidget *parent = nullptr);
    LoginDialog(void);
    ~LoginDialog();
public slots:
    //处理ok按钮的槽函数
    void onAccepted(void);
    //处理Cancel按钮的槽函数
    void onRejected(void);
private:
    Ui::LoginDialog *ui;
};
#endif // LOGINDIALOG_H
4.1.3 logindialog.cpp
#include "logindialog.h"
#include "ui_logindialog.h"
LoginDialog::LoginDialog(void): ui(new Ui::LoginDialog)
{
//界面初始化
ui->setupUi(this);
//信号和槽连接
//点击OK发送信号accepted
connect(ui->m_btnBox,SIGNAL(accepted(void)),
this,SLOT(onAccepted(void)));
//点击Cancel发送信号rejected
connect(ui->m_btnBox,SIGNAL(rejected(void)),
this,SLOT(onRejected(void)));
}
//处理ok按钮的槽函数
void LoginDialog::onAccepted(void){
//terna/123456:提示登录成功,否则提示失败
if(ui->m_usernameEdit->text() == "terna" &&
ui->m_passwordEdit->text() == "123456"){
qDebug() << "登录成功";
close();//关闭登录窗口
}else{
//创建消息提示框
QMessageBox msgBox(
QMessageBox::Critical,//图标
"Error",//标题
"用户名或密码错误",//提示消息
QMessageBox::Ok,//按钮
this);//父窗口
//显示消息提示框,并进入事件循环
msgBox.exec();
}
}
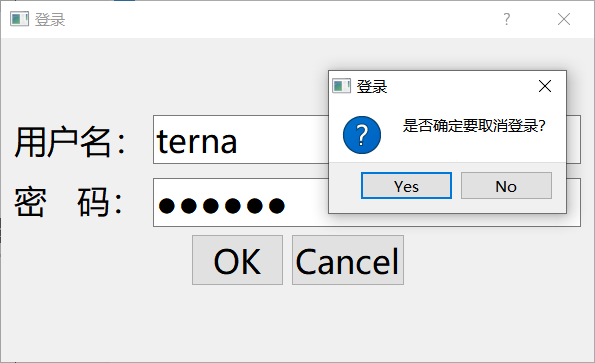
//处理Cancel按钮的槽函数
void LoginDialog::onRejected(void){
QMessageBox msgBox(
QMessageBox::Question,
"登录",
"是否确定要取消登录?",
QMessageBox::Yes|QMessageBox::No,
this);
//显示消息提示框,并进入事件循环,点击Yes或No时候都会退出循环
//但是返回结果不同,如果点击Yes则退出登录对话框
if(msgBox.exec() == QMessageBox::Yes){
close();
}
}
LoginDialog::~LoginDialog()
{
delete ui;
}
4.1.4 main.cpp
#include "logindialog.h"

#include <QApplication>

int main(int argc, char *argv[])
{

    QApplication a(argc, argv);
    LoginDialog w;
    w.show();
    return a.exec();
}
4.1.5 运行结果
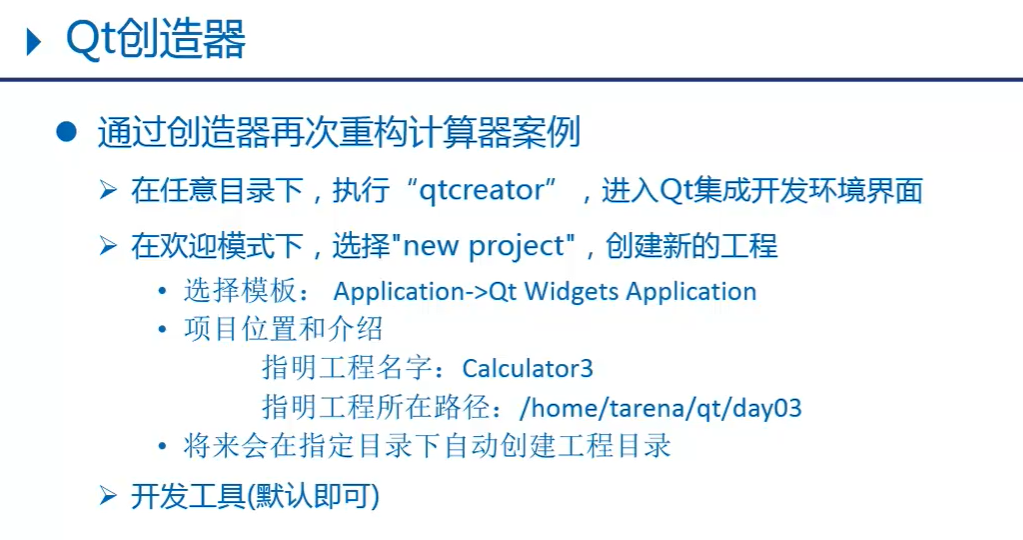
05.QT创造器
后记
进阶笔记到此结束
智能推荐
Docker 快速上手学习入门教程_docker菜鸟教程-程序员宅基地
文章浏览阅读2.5w次,点赞6次,收藏50次。官方解释是,docker 容器是机器上的沙盒进程,它与主机上的所有其他进程隔离。所以容器只是操作系统中被隔离开来的一个进程,所谓的容器化,其实也只是对操作系统进行欺骗的一种语法糖。_docker菜鸟教程
电脑技巧:Windows系统原版纯净软件必备的两个网站_msdn我告诉你-程序员宅基地
文章浏览阅读5.7k次,点赞3次,收藏14次。该如何避免的,今天小编给大家推荐两个下载Windows系统官方软件的资源网站,可以杜绝软件捆绑等行为。该站提供了丰富的Windows官方技术资源,比较重要的有MSDN技术资源文档库、官方工具和资源、应用程序、开发人员工具(Visual Studio 、SQLServer等等)、系统镜像、设计人员工具等。总的来说,这两个都是非常优秀的Windows系统镜像资源站,提供了丰富的Windows系统镜像资源,并且保证了资源的纯净和安全性,有需要的朋友可以去了解一下。这个非常实用的资源网站的创建者是国内的一个网友。_msdn我告诉你
vue2封装对话框el-dialog组件_<el-dialog 封装成组件 vue2-程序员宅基地
文章浏览阅读1.2k次。vue2封装对话框el-dialog组件_
MFC 文本框换行_c++ mfc同一框内输入二行怎么换行-程序员宅基地
文章浏览阅读4.7k次,点赞5次,收藏6次。MFC 文本框换行 标签: it mfc 文本框1.将Multiline属性设置为True2.换行是使用"\r\n" (宽字符串为L"\r\n")3.如果需要编辑并且按Enter键换行,还要将 Want Return 设置为 True4.如果需要垂直滚动条的话将Vertical Scroll属性设置为True,需要水平滚动条的话将Horizontal Scroll属性设_c++ mfc同一框内输入二行怎么换行
redis-desktop-manager无法连接redis-server的解决方法_redis-server doesn't support auth command or ismis-程序员宅基地
文章浏览阅读832次。检查Linux是否是否开启所需端口,默认为6379,若未打开,将其开启:以root用户执行iptables -I INPUT -p tcp --dport 6379 -j ACCEPT如果还是未能解决,修改redis.conf,修改主机地址:bind 192.168.85.**;然后使用该配置文件,重新启动Redis服务./redis-server redis.conf..._redis-server doesn't support auth command or ismisconfigured. try
实验四 数据选择器及其应用-程序员宅基地
文章浏览阅读4.9k次。济大数电实验报告_数据选择器及其应用
随便推点
灰色预测模型matlab_MATLAB实战|基于灰色预测河南省社会消费品零售总额预测-程序员宅基地
文章浏览阅读236次。1研究内容消费在生产中占据十分重要的地位,是生产的最终目的和动力,是保持省内经济稳定快速发展的核心要素。预测河南省社会消费品零售总额,是进行宏观经济调控和消费体制改变创新的基础,是河南省内人民对美好的全面和谐社会的追求的要求,保持河南省经济稳定和可持续发展具有重要意义。本文建立灰色预测模型,利用MATLAB软件,预测出2019年~2023年河南省社会消费品零售总额预测值分别为21881...._灰色预测模型用什么软件
log4qt-程序员宅基地
文章浏览阅读1.2k次。12.4-在Qt中使用Log4Qt输出Log文件,看这一篇就足够了一、为啥要使用第三方Log库,而不用平台自带的Log库二、Log4j系列库的功能介绍与基本概念三、Log4Qt库的基本介绍四、将Log4qt组装成为一个单独模块五、使用配置文件的方式配置Log4Qt六、使用代码的方式配置Log4Qt七、在Qt工程中引入Log4Qt库模块的方法八、获取示例中的源代码一、为啥要使用第三方Log库,而不用平台自带的Log库首先要说明的是,在平时开发和调试中开发平台自带的“打印输出”已经足够了。但_log4qt
100种思维模型之全局观思维模型-67_计算机中对于全局观的-程序员宅基地
文章浏览阅读786次。全局观思维模型,一个教我们由点到线,由线到面,再由面到体,不断的放大格局去思考问题的思维模型。_计算机中对于全局观的
线程间控制之CountDownLatch和CyclicBarrier使用介绍_countdownluach于cyclicbarrier的用法-程序员宅基地
文章浏览阅读330次。一、CountDownLatch介绍CountDownLatch采用减法计算;是一个同步辅助工具类和CyclicBarrier类功能类似,允许一个或多个线程等待,直到在其他线程中执行的一组操作完成。二、CountDownLatch俩种应用场景: 场景一:所有线程在等待开始信号(startSignal.await()),主流程发出开始信号通知,既执行startSignal.countDown()方法后;所有线程才开始执行;每个线程执行完发出做完信号,既执行do..._countdownluach于cyclicbarrier的用法
自动化监控系统Prometheus&Grafana_-自动化监控系统prometheus&grafana实战-程序员宅基地
文章浏览阅读508次。Prometheus 算是一个全能型选手,原生支持容器监控,当然监控传统应用也不是吃干饭的,所以就是容器和非容器他都支持,所有的监控系统都具备这个流程,_-自动化监控系统prometheus&grafana实战
React 组件封装之 Search 搜索_react search-程序员宅基地
文章浏览阅读4.7k次。输入关键字,可以通过键盘的搜索按钮完成搜索功能。_react search