SwiftUI之深入解析高级动画的时间轴TimelineView_swiftui 时间轴虚线-程序员宅基地
技术标签: 时间调度器 TimelineView原理 SwiftUI 自定义时间调度器 与传统动画结合 关键帧动画
一、前言
- 本文中将详细探讨 TimelineView,将从最常见的用法开始。然而,我认为最大的潜力在于结合TimelineView和我们已经知道的现有动画。通过一点创造性,这种组合将让我们最终做出“关键帧类”的动画。

二、TimelineView 的组件
- TimelineView 是一个容器视图,它根据相关的调度器确定的频率重新评估它的内容,TimelineView 接收一个调度器作为参数。如下所示,使用一个每半秒触发一次的调度器:
TimelineView(.periodic(from: .now, by: 0.5)) {
     timeline in

    ViewToEvaluatePeriodically()

}
- 另一个参数是接收 TimelineView 的内容闭包,上下文参数看起来像这样:
struct Context {

    let cadence: Cadence
    let date: Date

    enum Cadence: Comparable {

        case live
        case seconds
        case minutes
    }
}
- Cadence 是一个 enum,可以使用它来决定在视图中显示什么内容,值可以为 live、seconds、minutes 等。以此作为一个提示,避免显示与节奏无关的信息,典型的例子是避免在具有以秒或分钟为节奏的调度程序的时钟上显示毫秒。
- 注意,Cadence 不是可以改变的东西,而是反映设备状态的东西,例如在 watchOS 上,手腕下降时节奏会变慢。
三、TimelineView 工作原理
- 如下所示,有两个随机变化的表情符号,两者之间的唯一区别是,一个是在内容闭包中编写的,而另一个被放在一个单独的视图中,以提高可读性:
struct ManyFaces: View {

    static let emoji = ["", "", "", "", "", "", "", "", "", "", "", "", ""]

    var body: some View {

        TimelineView(.periodic(from: .now, by: 0.2)) {
     timeline in

            HStack(spacing: 120) {


                let randomEmoji = ManyFaces.emoji.randomElement() ?? ""

                Text(randomEmoji)
                    .font(.largeTitle)
                    .scaleEffect(4.0)

                SubView()

            }
        }
    }

    struct SubView: View {

        var body: some View {

            let randomEmoji = ManyFaces.emoji.randomElement() ?? ""

            Text(randomEmoji)
                .font(.largeTitle)
                .scaleEffect(4.0)
        }
    }
}
- 运行代码时效果如下:
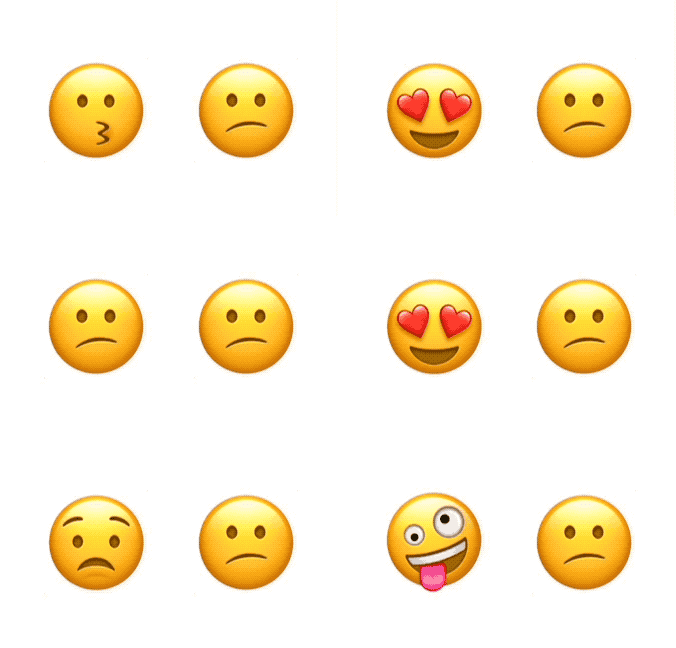
- 为什么左边的表情变了,而另一个表情一直是悲伤的表情?其实,SubView 没有接收到任何变化的参数,这意味着它没有依赖关系,SwiftUI 没有理由重新计算视图的 body。在去年的 WWDC Demystify SwiftUI 有一个很棒的演讲,那就是揭开 SwiftUI 的神秘面纱,它解释了视图标识、生存期和依赖关系,所有这些主题对于理解时间轴的行为是非常重要的。
- 为了解决这个问题,可以改变 SubView 视图来添加一个参数,这个参数会随着时间轴的每次更新而改变。注意,我们不需要使用参数,它只是必须存在:
struct SubView: View {

    let date: Date // just by declaring it, the view will now be recomputed apropriately.

    var body: some View {


        let randomEmoji = ManyFaces.emoji.randomElement() ?? ""

        Text(randomEmoji)
            .font(.largeTitle)
            .scaleEffect(4.0)
    }
}
- 现在的 SubView 是这样创建的:
SubView(date: timeline.date)
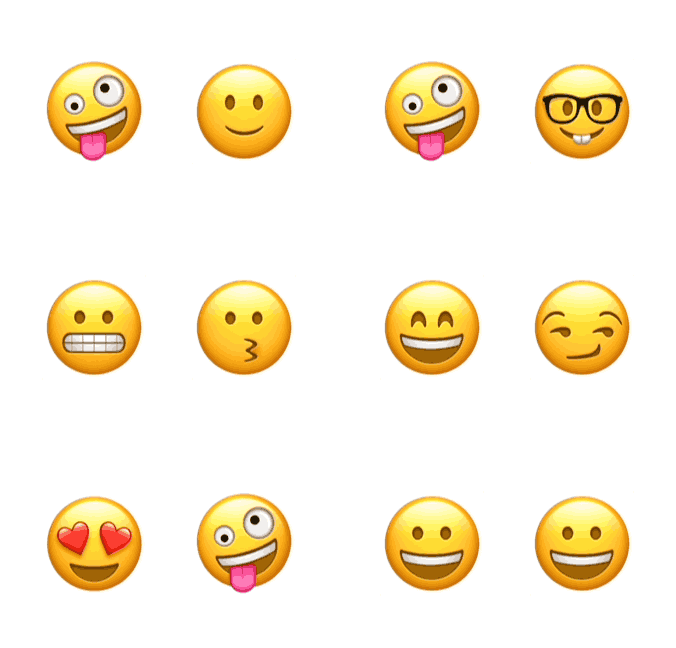
- 最后,表情符号都可以经历情感的旋风:
四、作用于 Timeline
- 大多数关于 TimelineView 的例子(在撰写本文时)通常都是关于绘制时钟的,这是有意义的,毕竟时间轴提供的数据是一个日期。
- 一个最简单的 TimelineView 时钟如下:
TimelineView(.periodic(from: .now, by: 1.0)) {
     timeline in

    Text("\(timeline.date)")

}
- 钟表可能会变得更精致一些,例如使用带有形状的模拟时钟,或使用新的 Canvas 视图绘制时钟。然而,TimelineView 不仅仅用于时钟,在很多情况下,我们希望视图在每次时间线更新视图时都做一些事情,放置这些代码的最佳位置是 onChange(of:perform) 闭包。
- 在下面的例子中,我们使用这种技术,每 3 秒更新模型:
struct ExampleView: View {

    var body: some View {

        TimelineView(.periodic(from: .now, by: 3.0)) {
     timeline in
            QuipView(date: timeline.date)
        }
    }

    struct QuipView: View {

        @StateObject var quips = QuipDatabase()
        let date: Date

        var body: some View {

            Text("_\(quips.sentence)_")
                .onChange(of: date) {
     _ in
                    quips.advance()
                }
        }
    }
}

class QuipDatabase: ObservableObject {

    static var sentences = [
        "There are two types of people, those who can extrapolate from incomplete data",
        "After all is said and done, more is said than done.",
        "Haikus are easy. But sometimes they don't make sense. Refrigerator.",
        "Confidence is the feeling you have before you really understand the problem."
    ]

    @Published var sentence: String = QuipDatabase.sentences[0]

    var idx = 0

    func advance() {

        idx = (idx + 1) % QuipDatabase.sentences.count

        sentence = QuipDatabase.sentences[idx]
    }
}
- 需要注意的是,每次时间轴更新,QuipView 都会刷新两次,也就是说,当时间轴更新一次时,再更新一次,因为通过调用 quips.advance(),将影响 quips 的 @Published 值,更改并触发视图更新。
五、 TimelineView 与传统动画结合
- 新的 TimelineView 带来了很多新的用处,将它与 Canvas 结合起来,这是一个很好的添加,但这就把为每一帧动画编写所有代码的任务推给了我们。使用已经知道并喜欢的动画来动画视图从一个时间轴更新到下一个,这最终将让完全在 SwiftUI 中创建类似关键帧的动画。
- 如下所示的节拍器,放大音量播放视频,欣赏拍子的声音是如何与钟摆同步的,而且就像节拍器一样,每隔几拍就会有一个铃声响起:

- 首先,来看看时间线是怎样的:
struct Metronome: View {

    let bpm: Double = 60 // beats per minute

    var body: some View {

        TimelineView(.periodic(from: .now, by: 60 / bpm)) {
     timeline in
            MetronomeBack()
                .overlay(MetronomePendulum(bpm: bpm, date: timeline.date))
                .overlay(MetronomeFront(), alignment: .bottom)
        }
    }
}
- 节拍器的速度通常用 bpm 表示,上面的示例使用了一个周期调度器,它每 60/bpm 秒重复一次,bpm = 60,因此调度器每 1 秒触发一次,也就是每分钟 60 次。
- Metronome 视图由三个层组成:MetronomeBack、MetronomePendulum 和 MetronomeFront,它们是按这个顺序叠加的,唯一需要在每次时间轴更新时刷新的视图是 MetronomePendulum,它会从一边摆动到另一边,其它视图不会刷新,因为它们没有依赖项。
- MetronomeBack 和 MetronomeFront 的代码非常简洁,它们使用了一个名为 rounded 梯形的自定义形状:
struct MetronomeBack: View {

    let c1 = Color(red: 0, green: 0.3, blue: 0.5, opacity: 1)
    let c2 = Color(red: 0, green: 0.46, blue: 0.73, opacity: 1)

    var body: some View {

        let gradient = LinearGradient(colors: [c1, c2],
                                      startPoint: .topLeading,
                                      endPoint: .bottomTrailing)

        RoundedTrapezoid(pct: 0.5, cornerSizes: [CGSize(width: 15, height: 15)])
            .foregroundStyle(gradient)
            .frame(width: 200, height: 350)
    }
}

struct MetronomeFront: View {

    var body: some View {

        RoundedTrapezoid(pct: 0.85, cornerSizes: [.zero, CGSize(width: 10, height: 10)])
            .foregroundStyle(Color(red: 0, green: 0.46, blue: 0.73, opacity: 1))
            .frame(width: 180, height: 100).padding(10)
    }
}
struct RoundedTrapezoid: Shape {

    let pct: CGFloat
    let cornerSizes: [CGSize]

    func path(in rect: CGRect) -> Path {

        return Path {
     path in
            let (cs1, cs2, cs3, cs4) = decodeCornerSize()

            // Start of path
            let start = CGPoint(x: rect.midX, y: 0)

            // width base and top
            let wb = rect.size.width
            let wt = wb * pct

            // angles
            let angle: CGFloat = atan(Double(rect.height / ((wb - wt) / 2.0)))

            // Control points
            let c1 = CGPoint(x: (wb - wt) / 2.0, y: 0)
            let c2 = CGPoint(x: c1.x + wt, y: 0)
            let c3 = CGPoint(x: wb, y: rect.maxY)
            let c4 = CGPoint(x: 0, y: rect.maxY)

            // Points a and b
            let pa2 = CGPoint(x: c2.x - cs2.width, y: 0)
            let pb2 = CGPoint(x: c2.x + CGFloat(cs2.height * tan((.pi/2) - angle)), y: cs2.height)

            let pb3 = CGPoint(x: c3.x - cs3.width, y: rect.height)
            let pa3 = CGPoint(x: c3.x - (cs3.height != 0 ? CGFloat(tan(angle) / cs3.height) : 0.0), y: rect.height - cs3.height)

            let pa4 = CGPoint(x: c4.x + cs4.width, y: rect.height)
            let pb4 = CGPoint(x: c4.x + (cs4.height != 0 ? CGFloat(tan(angle) / cs4.height) : 0.0), y: rect.height - cs4.height)

            let pb1 = CGPoint(x: c1.x + cs1.width, y: 0)
            let pa1 = CGPoint(x: c1.x - CGFloat(cs1.height * tan((.pi/2) - angle)), y: cs1.height)

            path.move(to: start)

            path.addLine(to: pa2)
            path.addQuadCurve(to: pb2, control: c2)

            path.addLine(to: pa3)
            path.addQuadCurve(to: pb3, control: c3)

            path.addLine(to: pa4)
            path.addQuadCurve(to: pb4, control: c4)

            path.addLine(to: pa1)
            path.addQuadCurve(to: pb1, control: c1)

            path.closeSubpath()
        }
    }

    func decodeCornerSize() -> (CGSize, CGSize, CGSize, CGSize) {

        if cornerSizes.count == 1 {

            // If only one corner size is provided, use it for all corners
            return (cornerSizes[0], cornerSizes[0], cornerSizes[0], cornerSizes[0])
        } else if cornerSizes.count == 2 {

            // If only two corner sizes are provided, use one for the two top corners,
            // and the other for the two bottom corners
            return (cornerSizes[0], cornerSizes[0], cornerSizes[1], cornerSizes[1])
        } else if cornerSizes.count == 4 {

            // If four corners are provided, use one for each corner
            return (cornerSizes[0], cornerSizes[1], cornerSizes[2], cornerSizes[3])
        } else {

            // In any other case, do not round corners
            return (.zero, .zero, .zero, .zero)
        }
    }
}
- 在 MetronomePendulum 视图中:
struct MetronomePendulum: View {

    @State var pendulumOnLeft: Bool = false
    @State var bellCounter = 0 // sound bell every 4 beats

    let bpm: Double
    let date: Date

    var body: some View {

        Pendulum(angle: pendulumOnLeft ? -30 : 30)
            .animation(.easeInOut(duration: 60 / bpm), value: pendulumOnLeft)
            .onChange(of: date) {
     _ in beat() }
            .onAppear {
     beat() }
    }

    func beat() {

        pendulumOnLeft.toggle() // triggers the animation
        bellCounter = (bellCounter + 1) % 4 // keeps count of beats, to sound bell every 4th

        // sound bell or beat?
        if bellCounter == 0 {

            bellSound?.play()
        } else {

            beatSound?.play()
        }
    }

    struct Pendulum: View {

        let angle: Double

        var body: some View {

            return Capsule()
                .fill(.red)
                .frame(width: 10, height: 320)
                .overlay(weight)
                .rotationEffect(Angle.degrees(angle), anchor: .bottom)
        }

        var weight: some View {

            RoundedRectangle(cornerRadius: 10)
                .fill(.orange)
                .frame(width: 35, height: 35)
                .padding(.bottom, 200)
        }
    }
}
- 视图需要跟踪在动画中的位置,可以叫做动画阶段,因为需要跟踪这些阶段,所以将使用 @State 变量:
-
- pendulumOnLeft:保持钟摆摆动的轨迹;
-
- bellCounter:它记录节拍的数量,以确定是否应该听到节拍或铃声。
- 这个例子使用了 .animation(_:value:) 修饰符,此版本的修饰符,是在指定值改变时应用动画。注意,也可以使用显式动画,只需在 withAnimation 闭包中切换 pendulumOnLeft 变量,而不是调用 .animation()。
- 为了让视图在动画阶段中前进,我们使用 onChange(of:perform) 修饰符监视日期的变化。除了在每次日期值改变时推进动画阶段外,我们还在 onAppear 闭包中这样做,否则一开始就会有停顿。
- 最后是创建 NSSound 实例,为了避免例子过于复杂,创建两个全局变量:
let bellSound: NSSound? = {

    guard let url = Bundle.main.url(forResource: "bell", withExtension: "mp3") else {
     return nil }
    return NSSound(contentsOf: url, byReference: true)
}()

let beatSound: NSSound? = {

    guard let url = Bundle.main.url(forResource: "beat", withExtension: "mp3") else {
     return nil }
    return NSSound(contentsOf: url, byReference: true)
}()
- 如果需要声音文件,可以在 https://freesound.org/ 上找到一个大型数据库,其中一个例子如下:
-
- bell 声音:metronome_pling;
-
- beat 声音:metronome.wav。
六、时间调度器 TimelineScheduler
- TimelineView 需要一个 TimelineScheduler 来决定何时更新它的内容,SwiftUI 提供了一些预定义的调度器,但是也可以创建自己的自定义调度程序。
- 时间轴调度器基本上是一个采用 TimelineScheduler 协议的结构体,现有的类型有:
-
- AnimationTimelineSchedule:尽可能快地更新,让你有机会绘制动画的每一帧,它的参数允许限制更新的频率,并暂停更新,这个在结合 TimelineView 和新的 Canvas 视图时非常有用;
-
- EveryMinuteTimelineSchedule:顾名思义,它每分钟更新一次,在每分钟的开始;
-
- ExplicitTimelineSchedule:你可以提供一个数组,其中包含你希望时间轴更新的所有时间;
-
- PeriodicTimelineSchedule:你可以提供一个开始时间和更新发生的频率。
- 可以这样创建时间线:
Timeline(EveryMinuteTimelineSchedule()) {
     timeline in
    ...
}
- 自从 Swift 5.5 和 SE-0299 的引入,支持类 enum 语法,这使得代码更具可读性,并提高了自动完成功能,可以使用如下:
TimelineView(.everyMinute) {
     timeline in
    ...
}
- 对于每个现有的调度器,可能有多个类似 enum 的选项,如下所示,两行代码创建一个 AnimationTimelineSchedule 类型的调度程序:
TimelineView(.animation) {
     ... }

TimelineView(.animation(minimumInterval: 0.3, paused: false)) {
     ... }
- 甚至可以创建自己的(不要忘记静态关键字):
extension TimelineSchedule where Self == PeriodicTimelineSchedule {

    static var everyFiveSeconds: PeriodicTimelineSchedule {

        get {
     .init(from: .now, by: 5.0) }
    }
}

struct ContentView: View {

    var body: some View {

        TimelineView(.everyFiveSeconds) {
     timeline in
            ...
        }
    }
}
七、自定义 TimelineScheduler
- 如果现有的调度器都不适合您的需要,可以创建自己的调度器。如下所示动画:

- 在这个动画中,我们有一个心形的表情符号,它以不规则的间隔和不规则的振幅改变其大小:它从 1.0 开始,0.2 秒后增长到 1.6,0.2 秒后增长到 2.0,然后收缩到 1.0,停留 0.4 秒,然后重新开始,换句话说:
-
- 缩放变化:1.0→1.6→2.0 → 重新开始;
-
- 更改间隔时间:0.2→0.2→0.4→ 重新启动。
- 我们可以创建一个 HeartTimelineSchedule,它完全按照心脏的要求进行更新,但是,在可重用性的名义下,让我们做一些更通用的,可以在将来重用的东西。新调度器将被调用:CyclicTimelineSchedule,并将接收一个时间偏移量数组,每个偏移值将相对于数组中的前一个值,当调度器耗尽偏移量时,它将循环回到数组的开头并重新开始:
struct CyclicTimelineSchedule: TimelineSchedule {

    let timeOffsets: [TimeInterval]

    func entries(from startDate: Date, mode: TimelineScheduleMode) -> Entries {

        Entries(last: startDate, offsets: timeOffsets)
    }

    struct Entries: Sequence, IteratorProtocol {

        var last: Date
        let offsets: [TimeInterval]

        var idx: Int = -1

        mutating func next() -> Date? {

            idx = (idx + 1) % offsets.count

            last = last.addingTimeInterval(offsets[idx])

            return last
        }
    }
}
- 实现 TimelineSchedule 有几个要求:
-
- 提供 entries(from:mode:) 函数;
-
- Entries 的类型符合序列:Entries.Element == Date;
- 有几种符合 Sequence 的方法,这个例子实现了 IteratorProtocol,并声明了与 Sequence 和 IteratorProtocol 的一致性,可以参考Sequence。
- 为了让 Entries 实现 IteratorProtocol,必须编写 next() 函数,该函数在时间轴中生成日期,调度程序记住了最后一个日期并添加了适当的偏移量,当没有更多的偏移量时,它循环回到数组中的第一个偏移量。最后,调度器是创建一个类似 enum 的初始化器:
extension TimelineSchedule where Self == CyclicTimelineSchedule {

    static func cyclic(timeOffsets: [TimeInterval]) -> CyclicTimelineSchedule {

            .init(timeOffsets: timeOffsets)
    }
}
- 现在已经准备好了 TimelineSchedue 类型,继续添加:
struct BeatingHeart: View {

    var body: some View {

        TimelineView(.cyclic(timeOffsets: [0.2, 0.2, 0.4])) {
     timeline in
            Heart(date: timeline.date)
        }
    }
}

struct Heart: View {

    @State private var phase = 0
    let scales: [CGFloat] = [1.0, 1.6, 2.0]

    let date: Date

    var body: some View {

        HStack {

            Text("️")
                .font(.largeTitle)
                .scaleEffect(scales[phase])
                .animation(.spring(response: 0.10,
                                   dampingFraction: 0.24,
                                   blendDuration: 0.2),
                           value: phase)
                .onChange(of: date) {
     _ in
                    advanceAnimationPhase()
                }
                .onAppear {

                    advanceAnimationPhase()
                }
        }
    }

    func advanceAnimationPhase() {

        phase = (phase + 1) % scales.count
    }
}
- 现在应该熟悉这个模式,它和节拍器上用的是同一个模式,使用 onChange 和 onAppear 来推进动画,使用 @State 变量来跟踪动画,并设置一个动画,将视图从一个时间轴更新过渡到下一个,使用 .spring 动画,给它一个很好的抖动效果。
八、关键帧动画 KeyFrame Animations
- 上面的例子,在某种程度上,是关键帧动画,在整个动画中定义了几个关键点,在这些关键点上我们改变了视图的参数,并让 SwiftUI 对这些关键点之间的过渡进行动画处理,如下所示的示例,可以完全诠释这种处理:
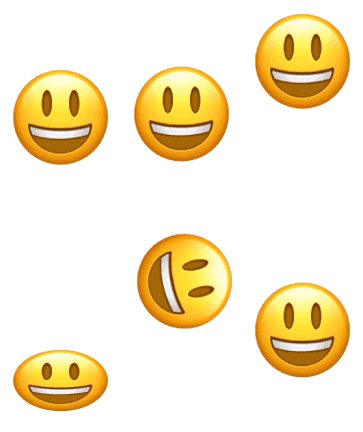
- 如果你仔细观察这个动画,会发现这个表情符号的许多参数在不同的时间点发生了变化,这些参数是 y-offset,rotation 和 y-scale。同样重要的是,动画的不同部分,有不同的动画类型(线性,easeIn 和 easeOut),因为这些是要更改的参数,所以最好将它们放在一个数组中:
struct KeyFrame {

    let offset: TimeInterval
    let rotation: Double
    let yScale: Double
    let y: CGFloat
    let animation: Animation?
}

let keyframes = [
    // Initial state, will be used once. Its offset is useless and will be ignored
    KeyFrame(offset: 0.0, rotation: 0, yScale: 1.0, y: 0, animation: nil),

    // Animation keyframes
    KeyFrame(offset: 0.2, rotation:   0, yScale: 0.5, y:  20, animation: .linear(duration: 0.2)),
    KeyFrame(offset: 0.4, rotation:   0, yScale: 1.0, y: -20, animation: .linear(duration: 0.4)),
    KeyFrame(offset: 0.5, rotation: 360, yScale: 1.0, y: -80, animation: .easeOut(duration: 0.5)),
    KeyFrame(offset: 0.4, rotation: 360, yScale: 1.0, y: -20, animation: .easeIn(duration: 0.4)),
    KeyFrame(offset: 0.2, rotation: 360, yScale: 0.5, y:  20, animation: .easeOut(duration: 0.2)),
    KeyFrame(offset: 0.4, rotation: 360, yScale: 1.0, y: -20, animation: .linear(duration: 0.4)),
    KeyFrame(offset: 0.5, rotation:   0, yScale: 1.0, y: -80, animation: .easeOut(duration: 0.5)),
    KeyFrame(offset: 0.4, rotation:   0, yScale: 1.0, y: -20, animation: .easeIn(duration: 0.4)),
]
- 当 TimelineView 出现时,它将绘制视图,即使没有计划更新,或如果他们是在未来,需要用第一个关键帧来表示视图的状态,但当循环时,这个帧会被忽略。来看看时间线:
struct JumpingEmoji: View {

    // Use all offset, minus the first
    let offsets = Array(keyframes.map {
     $0.offset }.dropFirst())

    var body: some View {

        TimelineView(.cyclic(timeOffsets: offsets)) {
     timeline in
            HappyEmoji(date: timeline.date)
        }
    }
}
- 我们已经从前面的例子中所做的工作以及重用 CyclicTimelineScheduler 中受益,正如前面提到的,不需要第一个关键帧的偏移量,所以丢弃它,如下所示:
struct HappyEmoji: View {

    // current keyframe number
    @State var idx: Int = 0

    // timeline update
    let date: Date

    var body: some View {

        Text("")
            .font(.largeTitle)
            .scaleEffect(4.0)
            .modifier(Effects(keyframe: keyframes[idx]))
            .animation(keyframes[idx].animation, value: idx)
            .onChange(of: date) {
     _ in advanceKeyFrame() }
            .onAppear {
     advanceKeyFrame()}
    }

    func advanceKeyFrame() {

        // advance to next keyframe
        idx = (idx + 1) % keyframes.count

        // skip first frame for animation, which we
        // only used as the initial state.
        if idx == 0 {
     idx = 1 }
    }

    struct Effects: ViewModifier {

        let keyframe: KeyFrame

        func body(content: Content) -> some View {

            content
                .scaleEffect(CGSize(width: 1.0, height: keyframe.yScale))
                .rotationEffect(Angle(degrees: keyframe.rotation))
                .offset(y: keyframe.y)
        }
    }
}
- 为了更好的可读性,可以将所有更改的参数放在一个名为 Effects 的修饰符中。正如你所看到的,这又是同样的模式:使用 onChange 和 onAppear 来推进动画,并为每个关键帧片段添加一个动画。
- 在发现 TimelineView 的路径中,可能会遇到这个错误:
Action Tried to Update Multiple Times Per Frame
- 来看一个生成这个错误的例子:
struct ExampleView: View {

    @State private var flag = false

    var body: some View {


        TimelineView(.periodic(from: .now, by: 2.0)) {
     timeline in

            Text("Hello")
                .foregroundStyle(flag ? .red : .blue)
                .onChange(of: timeline.date) {
     (date: Date) in
                    flag.toggle()
                }

        }
    }
}
- 这段代码看起来是无害的,它应该每两秒钟改变文本颜色,在红色和蓝色之间交替,那么这是怎么回事呢?我们知道,时间轴的第一次更新是在它第一次出现时,然后它遵循调度程序规则来触发下面的更新。因此,即使调度器没有产生更新,TimelineView 内容至少会生成一次。在这个特定的示例中,我们监视时间轴中的 timeline.date 值,当它发生变化时,切换标志变量,这将产生颜色变化。
- TimelineView 将首先出现,两秒钟后,时间轴将更新(例如,由于第一次调度程序更新),触发 onChange 闭包,这将反过来改变标志变量。现在,由于 TimelineView 依赖于它,它将需要立即刷新,触发另一个标记变量的切换,迫使另一个 TimelineView 刷新等,每帧多次更新。
- 那么该如何解决这个问题呢?在本例中,我们简单地封装了内容,并将标志变量移动到被封装的视图中,现在TimelineView不再依赖于它:
struct ExampleView: View {

    var body: some View {


        TimelineView(.periodic(from: .now, by: 1.0)) {
     timeline in
            SubView(date: timeline.date)
        }

    }
}

struct SubView: View {

    @State private var flag = false
    let date: Date

    var body: some View {

        Text("Hello")
            .foregroundStyle(flag ? .red : .blue)
            .onChange(of: date) {
     (date: Date) in
                flag.toggle()
            }
    }
}
九、探索新思路
- 每次时间线更新刷新一次:正如之前提到的,这个模式让我们的视图在每次更新时计算它们的 body 两次:第一次是在时间轴更新时,然后是在推进动画状态值时,在这种类型的动画中,在时间上间隔了关键点。
- 在动画中,时间点太近,也许需要避免这种情况,如果你需要更改一个存储值,但避免视图刷新……有一个技巧可以做到,使用 @StateObject 代替 @State,确保不要 @Published 这样的值。如果在某些时候,你需要告诉视图要刷新,可以调用 objectWillChange.send()。
- 匹配动画持续时间和偏移量:在关键帧的示例中,为每个动画片段使用不同的动画。为此,将 Animation 的值存储在数组中。如果你仔细看,可以发现在我们的例子中,偏移量和动画持续时间是匹配的,因此可以定义一个带有动画类型的 enum,而不是在数组中使用 Animation 值。稍后在视图中,将基于动画类型创建动画值,但使用从偏移值开始的持续时间对其进行实例化,如下所示:
enum KeyFrameAnimation {

    case none
    case linear
    case easeOut
    case easeIn
}

struct KeyFrame {

    let offset: TimeInterval
    let rotation: Double
    let yScale: Double
    let y: CGFloat
    let animationKind: KeyFrameAnimation

    var animation: Animation? {

        switch animationKind {

        case .none: return nil
        case .linear: return .linear(duration: offset)
        case .easeIn: return .easeIn(duration: offset)
        case .easeOut: return .easeOut(duration: offset)
        }
    }
}

let keyframes = [
    // Initial state, will be used once. Its offset is useless and will be ignored
    KeyFrame(offset: 0.0, rotation: 0, yScale: 1.0, y: 0, animationKind: .none),

    // Animation keyframes
    KeyFrame(offset: 0.2, rotation:   0, yScale: 0.5, y:  20, animationKind: .linear),
    KeyFrame(offset: 0.4, rotation:   0, yScale: 1.0, y: -20, animationKind: .linear),
    KeyFrame(offset: 0.5, rotation: 360, yScale: 1.0, y: -80, animationKind: .easeOut),
    KeyFrame(offset: 0.4, rotation: 360, yScale: 1.0, y: -20, animationKind: .easeIn),
    KeyFrame(offset: 0.2, rotation: 360, yScale: 0.5, y:  20, animationKind: .easeOut),
    KeyFrame(offset: 0.4, rotation: 360, yScale: 1.0, y: -20, animationKind: .linear),
    KeyFrame(offset: 0.5, rotation:   0, yScale: 1.0, y: -80, animationKind: .easeOut),
    KeyFrame(offset: 0.4, rotation:   0, yScale: 1.0, y: -20, animationKind: .easeIn),
]
- 如果你想知道为什么我一开始不这样做,这里只是想告诉说明两种方法都是可能的,第一种情况更灵活,但更冗长。也就是说,需要强制指定每个动画的持续时间,但是它却更灵活,因为可以自由地使用与偏移量不匹配的持续时间。然而,当使用这种新方法时,可以很容易地添加一个可定制的因素,它可以放慢或加快动画,而不需要触碰关键帧。
- 嵌套 TimelineViews:没有什么可以阻止你将一个 TimelineView 嵌套到另一个 TimelineView 中,现在有一个 JumpingEmoji,可以在 TimelineView 中放置三个 JumpingEmoji 视图,让它们一次出现一个,并带有延迟:
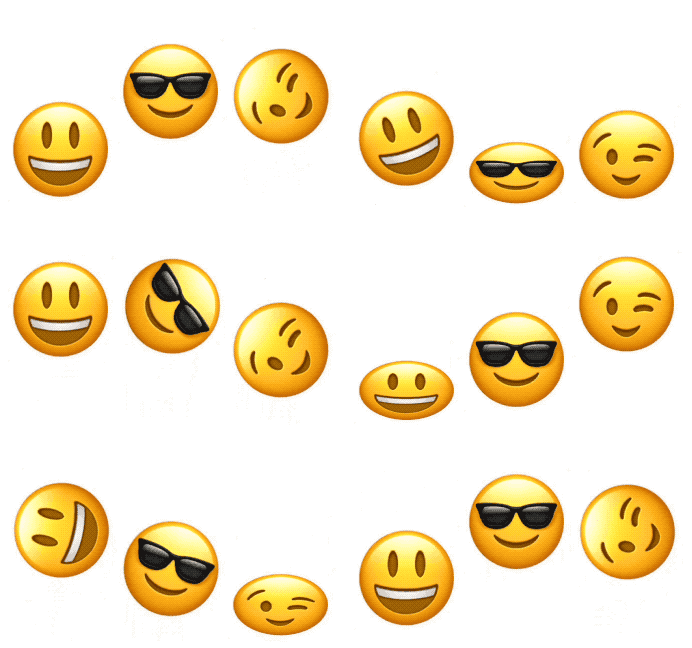
- emoji wave 的完整示例如下:
import SwiftUI

struct CyclicTimelineSchedule: TimelineSchedule {

    let timeOffsets: [TimeInterval]

    func entries(from startDate: Date, mode: TimelineScheduleMode) -> Entries {

        Entries(last: startDate, offsets: timeOffsets)
    }

    struct Entries: Sequence, IteratorProtocol {

        var last: Date
        let offsets: [TimeInterval]

        var idx: Int = -1

        mutating func next() -> Date? {

            idx = (idx + 1) % offsets.count

            last = last.addingTimeInterval(offsets[idx])

            return last
        }
    }
}

extension TimelineSchedule where Self == CyclicTimelineSchedule {

    static func cyclic(timeOffsets: [TimeInterval]) -> CyclicTimelineSchedule {

            .init(timeOffsets: timeOffsets)
    }
}

enum KeyFrameAnimation {

    case none
    case linear
    case easeOut
    case easeIn
}

struct KeyFrame {

    let offset: TimeInterval
    let rotation: Double
    let yScale: Double
    let y: CGFloat
    let animationKind: KeyFrameAnimation

    var animation: Animation? {

        switch animationKind {

        case .none: return nil
        case .linear: return .linear(duration: offset)
        case .easeIn: return .easeIn(duration: offset)
        case .easeOut: return .easeOut(duration: offset)
        }
    }
}

let keyframes = [
    // Initial state, will be used once. Its offset is useless and will be ignored
    KeyFrame(offset: 0.0, rotation: 0, yScale: 1.0, y: 0, animationKind: .none),

    // Animation keyframes
    KeyFrame(offset: 0.2, rotation:   0, yScale: 0.5, y:  20, animationKind: .linear),
    KeyFrame(offset: 0.4, rotation:   0, yScale: 1.0, y: -20, animationKind: .linear),
    KeyFrame(offset: 0.5, rotation: 360, yScale: 1.0, y: -80, animationKind: .easeOut),
    KeyFrame(offset: 0.4, rotation: 360, yScale: 1.0, y: -20, animationKind: .easeIn),
    KeyFrame(offset: 0.2, rotation: 360, yScale: 0.5, y:  20, animationKind: .easeOut),
    KeyFrame(offset: 0.4, rotation: 360, yScale: 1.0, y: -20, animationKind: .linear),
    KeyFrame(offset: 0.5, rotation:   0, yScale: 1.0, y: -80, animationKind: .easeOut),
    KeyFrame(offset: 0.4, rotation:   0, yScale: 1.0, y: -20, animationKind: .easeIn),
]

struct ManyEmojis: View {

    @State var emojiCount = 0
    let dates: [Date] = [.now.addingTimeInterval(0.3), .now.addingTimeInterval(0.6), .now.addingTimeInterval(0.9)]

    var body: some View {

        TimelineView(.explicit(dates)) {
     timeline in
            HStack(spacing: 80) {

                if emojiCount > 0 {

                    JumpingEmoji(emoji: "")
                }

                if emojiCount > 1 {


                    JumpingEmoji(emoji: "")

                }

                if emojiCount > 2 {

                    JumpingEmoji(emoji: "")
                }

                Spacer()
            }
            .onChange(of: timeline.date) {
     (date: Date) in
                emojiCount += 1
            }
            .frame(width: 400)
        }
    }
}

struct JumpingEmoji: View {

    let emoji: String

    // Use all offset, minus the first
    let offsets = Array(keyframes.map {
     $0.offset }.dropFirst())

    var body: some View {

        TimelineView(.cyclic(timeOffsets: offsets)) {
     timeline in
            HappyEmoji(emoji: emoji, date: timeline.date)
        }
    }
}

struct HappyEmoji: View {

    let emoji: String
    // current keyframe number
    @State var idx: Int = 0

    // timeline update
    let date: Date

    var body: some View {

        Text(emoji)
            .font(.largeTitle)
            .scaleEffect(4.0)
            .modifier(Effects(keyframe: keyframes[idx]))
            .animation(keyframes[idx].animation, value: idx)
            .onChange(of: date) {
     _ in advanceKeyFrame() }
            .onAppear {
     advanceKeyFrame()}
    }

    func advanceKeyFrame() {

        // advance to next keyframe
        idx = (idx + 1) % keyframes.count

        // skip first frame for animation, which we
        // only used as the initial state.
        if idx == 0 {
     idx = 1 }
    }

    struct Effects: ViewModifier {

        let keyframe: KeyFrame

        func body(content: Content) -> some View {

            content
                .scaleEffect(CGSize(width: 1.0, height: keyframe.yScale))
                .rotationEffect(Angle(degrees: keyframe.rotation))
                .offset(y: keyframe.y)
        }
    }
}
十、GifImage 示例
- 使用 TimelineView 来实现动画 gif 动画:
import SwiftUI

// Sample usage
struct ContentView: View {

    var body: some View {

        VStack {

            GifImage(url: URL(string: "https://media.giphy.com/media/YAlhwn67KT76E/giphy.gif?cid=790b7611b26260b2ad23535a70e343e67443ff80ef623844&rid=giphy.gif&ct=g")!)
                .padding(10)
                .overlay {

                    RoundedRectangle(cornerRadius: 8)
                        .stroke(.green)
                }
        }
        .frame(maxWidth: .infinity, maxHeight: .infinity)
    }
}

// ObservableObject that holds the data and logic to get all frames in the gif image.
class GifData: ObservableObject {

    var loopCount: Int = 0
    var width: CGFloat = 0
    var height: CGFloat = 0

    var capInsets: EdgeInsets?
    var resizingMode: Image.ResizingMode

    struct ImageFrame {

        let image: Image
        let delay: TimeInterval
    }

    var frames: [ImageFrame] = []

    init(url: URL, capInsets: EdgeInsets?, resizingMode: Image.ResizingMode) {

        self.capInsets = capInsets
        self.resizingMode = resizingMode

        let label = url.deletingPathExtension().lastPathComponent

        Task {

            guard let (data, _) = try? await URLSession.shared.data(from: url) else {
     return }

            guard let source = CGImageSourceCreateWithData(data as CFData, nil) else {
     return }

            let imageCount = CGImageSourceGetCount(source)

            guard let imgProperties = CGImageSourceCopyProperties(source, nil) as? Dictionary<String, Any> else {
     return }

            guard let gifProperties = imgProperties[kCGImagePropertyGIFDictionary as String] as? Dictionary<String, Any> else {
     return }

            loopCount = gifProperties[kCGImagePropertyGIFLoopCount as String] as? Int ?? 0
            width = gifProperties[kCGImagePropertyGIFCanvasPixelWidth as String] as? CGFloat ?? 0
            height = gifProperties[kCGImagePropertyGIFCanvasPixelHeight as String] as? CGFloat ?? 0

            let frameInfo = gifProperties[kCGImagePropertyGIFFrameInfoArray as String] as? [Dictionary<String, TimeInterval>] ?? []

            for i in 0 ..< min(imageCount, frameInfo.count) {

                if let image = CGImageSourceCreateImageAtIndex(source, i, nil) {


                    var img = Image(image, scale: 1.0, label: Text(label))

                    if let insets = capInsets {

                        img = img.resizable(capInsets: insets, resizingMode: resizingMode)
                    }

                    frames.append(
                        ImageFrame(image: img,
                                   delay: frameInfo[i][kCGImagePropertyGIFDelayTime as String] ?? 0.05)
                    )
                }
            }

            DispatchQueue.main.async {
     self.objectWillChange.send() }
        }
    }
}

// The GifImage view
struct GifImage: View {

    @StateObject var gifData: GifData

    /// Create an animated Gif Image
    /// - Parameters:
    ///   - url: the url holding the animated gif file
    ///   - capInsets: if nil, image is not resizable. Otherwise, the capInsets for image resizing (same as the standard image .resizable() modifier).
    ///   - resizingMode: ignored if capInsets is nil, otherwise, equivalent to the standard image .resizable() modifier parameter)
    init(url: URL, capInsets: EdgeInsets? = nil, resizingMode: Image.ResizingMode = .stretch) {

        _gifData = StateObject(wrappedValue: GifData(url: url, capInsets: capInsets, resizingMode: resizingMode))
    }

    var body: some View {

        Group {

            if gifData.frames.count == 0 {

                Color.clear
            } else {

                VStack {

                    TimelineView(.cyclic(loopCount: gifData.loopCount, timeOffsets: gifData.frames.map {
     $0.delay })) {
     timeline in
                        ImageFrame(gifData: gifData, date: timeline.date)
                    }
                }
            }
        }
    }

    struct ImageFrame: View {

        @State private var frame = 0
        let gifData: GifData
        let date: Date

        var body: some View {

            gifData.frames[frame].image
                .onChange(of: date) {
     _ in
                    frame = (frame + 1) % gifData.frames.count
                }
        }
    }
}

// A cyclic TimelineSchedule
struct CyclicTimelineSchedule: TimelineSchedule {

    let loopCount: Int // loopCount == 0 means inifinite loops.
    let timeOffsets: [TimeInterval]

    func entries(from startDate: Date, mode: TimelineScheduleMode) -> Entries {

        Entries(loopCount: loopCount, last: startDate, offsets: timeOffsets)
    }

    struct Entries: Sequence, IteratorProtocol {

        let loopCount: Int
        var loops = 0
        var last: Date
        let offsets: [TimeInterval]

        var idx: Int = -1

        mutating func next() -> Date? {

            idx = (idx + 1) % offsets.count

            if idx == 0 {
     loops += 1 }

            if loopCount != 0 && loops >= loopCount {
     return nil }

            last = last.addingTimeInterval(offsets[idx])

            return last
        }
    }
}

extension TimelineSchedule where Self == CyclicTimelineSchedule {

    static func cyclic(loopCount: Int, timeOffsets: [TimeInterval]) -> CyclicTimelineSchedule {

        .init(loopCount: loopCount, timeOffsets: timeOffsets)
    }
}
智能推荐
8连接路径_path("keys")-程序员宅基地
文章浏览阅读927次。文章目录8.1检查8.1.1初步检查8.5建立连接路径8.5.1 sort_inner_and_outer生成连接路径时所使用的算法—动态规划和遗传,动态规划推进到join_ search_one_ level遗传算法推进到merge clump,物理优化的部分从这两个函数开始就进入到了建立连接路径的阶段 连接路径指的是物理连接路径,也就是通过这种路径来实现逻辑连接操作建..._path("keys")
基于模板匹配的数字识别_基于模板匹配的数字电表数字识别-程序员宅基地
文章浏览阅读6.9k次,点赞5次,收藏35次。基于模板匹配的数字识别,将标准的8*16像素的数字0123456789读取,二值化,对每个数字进行等分区域分割,统计每个区域内的黑色像素点的个数,即为特征初值。采用欧式距离的模板匹配法。z//基于模板匹配的数字识别#include#include#include#include #includeusing namespace std; int main()_基于模板匹配的数字电表数字识别
Python代码的编写运行方式介绍_python安装好后怎么写代码-程序员宅基地
文章浏览阅读7.2k次,点赞11次,收藏74次。Python代码的编写运行方式详解_python安装好后怎么写代码
VS Code使用code runner插件无法识别gcc编译C语言程序_vscode无法识别gcc-程序员宅基地
文章浏览阅读1.2k次。VS Code配置Code runner_vscode无法识别gcc
Unity3D中使用mesh collider和box collider的区别-程序员宅基地
文章浏览阅读1.5w次,点赞10次,收藏14次。Unity3D中使用mesh collider和box collider的区别踩坑过程记录。设备是HTC的VIVE 和 Unity 5.xCPU: Intel Xeon Silver 4116 * 2GPU: NVIDIA Quadro P6000RAM: 64GB这个问题是在解决项目卡顿问题的同时出现的:最近在用U3D做一个VR项目,需求是要给网格加碰撞体以实现获取手柄射线与..._mesh collider和box collider
关于jar包后台运行及端口占用问题_centos启动jar包不显示端口占用-程序员宅基地
文章浏览阅读4.7k次。问题场景问题一:后端项目jar包打包上传运行,终端上正常,终端退出后,项目未能运行。问题二:第二次上传jar包并运行时提示该端口被占用。解决方法问题一:使用nohub命令启动jar包。nohup java -jar 1.0.0.jar &问题二:由于两次使用的同一个端口,先查找到当前端口正在运行的进程的进程号。netstat -lnp|grep 端口号然后用杀掉进程..._centos启动jar包不显示端口占用
随便推点
python之uWSGI和WSGI-程序员宅基地
文章浏览阅读130次。WSGI协议首先弄清下面几个概念:WSGI:全称是Web Server Gateway Interface,WSGI不是服务器,python模块,框架,API或者任何软件,只是一种规范,描述web server如何与web application通信的规范。server和application的规范在PEP 3333中有具体描述。要实现WSGI协议,必须同时实现web server和..._python uwsgi 和pywsgi
Java---简单易懂的KNN算法_jf.knn-%; 9 &-程序员宅基地
文章浏览阅读399次。一,简单介绍KNN算法---就是获取临近点,范围内,哪一种点最多(例如:红点:6,黑点:2,未知点肯定是红点),就是属于最多一方定义样本,拥有四个样本,已知A区两点分别(2,5)和(1,4),B区(8,1)和(9,2),求灰点(4,3)属于哪一区?代码定义实体类/** * 定义数据和数据类型 * @author peng * */ private s..._jf.knn-%; 9 &
最新版ffmpeg 提取视频关键帧_从视频中获取flag-程序员宅基地
文章浏览阅读8.9k次,点赞2次,收藏9次。对于ffmpeg的配置请看我的上篇博客:http://blog.csdn.net/kuaile123/article/details/11367309所用视频为 flv格式的,用的vs2010,电脑为64位,下面的也是64位,别下错了。因为ffmpeg的函数和版本有关系,这里记录下我所用的整合的版本,是昨天下的最新版的,需要请下载http://download.csdn.n_从视频中获取flag
【ARM Cache 系列文章 11 -- ARM Cache 直接映射 详细介绍】
在直接映射缓存中,每个内存地址通过某种映射函数(通常是地址的一部分)映射到一个特定的缓存行。这种结构简单,硬件实现成本较低,但可能会导致较高的缓存冲突(两个内存地址映射到同一缓存行),从而降低缓存效率。在介绍直接映射之前,以停车场停车作为例子,先把结构的特点简单地概括出来,便于读者了解。
Objective-C学习计划
持续学习,跟进Objective-C的最新发展和技术。了解Objective-C的基本语法和编程概念。掌握Objective-C的高级特性和常用框架。应用所学知识,完成实际项目。
【数据结构】最小生成树(Prim算法、Kruskal算法)解析+完整代码
设R为G的所有生成树的集合,若T为R中边的权值之和最小的生成树,则T称为G的最小生成树(MST)。每次选则一条权值最小的边,使这条边的两头连通(原本已经连通的不选),直到所有结点都连通。,生成树不同,每棵树的权(即树中所有边上的权值之和)也可能不同。1.最小生成树可能有多个,但边的权值之和总是唯一且最小的;每次将代价最小的新顶点纳入生成树,直到所有顶点都纳入为止。数组,找到最小值,将其加入树中,并继续遍历与其相连的边。数组,初始为false,判断结点是否加入树。最低的,且还没加入树的顶点。