摘要: 搭建Postfix+Dovecot邮件收发系统
服务器信息
系统:CentOS 6.5 minimal版本
主机:虚拟机
虚拟机IP:192.168.128.128/24
宿主IP:10.1.79.24/24
安装postfix
注意:CentOS 7实际上已经用postfix+Sasl2代替sendmail了,因此无需安装。
1.移除sendmail
安装完成还需要替换系统自带的sendmail:
# rpm -e sendmail#或者# yum remove sendmail
修改MTA(默认邮件传输代理)
手写查看有哪些可以选择的邮件系统
alternatives --display mta
mta - status is manual.
link currently points to /usr/sbin/sendmail.sendmail/usr/sbin/sendmail.sendmail - priority 90slave mta-pam: /etc/pam.d/smtp.sendmail
slave mta-mailq: /usr/bin/mailq.sendmail
slave mta-newaliases: /usr/bin/newaliases.sendmail
slave mta-rmail: /usr/bin/rmail.sendmail
slave mta-sendmail: /usr/lib/sendmail.sendmail
slave mta-mailqman: /usr/share/man/man1/mailq.sendmail.1.gz
slave mta-newaliasesman: /usr/share/man/man1/newaliases.sendmail.1.gz
slave mta-aliasesman: /usr/share/man/man5/aliases.sendmail.5.gz
slave mta-sendmailman: /usr/share/man/man8/sendmail.sendmail.8.gz/usr/sbin/sendmail.postfix - priority 30slave mta-pam: /etc/pam.d/smtp.postfix
slave mta-mailq: /usr/bin/mailq.postfix
slave mta-newaliases: /usr/bin/newaliases.postfix
slave mta-rmail: /usr/bin/rmail.postfix
slave mta-sendmail: /usr/lib/sendmail.postfix
slave mta-mailqman: /usr/share/man/man1/mailq.postfix.1.gz
slave mta-newaliasesman: /usr/share/man/man1/newaliases.postfix.1.gz
slave mta-aliasesman: /usr/share/man/man5/aliases.postfix.5.gz
slave mta-sendmailman: /usr/share/man/man1/sendmail.postfix.1.gz
Current `best' version is /usr/sbin/sendmail.sendmail.
然后我们修改为/usr/lib/sendmail.postfix
alternatives --set mta /usr/sbin/sendmail.postfix
检查一下是不是已经设置成功了。
alternatives --display mta | grep "/usr/sbin/sendmail.postfix"
第一行可以看到mta的状态。 例如:
链接当前指向 /usr/sbin/sendmail.postfix/usr/sbin/sendmail.postfix - priority 30当前“最佳”版本是 /usr/sbin/sendmail.postfix。
配置Postfix
编辑/etc/postfix/main.cf,可以下载下来修改,也可以使用vi进行编辑:
vi /etc/postfix/main.cf
编辑内容如下
# 75行: 取消注释,设置hostnamemyhostname = mail.bujidao.me# 83行: 取消注释,设置域名mydomain = bujidao.me# 99行: 取消注释myorigin = $mydomain# 116行: 修改inet_interfaces = all# 119行: 推荐ipv4,如果支持ipv6,则可以为allinet_protocols = all#209行,把前面的注释拿掉,不然无法发送到公网 【http://www.cnblogs.com/apexchu/p/4271264.html】local_recipient_maps =
# 164行: 添加mydestination = $myhostname, localhost.$mydomain, localhost, $mydomain# 264行: 取消注释,指定内网和本地的IP地址范围mynetworks = 127.0.0.0/8, 10.1.79.0/24,192.168.128.128# 419行: 取消注释,邮件保存目录home_mailbox = Maildir/# 571行: 添加smtpd_banner = $myhostname ESMTP $mail_name# 添加到最后# 规定邮件最大尺寸为10Mmessage_size_limit = 10485760# 规定收件箱最大容量为1Gmailbox_size_limit = 1073741824# SMTP认证smtpd_sasl_type = dovecotsmtpd_sasl_path = private/authsmtpd_sasl_auth_enable = yessmtpd_sasl_security_options = noanonymoussmtpd_sasl_local_domain = $myhostnamesmtpd_recipient_restrictions = permit_mynetworks,permit_auth_destination,permit_sasl_authenticated,reject
修改好了之后使用service开启postfix,使用chkconfig postfix on将postfix开机启动。
#service postfix restart#checkconfig postfix on #开机启动,可选
安装Dovecot
yum -y install dovecot
配置Dovecot
1.修改dovecot.cong
vi /etc/dovecot/dovecot.conf
修改如下:
listen = *,::protocols = imap pop3 lmtp
2.修改auth.conf
vi /etc/dovecot/conf.d/10-auth.conf
# 9行: 取消注释并修改,表示允许使用明文验证disable_plaintext_auth = no# 97行: 添加,表示允许使用明文登录auth_mechanisms = plain login
3.修改mail.conf
vi /etc/dovecot/conf.d/10-mail.conf
# 30行: 取消注释并添加,使用qmail风格mail_location = maildir:~/Maildir
4.修改master.conf
vi /etc/dovecot/conf.d/10-master.conf
# 88-90行: 取消注释并添加
# Postfix smtp验证
unix_listener /var/spool/postfix/private/auth {
    mode = 0666
    user = postfix
    group = postfix}
5.修改pop3.conf
vi /etc/dovecot/conf.d/20-pop3.conf
pop3_uidl_format = %08Xu%08Xvpop3_client_workarounds = outlook-no-nuls oe-ns-eoh
6.配置ssl验证
vi /etc/dovecot/conf.d/10-ssl.conf
ssl = no #不开启SSL#暂时不开启ssl,因为我们没有合法的证书,自签名证书可能存在问题#ssl_cert = </etc/pki/dovecot/certs/dovecot.pem#ssl_key = </etc/pki/dovecot/private/dovecot.pem
7.启动dovecot并设置开机启动
service dovecot start
chkconfig dovecot on
8.检查相关端口
ps aux | grep "dovecot"
root       3894  0.0  0.1 107936   604 pts/1    S+   14:27   0:00 tail -f dovecot-err.log
root       4040  0.0  0.1 107936   604 pts/2    S+   14:53   0:00 tail -f /var/log/dovecot-info.log
root       4442  0.0  0.3  15640  1520 ?        Ss   16:01   0:00 /usr/sbin/dovecot -F
dovecot    4445  0.0  0.2   9308  1024 ?        S    16:01   0:00 dovecot/anvil
root       4446  0.0  0.2   9436  1184 ?        S    16:01   0:00 dovecot/log
root       4517  0.0  0.2 112664   972 pts/0    R+   16:12   0:00 grep --color=auto dovecot
或者
netstat -lntp -4
Proto Recv-Q Send-Q Local Address           Foreign Address         State       PID/Program name
tcp        0      0 0.0.0.0:110             0.0.0.0:*               LISTEN      4533/dovecot
tcp        0      0 0.0.0.0:143             0.0.0.0:*               LISTEN      4533/dovecot
tcp        0      0 0.0.0.0:22              0.0.0.0:*               LISTEN      969/sshd
tcp        1      0 0.0.0.0:25              0.0.0.0:*               LISTEN      4361/master
使用lsof查询
lsof -i :143COMMAND PID USER FD TYPE DEVICE SIZE/OFF NODE NAME dovecot 4533 root 36u IPv4 95185 0t0 TCP *:imap (LISTEN) dovecot 4533 root 37u IPv6 95186 0t0 TCP *:imap (LISTEN)
lsof -i :110COMMAND PID USER FD TYPE DEVICE SIZE/OFF NODE NAME dovecot 4533 root 24u IPv4 95149 0t0 TCP *:pop3 (LISTEN) dovecot 4533 root 25u IPv6 95150 0t0 TCP *:pop3 (LISTEN)
lsof -i :25COMMAND PID USER FD TYPE DEVICE SIZE/OFF NODE NAME master 4361 root 13u IPv4 93270 0t0 TCP *:smtp (LISTEN) master 4361 root 14u IPv6 93271 0t0 TCP *:smtp (LISTEN)
可以看到master是stmpd,占用了25,dovecot占了110(pop3),143(imap)端口
邮箱验证与使用
创建用户
一切都弄好以后,就可以使用Foxmail等第三方软件来收发邮件了。在这里需要说一下,系统用户就是邮件的用户,例如root,就是一个邮箱用户,邮箱是[email protected],密码就是root的密码,所以需要创建用户,只要使用adduser创建用户,再使用passwd设置密码。
好了,假如我们创建一个admin的用户:
#创建用户组与用户,并且不允许用户登录系统,但是账户存在,只用于邮箱groupadd mailusers
adduser -g mailusers -s /sbin/nologin martin
adduser -g mailusers -s /sbin/nologin jack#分别给martin和jack添加密码passwd martin
passwd jack
使用伪域名验证
原则上,我们要使用邮箱,必须具有域名才行,我们要么搭建自己的DNS服务器,要么购买域名,这里为了方便,我们通过修改hosts的方式来实现
修改虚拟机上的hosts
127.0.0.1 bujidao.me192.168.128.128 bujidao.me127.0.0.1 mail.bujidao.me192.168.128.128 mail.bujidao.me然后修改宿主机上的hosts,如果你没使用宿主机,那么宿主机hosts就不需要修改了,但是大多数时候,我们需要修改。
添加如下内容
192.168.128.128 bujidao.me192.168.128.128 mail.bujidao.me关闭虚拟防火墙
service iptables stop
使用foxmail代理客户端收发邮件
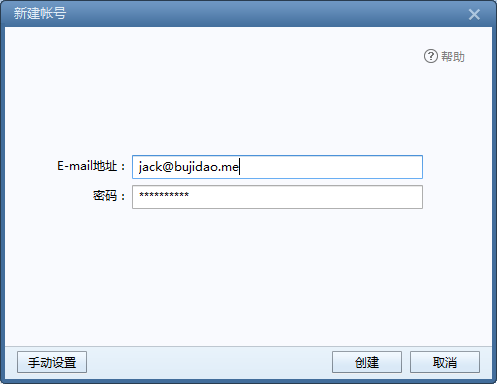
然后创建,到下个页面修改 邮件账号

注意:红色框部分不能带 @domain,否则登录不了,因为我们给系统创建的账户并没有添加邮箱
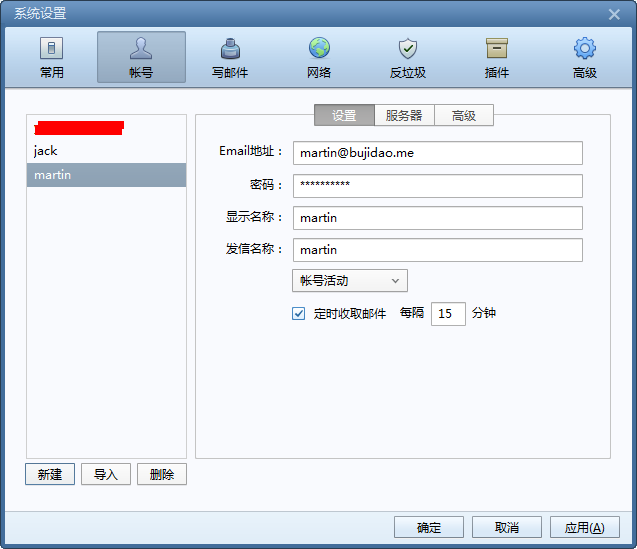
点击创建,就可以添加jack账户了,用同样的方式,我们可以将martin添加到foxmail
然后,我们可以使用jack,martin相互发送邮件了
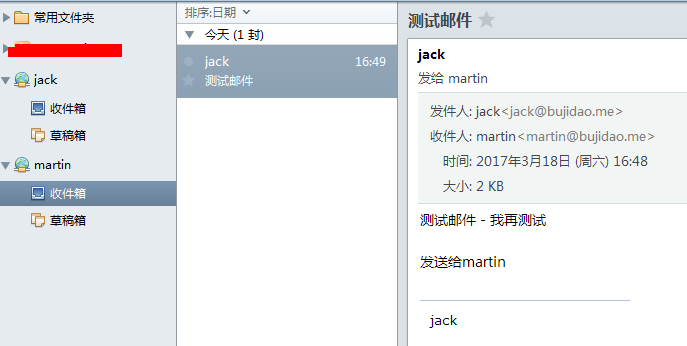
同样也可以给其他邮箱发,我给某网站邮箱发邮件也是成功的,当然,我们反对垃圾邮件,做一名好公民使我们的本分。